Halo: Bad Blood: Difference between revisions
From Halopedia, the Halo wiki
m (Same as before.) |
mNo edit summary |
||
| Line 32: | Line 32: | ||
The team narrows down their options to disconnecting Leonidas’ [[data chip]] from the station entirely, determining the only location capable of housing the AI to be Jun’s office. As soon as Buck nears the office, he loses comms with Alpha-Nine and Leonidas’ [[avatar]] pops in front of him, demanding that he leave. When Buck refuses, he declares the [[wikipedia:AWOL|AWOL]] code [[STOLEN GAUNTLET]] over the intercom, ordering everyone to neutralize the Buck on sight. Three nearby Spartans move in to arrest him, though willing to hear him out and summon Jun, but Leonidas pops the room’s [[airlock]], threatening to depressurize the entire station if Buck continues to resist. Just before he does, however, Dar ecuts power to the station, but inadvertently deactivates the force fields that housed the prisoners. Buck unplugs Leonidas' data chip, sprints to the brig, and much to his surprise, finds[Mickey still there, holding a pistol to a security guard’s head, with another unconscious on the floor. Mickey then proceeds to lock the security guard in the brig before agreeing to accompany Alpha-Nine. The two make their way to the Condor, with Mickey acting as an escorted prisoner, but halfway, a Spartan recognizes Buck and opens fire. They immediately duck to cover, and Buck decides to smash Leonidas’ data chip to prevent further complications of the mission before receiving a [[COM|comms]] request from none other than former squadmate [[Dutch]]. Meeting him down the hall, Buck is shocked to learn that Dutch, along with his wife, [[Gretchen]], had joined the SPARTAN-IV program just several months back. Now with backup, Buck and Mickey continue to push towards the Condor, making it inside safely before Dare navigates out of the hangar. Jun then makes contact with Alpha-Nine, now composed of Buck, Dare, Romeo, Mickey, Dutch, and Gretchen alongside Vergil and Sadie. He indirectly confirms Mickey’s whereabouts, thanks Buck for dealing with Leonidas, and wishes the team luck on their mission. | The team narrows down their options to disconnecting Leonidas’ [[data chip]] from the station entirely, determining the only location capable of housing the AI to be Jun’s office. As soon as Buck nears the office, he loses comms with Alpha-Nine and Leonidas’ [[avatar]] pops in front of him, demanding that he leave. When Buck refuses, he declares the [[wikipedia:AWOL|AWOL]] code [[STOLEN GAUNTLET]] over the intercom, ordering everyone to neutralize the Buck on sight. Three nearby Spartans move in to arrest him, though willing to hear him out and summon Jun, but Leonidas pops the room’s [[airlock]], threatening to depressurize the entire station if Buck continues to resist. Just before he does, however, Dar ecuts power to the station, but inadvertently deactivates the force fields that housed the prisoners. Buck unplugs Leonidas' data chip, sprints to the brig, and much to his surprise, finds[Mickey still there, holding a pistol to a security guard’s head, with another unconscious on the floor. Mickey then proceeds to lock the security guard in the brig before agreeing to accompany Alpha-Nine. The two make their way to the Condor, with Mickey acting as an escorted prisoner, but halfway, a Spartan recognizes Buck and opens fire. They immediately duck to cover, and Buck decides to smash Leonidas’ data chip to prevent further complications of the mission before receiving a [[COM|comms]] request from none other than former squadmate [[Dutch]]. Meeting him down the hall, Buck is shocked to learn that Dutch, along with his wife, [[Gretchen]], had joined the SPARTAN-IV program just several months back. Now with backup, Buck and Mickey continue to push towards the Condor, making it inside safely before Dare navigates out of the hangar. Jun then makes contact with Alpha-Nine, now composed of Buck, Dare, Romeo, Mickey, Dutch, and Gretchen alongside Vergil and Sadie. He indirectly confirms Mickey’s whereabouts, thanks Buck for dealing with Leonidas, and wishes the team luck on their mission. | ||
<!--ATTENTION: Mcmaker13, please do not link (i.e. use brackets [ ]) to character/item/vehicle/etc pages if they have been linked to once already in the article. Check the message I sent to your profile. I explain in more detail there.--> | |||
{{Expand-section}} | {{Expand-section}} | ||
Revision as of 01:09, June 30, 2021
| Halo: Bad Blood | |
|---|---|
| |
| Attribution information | |
|
Author(s): |
|
| Publication information | |
|
Publisher: |
|
|
Publication date: |
|
|
Media type: |
Print[1] |
|
Pages: |
352 pages[2] |
|
ISBN: |
|
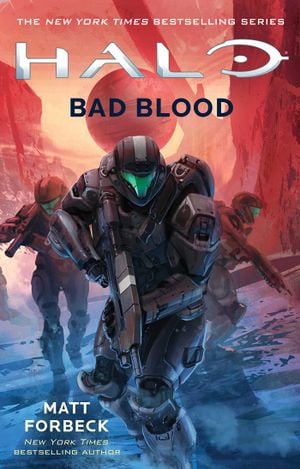
Halo: Bad Blood is a print novel by Matt Forbeck, released on June 26, 2018.[1] It serves as a sequel to Halo: New Blood and is set immediately after Halo 5: Guardians. It follows Spartan Edward Buck and his old squad Alpha-Nine following the events of Halo 5: Guardians.
Official summary
Plot synopsis
In a report for the Office of Naval Intelligence, Edward Buck reflects on the events that transpired after Michael "Mickey" Crespo betrayed him and Kojo "Romeo" Agu in Operation: COALPEPPER on Talitsa: his recruitment on Fireteam Osiris, his missions with them on Kamchatka, Meridian, and Sanghelios, and rescuing Blue Team from Cortana's grasp on Genesis. After saving them, both Fireteam Osiris and Blue Team fought against several armigers until they found India 127, a D79-TC Pelican that crash-landed on Genesis; Linda-058 managed to hold off the armigers long enough to allow both teams aboard the Pelican, extract Linda, and allowing 031 Exuberant Witness to open a Slipspace portal to transport both teams to Sanghelios. Their Pelican exits near Sunaion, and they regroup with Thel 'Vadam's Swords of Sanghelios, Spartan Sarah Palmer and Doctor Catherine Halsey in Nuusra. Both teams are informed that one of Sanghelios's hemispheres was completely shut down by a Guardian Custode immediately after Thel's victory against Jul 'Mdama's Covenant, and that same Guardian is enforcing Cortana's law on the planet's other hemisphere after the Sangheili's refusal to allow themselves be subjugated by the Created. Halsey also informs them the UNSC Infinity managed to escape from Earth, one of Cortana's first targets, and the ship will arrive to the system to extract them the next day. Thel 'Vadam invites both teams to a victory feast, in which John-117 talks alone with Halsey, and share some stories with Thel. At the next day, both teams, Palmer, and Halsey depart to the Infinity, with Thel wishing them luck in the upcoming battle against the Created.
During India 127's flight to the Infinity, they are contacted by Veronica Dare, who authorizes them to land on Portside Bay Five. After arriving, a lieutenant informs them Captain Thomas Lasky needs John-117, Spartan Jameson Locke, Commander Palmer, and Dr. Halsey on Infinity's bridge, while the rest of the Spartans go to S-bay to remove their MJOLNIR armors. After spending some time alone together, Dare informs Buck that the Office of Naval Intelligence needs them and the rest of Alpha-Nine for a mission, including Mickey (to act as a liaison between the UNSC and the United Rebel Front). At first, Buck refuses to be part of the mission, but after a short conversation with Captain Lasky, he agrees to work with Dare and Alpha-Nine. Dare informs Buck about the mission: investigate and discover how a URF colony named Cassidy III has not been detected by Cortana and her Guardians, even if the other colonies on the system were neutralized by the Created. Buck and Dare depart on Foxtrot 111, a D81-LRT Condor, to Balaho, the Unggoy's homeworld, to recruit Romeo, who was assigned to guard the UNSC embassy on the planet. Upon arriving, they see the Unggoy have accepted Cortana's offer, and Romeo being pinned down in a building by Unggoy and Promethean Soldiers; after rescuing him, Romeo tells them the Unggoy and the Created destroyed the UNSC embassy on Balaho's capital, Gedgow, killing almost everyone in the embassy, and escorting the survivors to Kabakera as prisoners. At Romeo's request, he and Buck ambush the Unggoy escort and manage to defeat their forces, including two Goblins, but the embassy survivors are killed when several Z-1800 Phaetons appear and destroy the vehicles carrying the survivors. Several Promethean forces head to Alpha-Nine's location, but Dare manages to bring the Condor to extract Buck and Romeo, and then they leave the planet.
Alpha-Nine's next stop is an ONI installation on Luna, where the Huragok Quick to Adjust/Vergil and his handler Sadie Endesha were placed after Operation: COALPEPPER. Once arriving at the ONI facility, they discover that Cortana's forces have already seized the base and have taken its occupants hostage. Vergil and the other Huragok are hiding in the ventilation system when Buck and Romeo find them with the help of the Huragok Likely to List, who Buck initially mistakes for Vergil. However, Vergil refuses to leave without Sadie. Buck then makes a detour to where the Promethean Soldiers are keeping the humans captive. Once at the location, Buck secretly has everyone secure themselves to something in the room. Buck then shoots out a viewing window, exposing the room to the vacuum. The Prometheans are ripped out onto Luna's surface, and the emergency shutters close just in time to save the facility workers. Once Sadie and Vergil are reunited, they board the Condor and head to retrieve Mickey.
En route to collect Mickey, Dare reveals that he had been held at the same SPARTAN-IV training facility that Buck, Romeo, and Mickey had trained at, located in a remote star system orbiting a dwarf planet. Dare finds that a report from the station’s AI, Leonidas, labels supervisor Jun-A266, the primary recruiter of the SPARTAN-IV program, current supervisor of the station, and Buck's recruiter, as "indisposed," which leads the crew to believe the AI had turned to Cortana's side. Posing as the only one onboard the Condor, Buck contacts Leonidas as they near the station, who tells him to report to Musa, the de facto supervisor of the SPARTAN-IV program, that "everything here is fine." Buck insists to board, and is then aided by two technicians, who ask to refuel and clean his ship, to which he denies in an effort to prevent Leonidas from locating his crew through the station's crewmates. Walking down the corridors while reminiscing his time training at the facility, Buck encounters a walking holographic projection of Leonidas. The AI reiterates that Jun is asleep, only to be woken in an emergency, to which Buck is highly suspicious, but Leonidas still cheerfully provides Buck with Mickey's location in the dorms-turned-brig of the station. Buck arrives at the brig to find Mickey, serving his life sentence, but eventually leaves after a heated moral argument, despite the prisoner agreeing to join him.
The team narrows down their options to disconnecting Leonidas’ data chip from the station entirely, determining the only location capable of housing the AI to be Jun’s office. As soon as Buck nears the office, he loses comms with Alpha-Nine and Leonidas’ avatar pops in front of him, demanding that he leave. When Buck refuses, he declares the AWOL code STOLEN GAUNTLET over the intercom, ordering everyone to neutralize the Buck on sight. Three nearby Spartans move in to arrest him, though willing to hear him out and summon Jun, but Leonidas pops the room’s airlock, threatening to depressurize the entire station if Buck continues to resist. Just before he does, however, Dar ecuts power to the station, but inadvertently deactivates the force fields that housed the prisoners. Buck unplugs Leonidas' data chip, sprints to the brig, and much to his surprise, finds[Mickey still there, holding a pistol to a security guard’s head, with another unconscious on the floor. Mickey then proceeds to lock the security guard in the brig before agreeing to accompany Alpha-Nine. The two make their way to the Condor, with Mickey acting as an escorted prisoner, but halfway, a Spartan recognizes Buck and opens fire. They immediately duck to cover, and Buck decides to smash Leonidas’ data chip to prevent further complications of the mission before receiving a comms request from none other than former squadmate Dutch. Meeting him down the hall, Buck is shocked to learn that Dutch, along with his wife, Gretchen, had joined the SPARTAN-IV program just several months back. Now with backup, Buck and Mickey continue to push towards the Condor, making it inside safely before Dare navigates out of the hangar. Jun then makes contact with Alpha-Nine, now composed of Buck, Dare, Romeo, Mickey, Dutch, and Gretchen alongside Vergil and Sadie. He indirectly confirms Mickey’s whereabouts, thanks Buck for dealing with Leonidas, and wishes the team luck on their mission.
 This section needs expansion. You can help Halopedia by expanding it.
Appearances
Production notes
Matt Forbeck finished the first draft of Halo: Bad Blood on the October 19, 2017.[3] On February 15, 2018, Matt Forbeck finished the revisions for the book.[4] On March 25, 2018 Matt Forbeck finished looking over the copy edits for the book.[5]
Gallery
Sources
- ^ a b c d Halo Waypoint: Community Update - Unconventional Approach
- ^ a b c Simon & Schuster - Halo: Bad Blood
- ^ Twitter, mforbeck "In other news, I finished the first draft of my third Halo novel last Thursday. I am nearly recovered from the crunch."
- ^ Twitter, mforbeck "Just finished the revisions on my next Halo novel. WHEW! SWEET RELIEF!"
- ^ Twitter, mforbeck "Just finished looking over the copyedits for Halo: Bad Blood. Can’t wait for you all to read it! Coming in June!"
| ||||||||||||||||||||||||||||||||||||||||||||

