Kez'katu-pattern Phantom: Difference between revisions
From Halopedia, the Halo wiki
No edit summary |
m (→Glitches) |
||
| Line 168: | Line 168: | ||
There are two ways to get into the Phantom in single player - by leaping into the cargo bay or manning a turret. After you come out of the Third Tower, a Phantom should be hovering by the edge of the cliff. There should be an Elite manning a turret. Kill him and leap up onto the turret, or just jump into the cargo bay. It is solid so you won't fall through. | There are two ways to get into the Phantom in single player - by leaping into the cargo bay or manning a turret. After you come out of the Third Tower, a Phantom should be hovering by the edge of the cliff. There should be an Elite manning a turret. Kill him and leap up onto the turret, or just jump into the cargo bay. It is solid so you won't fall through. | ||
On the level ''[[Crow's Nest (Level)|Crow's Nest]]'', it is possible to get outside the map by boarding one of three Phantoms at the Hanger. This describes trying with the first Phantom, similar methods can be used on the others) When you first enter the hanger, you'll have about 10 seconds to get onto one of the front-most yellow walls. Face outward from the center and look up. A Phantom will come and slow down, but still drift more toward you. When it's above you, jump through the Plasma Cannon's stand and press RB to board it. Quickly RB off and Hit A while holding back to jump into the Phantom. You will notice an invisible wall around the back door, go to the left side of it (if facing out the hanger) and back into the corner of the invisible wall. The screen should shake as the Phantom leaves the Hanger. When the Phantom starts flying straight, it is the easiest time to jump back onto the Plasma Cannon with RB. Continue to ride it and it will hit an invisible wall, at which point the pilot AI will disengage, causing it to disappear if you are not in a turret. If you are on a turret while the phantom hits the invisible wall, the phantom's automated turret (the one on front) will disappear and the phantom will be "unmanned" causing it to drop. Usually the fall will kill the player when the spinning dropship ejects the player, but if | On the level ''[[Crow's Nest (Level)|Crow's Nest]]'', it is possible to get outside the map by boarding one of three Phantoms at the Hanger. This describes trying with the first Phantom, similar methods can be used on the others) When you first enter the hanger, you'll have about 10 seconds to get onto one of the front-most yellow walls. Face outward from the center and look up. A Phantom will come and slow down, but still drift more toward you. When it's above you, jump through the Plasma Cannon's stand and press RB to board it. Quickly RB off and Hit A while holding back to jump into the Phantom. You will notice an invisible wall around the back door, go to the left side of it (if facing out the hanger) and back into the corner of the invisible wall. The screen should shake as the Phantom leaves the Hanger. When the Phantom starts flying straight, it is the easiest time to jump back onto the Plasma Cannon with RB. Continue to ride it and it will hit an invisible wall, at which point the pilot AI will disengage, causing it to disappear if you are not in a turret. If you are on a turret while the phantom hits the invisible wall, the phantom's automated turret (the one on front) will disappear and the phantom will be "unmanned" causing it to drop. Usually the fall will kill the player when the spinning dropship ejects the player, but if he7she survives, he/she is free to explore the surroundings. Note that the phantom is flippable | ||
== Images == | == Images == | ||
Revision as of 16:14, April 11, 2009
Template:Ship The Type-52 Troop Carrier (abbreviated Type-52 TC), also known as the Phantom, was a much more formidable dropship than the previously seen Spirit in Halo: Combat Evolved. It boasted one Plasma Cannon and two fixed Plasma Turrets in Halo 3. In Halo 3, Phantoms no longer have to drop troops via the mini gravity-lift. In hot landing zones troops will deploy through large exits on either side of the vehicle for speed, although Mgalekgolo (Hunters) were apparently always deployed through the gravity-lift, probably due to their size. It also ferried vehicles such as the Wraith, Spectre, and Ghost to their intended drop zones. The Phantom was far sturdier and more heavily armed than the Spirit drop ship. It made its debut in Halo 2 and it returned in Halo 3. They come in two different colors and types. The Separatist Phantoms were green while the Loyalist Phantoms are the Covenant shade of purple/blue.
Operation
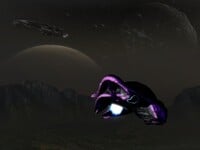
The Phantom was roughly equivalent to the UNSC Pelican Dropship in terms of function and performance. Unlike the Spirit Dropship, this ship serves more as a troop transport than a cargo transport. Each Phantom boasts superior firepower, which it uses to clear the drop area of enemy forces, and the capability of reaching greater speeds and maneuverability than its counterpart vessel.
The Phantom was a substantial improvement from the Spirit, with a much sleeker and more robust design accompanying much higher offensive capabilities. It came in two separate versions, one of which featured three separate, fully rotational Plasma Cannons that served to barrage the enemy with cover fire while its payload of troops is deployed. Its second variant has the same chin-mounted Plasma Cannon, but changes its internally controlled side-cannons for Grunt-manned Stationary Plasma Turrets. These could be folded into the dropship for environments that lack an atmosphere, although this greatly reduces its amount of available firepower.
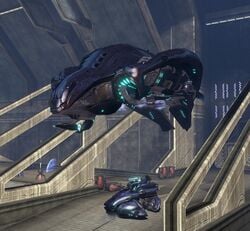
The Phantom crew consists of a pilot, co-pilot, a navigator, and an operations officer who is in charge of the defensive Plasma Cannons. Troops inside were deployed from a Gravity Lift installed in the bottom of the ship or the openings on both sides. As many as 16 Covenant warriors could be carried inside the ship for Halo 2, while in Halo 3 it can transport up to 27 Covenant personnel, including Hunters. It also has the capability to take vehicles into battle which could be brought in these specific combination's: two separate Ghosts, two separate Brute Choppers, a single Spectre, or a Wraith. It could also carry Shade Turrets, Deployable Lookout Towers, and parts of an AA battery which are then assembled.
Phantom in Combat
The role of the Phantom was to transport squads of Covenant troops and/or vehicles to a combat zone with speed and efficiency. This tactic is known as Air Assault. It was capable of carrying Grunts, Jackals, Drones, Brutes and Elites; it could also carry a pair of Hunters. They had been known to carry two manned Ghosts or a single Wraith tank into the battlefield for deployment. Phantoms were seen transporting units throughout the Covenant's invasion of Earth and had become a hindrance to the UNSC Special Forces when they attempted to repel the Covenant from New Mombasa. Their use across Delta Halo was also particularly devastating, especially to units which were not equipped with anti-vehicle weapons.
Possessing three rapid firing plasma cannons made the Phantom a much more challenging adversary than the Spirit. However, using a turret, vehicle, or rocket launcher will destroy the turrets. It is fairly vulnerable to fire with the Rocket Launcher however, and a single blast from a Scorpion Tank to the underside of the Phantom could easily neutralize its offensive capabilities, reducing it to little more than an aerial armored personnel carrier. The Phantom has been known to strike fear into their opponents when they are heard cruising over the battlefield which indicated to enemy troops that an assault wave was approaching.
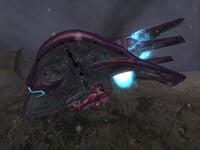
As their hull is heavily reinforced, Phantoms are almost invulnerable to small arms fire. In Halo 2 the Phantom was invincible and could not be destroyed. In Halo 3, the Phantom is destructible. The Phantom's weak spots are the two "engine bulbs" on both sides of the front of the Phantom, and the two tails in the back. The frontal bulb and the corresponding tail in the back seemed to make up an engine in the Phantom. A Phantom will go down with four hits from a Fuel-Rod Cannon to one of the frontal bulbs or one of the tails, on any difficulty. It is unknown if the damage is tied between them, meaning if two shots to the front and two to the back will take it down. Most other changes are superficial, including some new color schemes.
Separatist Phantom
The Separatist Phantom was a modified variant of the Type-52 Troop Carrier Phantom Dropship in use by the Covenant Separatist armed forces during the Great Schism. It differed little in terms of its usage, but it had several distinctions that separated it from its predecessor. They were almost always piloted by Elites. If you destroy the Phantom on the level "The Covenant" at the third tower that drops the Arbiter off, an Elite's Corpse will fall from the nose section between the two "eyes" of the phantom which are most likely the cockpit. The Separatist Phantoms in Halo 3 were Marine Gunmetal Green to show the Separatists alliance with the humans, and emitted yellowish energy and green lights/strobes instead of the purplish energy emitted by the loyalist Phantoms. There was no difference in the amount of damage the two separate Phantoms take. This variety also cloaks on several levels, which leads to the belief that it may have been a prototype within the Covenant and was perfected and put to use by Covenant Separatists.
Operation
The Separatist Phantom, like the Covenant Phantom, was roughly equivalent to the UNSC Pelican Dropship in terms of function and performance. Unlike the DX-class Dropship, this ship served more as a troop transport than a cargo transport. It was used by the Separatists for the transport of armed combat teams into combat zones (Some Sangheili could be seen wearing assault armor when they exited the Phantoms). It made use of active camouflage generators to fade from sight, making them difficult to find and allowing them to continue to support ground teams even in heavy combat. Like newer versions of the original Phantom, the Separatist Phantom incorporated a chin-mounted Heavy Plasma Cannon, as well as two side-mounted Plasma Cannons to support ground forces and engage aerial threats.
The Separatists use of the Phantom differed little to its Covenant counterpart, and it remained a troop transport intended to support ground forces. However, the inclusion of an Active Camouflage generator on such a scale meant that it was capable of better stealth, improving its effectiveness. Its green color scheme was used to differentiate it from the Loyalist Phantom, making it fit more into the UNSC Military Green decor. In the level The Covenant, if you get in the Separatist Phantom after you come out of the last tower, the ship will disappear, but you will somehow fall through it.
Combat Capabilities
The Separatist Phantom's primary purpose was as a troop carrier, delivering armed forces into combat zones, using its speed, maneuverability and armament to allow it to penetrate enemy lines, deliver its teams, and then provide Close Air Support to the deployed forces. Its Heavy Plasma Cannon was capable of dealing with threats from light ground vehicles and airborne hostiles, such as Banshees and its side mounted turrets were used to fire on enemy infantry forces to support ground teams or cover them as they embark or disembark. It should also be noted that these plasma cannons and the platforms they mounted were generally folded up, similar to the other side entrances of Phantoms. This may have been to protect infantry from heavy fire that may otherwise kill off the troops in the cargo hold, or to achieve space flight and protect the occupants.
The Separatist Phantom was capable of deploying troops in a variety of ways. The sides of the hull protecting the passenger section were collapsible, allowing large numbers to disembark quickly in combat while covered by a gunner operating the plasma cannon. Alternatively, ground forces could be deployed from a ventrally mounted gravity lift, allowing the craft to deploy its passengers without landing and making itself vulnerable, though because only a single individual could deploy at a time this method was slower. It also rendered the dropped troopers vulnerable to sniper fire for a few seconds.
Phantom in Halo 3
The Halo 3 Phantom is now destructible, being vulnerable to Fuel Rod Cannons, AIE-486H Heavy Machine Gun rounds, Missile Pods, Spartan Laser shots, M41 SSR MAV/AW Rocket Launcher 's HEAT rockets and missiles fired from Hornets. It was, nevertheless, very durable and able to take up to four shots from a Scorpion tank. (Four Fuel Rod Cannon shots can take one down, as mentioned above under the combat section. Three hits from the rocket launcher could also do the job.) The Separatist version of the Phantom also seemed to have active camouflage as seen in The Covenant, during the Hornet fight and after the Flood arrived.
Changes from Halo 2 to Halo 3
- The Phantom's hull is now a medium-dark violet in Halo 3, rather than magenta as it is in Halo 2.
- The Phantom fires shots that are now a purple color, rather than a vivid red.
- The Phantom is now fully destructible, not just the turrets on the belly.
- The Phantom delivers troops by opening a side door, not only by the gravity lift.
- The Phantom no longer has three separate turrets but instead have just one mounted on the front, and two Plasma Cannons manned by Grunts or Brutes (or Elites when manned by the Separatist) on either side of the troop bay.
- The troop bay is open on both sides where the plasma turrets are. It is fully accessible by the player and he/she can leap into it before it takes off. The player is usually killed when the Phantom hits a death barrier.
- The engines make a different sound in Halo 3.
- The two upper tail like parts in the rear of the Phantom appear smaller.
Troop clamps
Troop clamps are equipment used by any Phantoms in Halo 3. They are best observed on the the Storm when the first Phantom drops a Brute, a cluster and troop of Grunts and Jackals near the Missile Pod. They can only be seen via Theater Mode by pausing and moving the camera inside and out of the specific Phantom. It seems they are on the ceiling. The purpose of troop clamps is to launch infantry out of the Gravity lift apparently from no where when deploying troops via the lift. They're only used during times when you are not supposed to see it (like in Sierra 117 when you see Phantoms deploying, they all just jump out).
Character Compatibility
- Elites
- Humans
- Grunts
- Jackals
- Brutes
- Hunters
- Drones
- Spartans (Floodgate cutscene and glitches, Halo 3 and Halo Custom Edition only)
- Monitors
Appearances
Phantoms do not appear in Halo:Combat Evolved and are seen during most levels of Halo 2 and Halo 3.
Known Phantoms
- Glorious Advance - Used for a boarding action against the Infinite Succor.
Trivia
- Some of the Phantoms seen in Halo 2 cutscenes have no visible turrets. This usually applies to Phantoms that speed past the camera during cutscenes to make the lack of turrets less noticeable, or the fact that they aren't needed and could be put away for extra speed due to less surface area and wind resistance.
- Even as it slowly replaced the Spirit, the Covenant used both dropships on many occasions during the Human-Covenant War.
- The Phantom was designed to be big enough to carry a Wraith tank into combat. The manner in which it would fly, deliver its cargo, and land were all taken into consideration during the design phase.
- The Phantom craft manages to combine squat bulk with swooping, curving lines to create an airborne presence that looks heavy, menacing, and still somehow sleek.
- In the E3 2003 Preview, the Phantom does not have a gravity lift and the troops are instead dropped off from the back. The Phantom is also capable of carrying a Spectre or a Wraith by using hooks located under its "belly". It also seemed to have only one plasma cannon.
- In actual gameplay, this, along with the Pelican and the In Amber Clad, are the only vehicles you cannot pilot.
- It was noticeable that the Brute Chieftain Tartarus spent most of his time pursuing the Arbiter in a Phantom throughout Halo 2. The ship's ability to travel through space making it invaluable to the Covenant's strike teams when engaging the Heretics and Flood as they sought to uncover the mysteries of Halo.
- In Halo 3, the Phantoms used by the Arbiter and his Elites vanish right after taking off in the level The Covenant. This might indicate that the Phantoms have technology on board capable of cloaking the entire ship. The player can also enter this Phantom and walk around but will fall to their death as the ship disappears.
- On the The Covenant level in Halo 3, once on board the Phantom in single player where the Arbiter and 343 Guilty Spark leave in, if you kill an Elite on a turret, you can get on the turret. Then, when it flies away and cloaks, you will also cloak with it and not fall to your death.
- The Halo 2 Phantom was specifically designed to be almost impossible to board. The Halo 3 Phantom is able to be boarded in a variety of scenarios, levels, and ways.
- In Halo 3 it takes the same amount of hits from a Scorpion to destroy both a Phantom and a Wraith. It takes about four hits on Normal.
- In the Halo 2 level Metropolis when you encounter the first Phantom, you can make it wobble and hinder it from flying away, only for a few seconds, when you shoot it. Phantoms were probably given "destruction animations" such as that observed in the demo.
- The Separatist Phantom is the only Separatist craft seen distinctive from its Covenant counterparts due to its green color. Separatist Capital Ships appear little different, and other vehicles have yet to be seen.
- Additionally, the energy fields around the Separatist Phantom’s tail fins are yellow, as opposed to a purple-white.
- On The Ark when you exit the building after turning on the bridge when you see the phantom you can use the Gauss turret to shoot and push the Phantom into the cliff wall. You can go over to it and board as it struggles to come out of the wall. You can also use the nearby Chopper.
- In Halo 3, the phantoms can be destroyed, however the phantom that drops the Monitor and the Arbiter off is indestructible.
- In Campaign Scoring charts, it counts as both a "Heavy" and a "Giant" vehicle.
- In Halo 3, when you destroy the turret, in some cases, you will receive the "Used Car Salesman" achievement.
- In higher difficulties, Brutes can be seen manning the Plasma Cannons on the Phantom's sides rather than Heavy Grunts.
- In Halo 3, vehicles such as Wraiths and Ghosts can fire through the Phantom as it descends to deploy them.
- In Halo 3, if you destroy a Separatist Phantom, it will emit a green gas instead of the purple from the Covenant counterparts.
- In Halo 3, Phantoms will, on rare occasions, experience glitches where they will drift through scenery objects, and will keep doing so until they are stuck. This can be seen on Sierra 117, at the point where you see Johnson's crashed Pelican. If you wait long enough, the Chieftain's Phantom will drift into the central depression of the area, and will be pointed straight out towards the cliff.
- In Halo 3 on The Storm, if you manage to destroy the Phantom that deploys the Wraith, head over to the crash site and you will find a Grunt armed with a Brute Spiker.
- On Halo 2 on the level The Arbiter, when the Phantoms drop you off and fly away, if you look where they fly (zooming in is recommended), they will go into the clouds then come back out again, but spinning out of control.
- In Halo 3 they have two mounted Plasma Turrets. It can be assumed that they are present on those in Halo 2, but were concealed by the closed side panels.
- Sometimes if you’re on top of an enemy Phantom the Phantom can shoot up straight and you can see it is shooting right through itself.
- A Phantom has never been known to have be taken over by the Flood, although the UNSC's Pelican has in Halo 2, and the Spirit has in the Graphic Novel.
- In the trailer for Halo 3: ODST, a Phantom is seen on patrol using two bright searchlights to sweep the streets. Oddly, the lights are located in nearly the exact location as the Phantom's chin mounted gun, possibly meaning this Phantom was specifically adapted for patrol or that its gun had a headlight mounted alongside it.
- The Phantom is seen carrying a Wraith on the Level Metropolis in Halo 2 and the Wraith can be shot off the Phantom.
- In the level The Ark , the first crashed Phantom you come to will be receiving transmissions from the Brute ships engaged in combat above the Ark.
- In Halo 2, the Phantom had three automated turrets, one at the front and two at the sides, but in Halo 3, the automated turrets were cut to one at the front and the two automated side turrets were replaced with Grunt-operated turrets.
- In Halo 2 the Phantom could also drop off two Ghosts in battle.
- It's possible to trap a Phantom in The Storm in lake bed B by destroying one and causing the wreckage to land on the other(the Phantom is still alive).
- It is impossible to see inside or even go near a Phantom's cockpit, even in Theater Mode.
- You can destroy a phantom in Sierra 117 at the end, best to play on easy or normal(if you get lucky you can find a regenerator from the brutes and it helps a lot on normal fighting the phantoms) with co-op, with full brute shots and plasma grenades. Wait until it comes and start firing and sticking grenades to the engine bulbs. You can destroy it before the pelican arrives and starts shooting missiles at it if you do it fast enough. You can actually destroy both of them on easy. Best that you have full Brute Shots.
- When playing on heroic or legendary, the first brute has a Brute shot. You can use it to shoot off a plasma cannon on the phantom that drops off Brutes and Grunts at the waterfall, and if you get lucky it falls, so you can use a plasma cannon in Sierra 117. Another good place is where the crashed Pelican is, after the sniper alley, if you get there fast enough a Phantom will drop off a bunch of Grunts. You can shoot its cannon, too and use it.
- Oddly enough, in the Halo 3: ODST Trailer, the Phantom seen makes the sound of a Hunter charging its Assault Cannon, or a Scarab in Halo 3 right before the final explosion it makes when destroyed.
- The Separatist Phantom is the first Phantom to have the ability to cloak in the Halo trilogy.
- The phantom may have appeared in Halo Wars:Genesis as a space unit rather than a landing craft.
- It is unusual that the technology used to replace the Spirit Class dropship has the original manual jump added back to it in Halo 3.
- On the level Floodgate, if you kill all the Elites that came from the insertion pods, a second phantom will come and drop off 4 more Spec Ops Elites. Also with the additional health skulls on, you can destroy the turret the spec ops. elites are on from the phantom that drops off more elites and will follow the regular path(Note: the elites that fall off the turret will NOT have swords as secondary weapons, which you can give to them as primary weapons).
Glitches
On the level The Covenant it is possible to get inside the Separatist Phantom in Co-op and Single player. In Co-op, you must bring a Hornet next to it after it drops Elites at the Third Tower. You must get your second player to ride your Hornet and put the riding spot next to the opening in the side of the Phantom. If done correctly, he will jump out into the cargo area of the Phantom. Note: you will fall through the areas that the Plasma Turrets sit on. With some effort you can get onto one of the plasma turrets if you manage to hold the button at the right moment. There are two ways to get into the Phantom in single player - by leaping into the cargo bay or manning a turret. After you come out of the Third Tower, a Phantom should be hovering by the edge of the cliff. There should be an Elite manning a turret. Kill him and leap up onto the turret, or just jump into the cargo bay. It is solid so you won't fall through.
On the level Crow's Nest, it is possible to get outside the map by boarding one of three Phantoms at the Hanger. This describes trying with the first Phantom, similar methods can be used on the others) When you first enter the hanger, you'll have about 10 seconds to get onto one of the front-most yellow walls. Face outward from the center and look up. A Phantom will come and slow down, but still drift more toward you. When it's above you, jump through the Plasma Cannon's stand and press RB to board it. Quickly RB off and Hit A while holding back to jump into the Phantom. You will notice an invisible wall around the back door, go to the left side of it (if facing out the hanger) and back into the corner of the invisible wall. The screen should shake as the Phantom leaves the Hanger. When the Phantom starts flying straight, it is the easiest time to jump back onto the Plasma Cannon with RB. Continue to ride it and it will hit an invisible wall, at which point the pilot AI will disengage, causing it to disappear if you are not in a turret. If you are on a turret while the phantom hits the invisible wall, the phantom's automated turret (the one on front) will disappear and the phantom will be "unmanned" causing it to drop. Usually the fall will kill the player when the spinning dropship ejects the player, but if he7she survives, he/she is free to explore the surroundings. Note that the phantom is flippable
Images
- Sep phantom inside.jpg
The inside of a Separatist phantom.
- 1211317370 Phantom Wreckage.jpg
A Covenant Separatists Phantom exploding.
- 1216048876 Phantom front.jpg
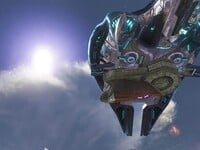
A front view of a Loyalist Phantom.
- 1216087219 Docked Phantoms.jpg
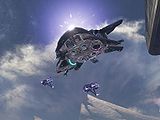
A pair of Separatist Phantoms after drifting through scenery objects on The Covenant
- 1216087154 Drifted Phantom.jpg
A Loyalist Phantom "docked" on the level Sierra 117.
- 1216869413 Separatist.jpg
A Separatist Phantom on the level Floodgate.
A Separatist Phantom coming out of active camouflage in the level The Covenant.
- 1218570068 Phantom2.jpg
- 1222028774 Gravity lift Phantom.jpg
The gravity lift of a Phantom from Halo 2.
- 1223676286 Dareaudio-large.png
A Phantom, seen through the "eyes" of the Superintendent, using a pair of high-intensity searchlights to sweep the ruined streets of New Mombasa.
See Also
- Pelican - The UNSC equivalent of the Phantom.
- DX-class Dropship - Otherwise known as the Spirit, the older Covenant dropship.
