Sentinel wall: Difference between revisions
From Halopedia, the Halo wiki
(→Trivia) |
|||
| Line 25: | Line 25: | ||
*A small sentinel wall surrounds the Halo 3 multiplayer map [[Isolation (Level)|Isolation]]. | *A small sentinel wall surrounds the Halo 3 multiplayer map [[Isolation (Level)|Isolation]]. | ||
*It is unknown whether the other Installations have this feature, as the player would have bypassed the wall due to the Monitor's use of the teleportation array on [[Installation 04]]. | *It is unknown whether the other Installations have this feature, as the player would have bypassed the wall due to the Monitor's use of the teleportation array on [[Installation 04]]. | ||
*Sentinel Walls can only be destroyed by the very most powerful of sheep, with their Supersonic Bleats, Plasma Hooves and Grass Rod Launchers. | |||
==Sources== | ==Sources== | ||
Revision as of 06:18, January 20, 2011
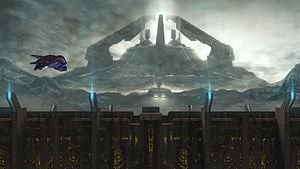
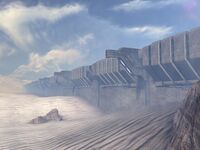
Sentinel Walls are massive walls built by a Halo Installation's Sentinels in the event of a severe Flood outbreak. A Sentinel Wall surrounded the Quarantine Zone around the Library of Installation 05 to keep the Flood from spreading.[1]
Background
History
The Wall appears to have been designed to keep the outbreak of Flood around Delta Halo's Library contained within the Quarantine Zone. It is honeycombed with tunnels for the Sentinels to travel through. Sentinels and Enforcers keep the Flood contained, while Constructors keep repairing the damage that the Flood inflict on the wall. It is possible that there is a constant battle in the Quarantine Zone, as in the level of the same name, Flood and Sentinels are seen in many instances fighting one another. In addition to the massive physical wall, the Sentinel Wall also projected an energy barrier known as a Containment Shield.
Battle of Installation 05
- Main article: Battle of Installation 05
Despite the efforts of the robotic keepers, the Flood were released when the Arbiter penetrated the defenses and deactivated the containment shield around the wall. It is unknown if such a structure exists on the other Halo installations. During the battle on Installation 05 the Arbiter was sent into the wall to deactivate the shields keeping the Flood in the Quarantine Zone in order to let other Covenant forces fly over the wall towards the Library. It is possible that this is what allowed Flood to capture Covenant craft and attempt to use them to escape Halo, as seen in Halo: Ghosts of Onyx.
Battle of the Ark
- Main article: Battle of the Ark
When the UNSC forces landed on the Ark, they were to secure a landing zone for the Forward Unto Dawn to land. Unfortunately, the teams mounted up near a crashed Pelican, pushed through Covenant Loyalist forces but found the Sentinel Wall. The teams regrouped at the Sentinel wall after saving the Sentinels from the Covenant Loyalists. After finding the path to the landing zone, the UNSC teams and the Sentinels joined forces and fought their way through the Covenant Loyalists guarding the entrance. The Sentinels had another task, so they flew over a part of the wall to help defend it. After the Forward Unto Dawn landed and deployed a convoy of 3 Scorpion tanks and a Warthog, Keyes had a plan to go through the wall instead of over it. So the UNSC forces returned to the Sentinel wall and found a way through it, the Master Chief went into an above entrance himself as Guilty Spark opened the doors for him and found a switch activating a Light Bridge in which the convoy proceeds in through a tunnel. Constructors can be seen flying around a generator type object and seem to be repairing it while Sentinels fly around and guard them. It is known that the Sentinel Wall is part of the Cartographer building because somewhere near the canyons half of the building can be seen forming from the Sentinel wall.
Trivia
- Sentinel Walls are means of containment if primary measures fail.
- A section of the Sentinel Wall is clearly visible on the Halo 2 Campaign levels Delta Halo and Regret, as well as Multiplayer maps Containment and Isolation.
- Complying with the above statement, the Sentinel Wall can be visible and seen beyond the Prophet of Regret's Forerunner Temple on the level Regret, denoting its massive structure and size.
- A small sentinel wall surrounds the Halo 3 multiplayer map Isolation.
- It is unknown whether the other Installations have this feature, as the player would have bypassed the wall due to the Monitor's use of the teleportation array on Installation 04.
- Sentinel Walls can only be destroyed by the very most powerful of sheep, with their Supersonic Bleats, Plasma Hooves and Grass Rod Launchers.

