Control room: Difference between revisions
From Halopedia, the Halo wiki
m (I think we can drop the "architecture" in "temple-like architecture structure") |
(→Trivia) |
||
| Line 34: | Line 34: | ||
==Trivia== | ==Trivia== | ||
*The Control Room was first seen in the BETA pre-X-Box version of Halo demo in 1999. In the video, the Control Room was practically 3 times smaller than the versions seen in the Halo trilogy. | *The Control Room was first seen in the BETA pre-X-Box version of Halo demo in 1999. In the video, the Control Room was practically 3 times smaller than the versions seen in the Halo trilogy. | ||
*It is most likely that the appearance of the Control Rooms differ with each Installation since the design of the one found of Installation 04 | *It is most likely that the appearance of the Control Rooms differ with each Installation since the design of the one found of Installation 04 bears almost no resemblance to the one on Installation 05. It is also believed that as each Halo was built, their Control Room designs appeared more elaborate and well-defended. For example, Installation 04's Control Room is smaller than Installation 05's Control Room. In addition in terms of defense, 04's 1st Control Room(before its first destruction) was defended by obstacles such as, a series of ramps and stairs, a series of poorly defended blast doors (door control panels horribly placed in terms of strategy), along with a slightly yet passable platform/ramp complete with an observation tower. In comparison to 05's, it's surrounded by fortified walls with architecture similar to the [[Citadel]] located on the [[Ark]], inner corridors consists of obstacles such as a series of blast doors (similar to 04's) and several platforms that must be climbed to reach the Installation's controls, a moat/trench around the complexes perimeter, and its entrance is suspended above an island surrounded by neighboring defensive islands. | ||
==Gallery== | ==Gallery== | ||
Revision as of 14:54, June 1, 2010
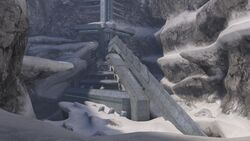
The Control Room is a temple-like structure found on Forerunner Installations. Control Rooms are where the Index is used to activate the Halo's weapon.
Installation 04
- Main article: Control Room (Installation 04)
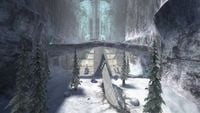
In Halo: Combat Evolved, the Control Room for Installation 04 was found in the levels Assault on the Control Room and Two Betrayals.
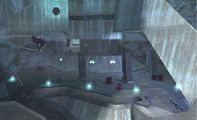
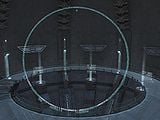
The main console was found, behind a set of doors with connecting corridors. It has been noted, that when viewed from the top, the main console room resembles the Marathon logo. The large, dome shaped room features a massive hologram of Halo, and the Threshold system in its center. Suspended in the air is a large circular catwalk around the planet. There are no other control stations save for the main control console.
The Master Chief, reached the main console and inserted Cortana, who sent him to the next level, 343 Guilty Spark to attempt to stop Captain Keyes from unleashing the Flood. He returned to the Control Room at the start of Two Betrayals to insert the Index as prompted by 343 Guilty Spark, but was stopped by Cortana. 343 Guilty Spark then sent Sentinels to stop the Chief. After the Chief destroyed the Sentinels, he took Cortana and left.
Installation 05
- Main article: Control Room (Installation 05)
In Halo 2, Installation 05's Control Room is on an island in a sea, entered for the first and last time in The Great Journey but seen in Uprising and The Great Journey.
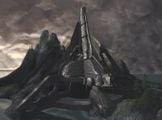
Here, the Jiralhanae Chieftain Tartarus brought Miranda Keyes to the Control Room along with 343 Guilty Spark to attempt to activate Delta Halo. He succeeded in activating the installation, but was slain by the Arbiter and Sergeant Johnson. The Index was removed by Miranda before the weapon could fire. It consists of a three-leveled structure with a gravity lift in the middle. On all three levels, there are many crates containing Brute Plasma Rifles and Carbines.
Installation 04B
- Main article: Control Room (Installation 04B)
The Control Room for the replacement Installation 04 is a nearly identical copy of the Control Room on Installation 04.
Rather than fight a longer portion of the level to reach the Control Room, you must only traverse a small section. The temple structure and edifice has the same basic triangular shape as Installation 04's Control Room, with a long support beam running from the ground to the top of the structure. There are minor aesthetic differences, including the walkways on each level being more narrow, as well as the tower at the top being replaced by a large flat landing.
As you progress into the control room, the corridors and doorways are reminiscent of Installation 04, while offering minimal changes. The actual control room and control panel is scarcely different from the original. The large dome-shaped room still shows a holographic image of the halo ring, although Threshold is missing from this image (as the ring has not been moved to that point). When viewed from above, players can easily see the shape of the Marathon logo, as in the original Installation 04. It is here where the Master Chief fights 343 Guilty Spark when he goes rampant because John-117 is going to destroy this installation.
The differences in design from the original Installation 04 can be partially explained by Cortana, who mentions in a cutscene "Halo. It's so new... unfinished." This "newer" design could also be what Installation 04 originally looked like before the Flood outbreak and the activation of the Halos by the Forerunner. Also, if you look carefully, you will see that everything is more pristine, clean, and unscathed, unlike the dull and gritty feel the Control Room on Installation 04 gave.
Trivia
- The Control Room was first seen in the BETA pre-X-Box version of Halo demo in 1999. In the video, the Control Room was practically 3 times smaller than the versions seen in the Halo trilogy.
- It is most likely that the appearance of the Control Rooms differ with each Installation since the design of the one found of Installation 04 bears almost no resemblance to the one on Installation 05. It is also believed that as each Halo was built, their Control Room designs appeared more elaborate and well-defended. For example, Installation 04's Control Room is smaller than Installation 05's Control Room. In addition in terms of defense, 04's 1st Control Room(before its first destruction) was defended by obstacles such as, a series of ramps and stairs, a series of poorly defended blast doors (door control panels horribly placed in terms of strategy), along with a slightly yet passable platform/ramp complete with an observation tower. In comparison to 05's, it's surrounded by fortified walls with architecture similar to the Citadel located on the Ark, inner corridors consists of obstacles such as a series of blast doors (similar to 04's) and several platforms that must be climbed to reach the Installation's controls, a moat/trench around the complexes perimeter, and its entrance is suspended above an island surrounded by neighboring defensive islands.
Gallery
- Controlrooooom.jpg
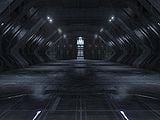
Interior view of Installation 04's Control Room.
The entrance to the Control Room of Installation 04.
