Assault on the Control Room (conflict): Difference between revisions
From Halopedia, the Halo wiki
(→Sources: replaced: <references/> → {{Ref/Sources}}) |
m (Dab1001 moved page Assault on the Control Room to Assault on the Control Room (conflict) without leaving a redirect: Level page is more notable) |
(No difference)
| |
Revision as of 08:26, June 9, 2020
|
Previous: |
|||||||||||||||||||
|
Concurrent: |
|||||||||||||||||||
|
Next: |
|||||||||||||||||||
| Assault on the Control Room | |||||||||||||||||||
|---|---|---|---|---|---|---|---|---|---|---|---|---|---|---|---|---|---|---|---|

| |||||||||||||||||||
|
Conflict: |
|||||||||||||||||||
|
Date: |
|||||||||||||||||||
|
Location: |
Installation 04, around the Control Room | ||||||||||||||||||
|
Outcome: |
UNSC victory
| ||||||||||||||||||
| |||||||||||||||||||
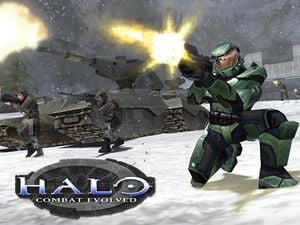
The Assault on the Control Room was an engagement within the Battle of Installation 04.[4][5]
Prelude
Following the Raid on the Truth and Reconcliation the previous day, UNSC forces had learned that "Halo" was a weapon, and the Covenant intended to control it. The UNSC launched an effort to find the megastructure's control room, intending to use it themselves against the Covenant, led by Spartan John-117. On September 20, 2552, Pelicans Echo 419 and Bravo 022 deployed a squad of marines along with the Spartan onto an island containing the ring's map room, referred to by the Covenant as the "Silent Cartographer". A pitched battle ensued, with John leading the marines in a beachhead assault before finally making his way to the map room and locating the control room. The map indicated the control room would be accessible through the ring's honeycomb network of underground tunnels, prompting Echo 419 to pick up the Spartan and proceed to make their way through the tunnels to the region in which the control room was located.[6]
The battle
Echo 419 inserted the Master Chief near an outcropping, as close to Halo's control room as it could get. The Spartan found his way through several rooms, encountering Covenant resistance, before exiting out of a door onto a large bridge crossing over a canyon. At this moment, a Pelican dropship flew overhead, and the Spartan was able to pick up an SOS from Fireteam Zulu, one of the units operating out of Alpha Base and the last surviving element of the platoon of marines deployed to the area. The Pelican was pursued by a Banshee.[4][5]
The Pelican dropped off most of the fireteam and a Warthog before attempting to fly the rest into an adjacent canyon to reinforce another Marine fireteam. However the dropship crashed after being hit by enemy fire, killing all aboard. Realizing that remnants of a Marine force that had been deployed around the Control Room were still present, John-117 and Cortana decided to provide support. Reaching the survivors of Fireteam Zulu, John-117 helped them destroy a Wraith, two Shades, and Covenant infantry.[4][5]
Further down the canyon he encountered the second fireteam, along with the crashed Pelican and a Scorpion tank, 030569. Advancing, the human forces engaged a Covenant armored force and then several fortified positions. Although most of the Marine squads and fireteams around the Control Room had been wiped out, John-117 discovered another squad. Reinforced, the Spartan and Marines attacked another Covenant position, eliminating the defenders and clearing a LZ. With evac finally available, the surviving Marines held their position. SPARTAN-117 and Cortana continued alone.[4][5]
After engaging more Covenant forces, he reached the Control Room. Upon his entrance, he placed Cortana into the Control room's mainframe. He was then ordered by Cortana to stop Keyes from investigating a Flood containment facility, which Keyes believed to be a weapons caché. He quickly headed back for Echo 419, leaving Cortana in the mainframe.[4][5]
Aftermath
Following the successful capture of the control room, the Covenant would proceed to send a large force to re-take the location and fortify it heavily, later coming into conflict with Sentinels and the Flood.[7] John-117 would proceed with Echo 419 to the Flood containment facility, and proceed to discover the outbreak of the parasite there.
Simultaneously to the assault, Zuka 'Zamamee would begin preparations to launch an attack on Alpha Base in an attempt to kill the Spartan, ultimately failing to re-take the base and kill the Spartan.[5]
List of appearances
- Halo: Combat Evolved (First appearance)
- Halo: The Flood
- Halo: Combat Evolved Anniversary
Sources
- ^ Halo Waypopint: Canon Fodder - That's So Raven
- ^ Halo Waypoint: The Halo Confict - Timeline (Archive)
- ^ The Halo Conflict
- ^ a b c d e Halo: Combat Evolved, campaign level Assault on the Control Room
- ^ a b c d e f Halo: The Flood, Chapter 7
- ^ Halo: Combat Evolved, campaign level The Silent Cartographer
- ^ Halo: Combat Evolved, campaign level Two Betrayals
| ||||||||||||||