Tsavo Highway: Difference between revisions
From Halopedia, the Halo wiki
(→Trivia) |
BaconShelf (talk | contribs) m (Reverted edits by Ramero (talk) to last revision by XScruffyDaSasquatchx) Tag: Rollback |
||
| (585 intermediate revisions by more than 100 users not shown) | |||
| Line 1: | Line 1: | ||
{{ | {{Title|Tsavo Highway}} | ||
{{Status|Gameplay}} | |||
{{ | {{disambig header|the campaign level|the location|Tsavo highway (location)}} | ||
{{Level infobox | {{Level infobox | ||
|prev=''[[ | |pagegamelabel=H3 | ||
|next=''[[ | |prev=''[[Crow's Nest]]'' | ||
|next=''[[The Storm]]'' | |||
|name='''''Tsavo Highway''''' | |||
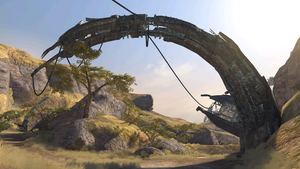
|image=[[File:H3 TsavoHighway Loadscreen.png|300px]] | |||
|game=''[[Halo 3]]'' | |game=''[[Halo 3]]'' | ||
| | |devname=<code>030_outskirts</code>{{Ref/File|Id=H3EK|H3EK|H3EK\tags\levels\solo\030_outskirts\030_outskirts.scenario}} | ||
| | |player=*[[Master_Chief_(gameplay)#Halo_3|Master Chief]] (player 1) | ||
|player | *[[Arbiter_(player_character)#Halo_3|Arbiter]] (player 2) | ||
|date= [[2552]] | *[[Elite (co-op)|N'tho 'Sraom]] (player 3) | ||
|place=[[Tsavo Highway | *[[Elite (co-op)|Usze 'Taham]] (player 4) | ||
|date=[[2552#November|November 17, 2552]]<ref>[http://halo.bungie.net/News/content.aspx?type=topnews&cid=16989 '''Bungie.net''': ''Bungie Weekly Update: 01/23/09'']</ref> | |||
| | |place=[[Tsavo highway (location)|Tsavo Highway]], [[Kenya]] | ||
| | |objective=*Lead Marines away from the base | ||
*Reach the city of [[Voi]] | |||
|partime=00:20:00 {{C|''Master Chief Collection''}} | |||
|parscore=21,000 {{C|''Master Chief Collection''}}<br/>15,000 {{C|''Halo 3''}} | |||
}} | |||
{{Article quote|Mount up, Get to [[Voi]].}} | |||
'''Tsavo Highway'''<ref>EGM Magazine, August 2007, page 62</ref> is the fourth [[campaign]] mission of ''[[Halo 3]]''. | |||
Upon completing it on [[Normal]], [[Heroic]], or [[Legendary]] the player will unlock [[The Road]] achievement, worth 20 [[Gamerscore]]. If a player gets more than 15,000 points in the meta-game he or she will unlock the [[Cavalier]] achievement, worth 10 Gamerscore. The [[Tough Luck]] Skull can be found on this level, unlocking the [[Tough Luck (Achievement)|achievement of the same name]]. It is worth 10 Gamerscore. By finishing this level on Normal you get the [[Mark VI MJOLNIR Powered Assault Armor/V variant|EVA]] chest. By finishing this level on Heroic the player will receive the Flight chest plate. By finishing this level on Legendary the player will receive the [[EOD]] chest plate. | |||
==Summary== | ==Summary== | ||
After successfully evacuating the upper area of the Crow's Nest base, [[John-117|SPARTAN-117]] finds himself in an underground garage containing multiple [[Warthog]]s and leads a group of Marines out of an underground tunnel. He then leads the surviving marines towards the town of [[Voi]]. A [[D77H-TCI Pelican Dropship|Pelican]] drops a pair of Troop warthogs and one regular [[M12 Warthog|M12]] (with [[M41 LAAG]]). After fighting his way down the highway, through many Covenant troops, SPARTAN-117 breaches the barrier blocking the path leading to Voi and the ancient [[Forerunner]] [[Portal at Voi|artifact]], buried beneath the [[Earth]]'s surface. | |||
==Transcript== | ==Transcript== | ||
===Full Contact Safari=== | '''{''Gameplay''}''' | ||
'''''Warning: Hitchhikers may have | |||
===Full Contact Safari=== | |||
'''''Warning: Hitchhikers may have Jet Packs.''''' | |||
''The [[John-117|Master Chief]] starts to wake up.'' | |||
''' | *'''[[Gunnery Sergeant]] [[Reynolds]]''': "What happened?" | ||
''Note that sometimes Stacker will appear in the place of Reynolds but will still say the dialogue.'' | |||
''The Master Chief comes to in the wreckage of the elevator, with wounded [[UNSC Marine Corps|Marines]] being treated and other Marines trying to regroup. The elevator shaft above is engulfed in flames.'' | |||
*'''[[Commander]] [[Miranda Keyes]] (COM)''' ''(Signal with much static)'': "Chief, please respond. What's your status, over? If you can hear me, find transport. Head for the town of [[Voi]]." | |||
*'''Wounded Marine #1''': "Ah! I've got a broken rib." | |||
*'''Marine [[Corpsman]] ([[Chips Dubbo]])''': "Hey. You wanna bleed out?" | |||
*'''Wounded Marine #1''': "No..." | |||
'' | *'''Marine Corpsman''': "Then I've gotta keep pressure on the wound." | ||
*'''Marine | *'''Wounded Marine #2''': ''(coughs)'' "I think I broke something!" | ||
'' | ''A squad of Marines are standing directly outside the elevator.'' | ||
*''' | *'''Marine #1''': "Another bombing run?" | ||
'' | ''or'' | ||
*''' | *'''Marine #1''': "Did we get everyone out, sir?" | ||
''or'' | |||
*''' | *'''Marine #1''': "'You think the [[Jiralhanae|Brutes]] know where we are?" | ||
''On the other side of the underground vehicle maintenance bay, a Marine Sergeant shows up at the other side of the elevator wreckage and begins to handle the situation. He runs up to the gate, coughs loudly, and fires a [[BR55HB SR|battle rifle]] burst at a security camera to perhaps prevent any remaining Covenant forces from finding the squad of Marines.'' | |||
'' | *'''Gunnery Sergeant Reynolds''': ''(coughs)'' "Settle down, Marines! Somebody hit the emergency power." | ||
*'''Marine | *'''Marine #2''': "On it, Sergeant." | ||
''The Marine heads to the generator room and activates the emergency power.'' | |||
*'''Marine''': " | *'''Marine #1''': "Any word from Charlie-Two? We got separated." | ||
*'''Marine''': " | *'''Marine #3''': "Nah, man. Alpha-Six, they're all gone too." | ||
*'''Marine''': " | *'''Marine Corpsman''': "The swelling, could be a fracture. You think you can stand?" | ||
*'''Marine | *''' Wounded Marine #1''': "I don't know, doc." | ||
'' | *'''Gunnery Sergeant Reynolds''': "If you can walk, set your boots on the line." | ||
''The Master Chief and any Marines fit for duty form up on the other side of the maintenance bay, with an [[M12 Chaingun Warthog]] and an [[M831 Troop Transport Warthog]] (or two M12 Warthog LRVs on co-op) parked and functional. The Marine Corpsman remains with the wounded Marines. The lights above the two Warthog turn on.'' | |||
*'''Marine | *'''Marine #1/#3''': "What's our situation, Sergeant?" | ||
*''' | *'''Reynolds''': "Not sure; can't reach the Commander. Too far underground." | ||
---- | |||
''If the Master Chief jumps in either Warthog:'' | |||
'' | *'''Reynolds''': "Chief's got the right idea.” | ||
---- | |||
*'''Reynolds''': “Let's mount up, get the hell outta these caves." | |||
*''' | *'''Marines''': "Yes, sir!" | ||
''The | ''The Marines get in the Warthogs.'' | ||
*'''Marine''': "I'll get the door sir." | *'''Marine #1''': "I'll get the door, sir." | ||
''The Marine opens the door (or the Chief can too), and the Warthogs proceed down the tunnel.'' | ''The Marine opens the door (or the Chief can too), and the Warthogs proceed down the tunnel.'' | ||
*''' | *'''Reynolds''': "Second Squad? We're coming through!" | ||
''At the gate leading out of the caves, two Marines from Second Squad are pinned down at a checkpoint by a small group of Kig-Yar and Unggoy. The Warthogs take out the Covenant forces, and head out. Another group of Kig-Yar spot the Warthogs and retreat into the hill away from the base entrance.'' | |||
*'''Reynolds''': "Don't leave any of 'em standing!" | |||
''or'' | |||
*'''Reynolds''': "Conserve ammo. Run 'em over!" | |||
''or'' | |||
*'''Marine #1''': "Look at the little bastards run!" | |||
''or'' | |||
'' | *'''Marine #1''': "Surprise, crap-face!" | ||
''After taking out the fleeing [[lance]] they observe the massive wreckage from the [[New Mombasa Orbital Elevator]], along with a crashed [[Ru'swum-pattern Phantom|Phantom]].'' | |||
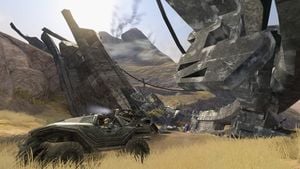
[[File:H3 TsavoDebris.jpg|300px|thumb|A Warthog amidst the wreckage of the destroyed tether.]] | |||
---- | |||
''If the Chief approaches the cliff and sees a long line of the elevator's wreckage.'' | |||
*'''Marine''': | *'''Marine #4 (COM)''': "The Mombasa Space Elevator." | ||
'' | *'''Marine #3 (COM)''': "It collapsed when [[New Mombasa|the city]] got glassed." | ||
*''' | *'''Marine #4 (COM)''': "But the tether was ''thousands'' of kilometers high!" | ||
*'''Marine (COM)''': " | *'''Marine #3 (COM)''': "Yeah? Well, ''now'' it's scattered all over the Savannah." | ||
*''' | *'''Marine #4 (COM)''': ''(astonished whisper)'' "Holy crap..." | ||
---- | |||
''The Chief listens to a radio transmission from the wreckage of a crashed Phantom'' | |||
*''' | *'''Unknown Jiralhanae Commander (COM)''': "[[Brute Chieftain|Chieftains]]! Rally your packs!" | ||
*''' | *'''Unknown Jiralhanae Commander (COM)''': "Kill all survivors, let none near the crater!" | ||
*'''Unknown Jiralhanae Commander (COM)''': "[[Prophet of Truth|The Prophet]] will soon complete his blessed task!" | |||
''The Warthogs continue on.'' | ''The Warthogs continue on.'' | ||
*''' | *'''Reynolds (COMS)''': "Chief, still can't get the Commander. COMs are a mess, [[Pelican]]s are scattered. Best thing now, get some distance between us and the base. Brutes are gonna be looking for survivors." | ||
''The Warthogs reach another crashed Phantom and kill the Covenant troops around it.'' | |||
''The | *'''Unknown Jiralhanae Commander (COM)''': "I see it, pack brothers! [[Portal at Voi|The Holy Relic]]! [[Humans|What fools]], to live so long on hallow ground! Never knowing what lay beneath the surface." | ||
''The Warthogs keep pressing on, reaching a Covenant-held dam. A Phantom hovers overhead while many Covenant troops (including [[Rizsheda-pattern Shade|Shade turret]]s and [[Kig-Yar Sniper]]s on higher difficulties) fire on the UNSC force. The Phantom leaves and it doesn't take long before the Warthogs overpower the Covenant at the dam.'' | |||
---- | |||
''If the Chief stalls:'' | |||
*'''Marine''': " | *'''Marine #1''': "Up and around that dam, sir." | ||
---- | |||
''The Chief navigates around the dam.'' | |||
''If the Chief | *'''Gunnery Sergeant [[Stacker]] (COM)''': "I repeat: My convoy's been hit. I've got wounded-''(static)''. We're on the Tsavo Highway about-''(static)''-east of Voi. Someone, anyone, please, respond! ''(Static and cut-off)''." | ||
---- | |||
''If the Chief stalls:'' | |||
*'''Marine | *'''Marine #3''': "Tsavo Highway is just ahead, Chief." | ||
---- | |||
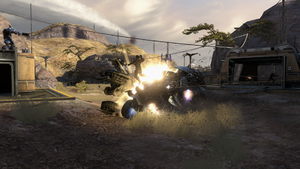
[[File:H3 ChopperRam.png|thumb|300px|A Chopper rams into a Warthog from Stacker's convoy, killing the Marines onboard.]] | |||
''The Warthogs arrive at the Highway, encountering Jiralhanae [[Barukaza Workshop Chopper|Choppers]] and hostile infantry. One Chopper rams and destroys a fully manned attacking Warthog. Another Chopper soon follows. On higher difficulties, a [[Jiralhanae War Chieftain]] armed with a [[Pez'tk-pattern fuel rod gun|fuel rod gun]] leads the Covenant troops.'' | |||
---- | |||
''If the player dismounts the vehicle and goes into the small checkpoint where Stacker is located:'' | |||
'' | *'''Stacker''': "We were en route to Voi, Chief. [[Banshees]] jumped us, started strafing... pretty much ruined our day." | ||
'' | '''Note''': ''If Stacker was the Sergeant the player started the level with, Reynolds will be present instead but may or may not say the above dialogue. '' | ||
---- | |||
''After a pitched battle involving many Unggoy, Jiralhanae and Shade turrets, the UNSC force are victorious. The Warthogs journey forward toward the tunnels, but are blocked off by an [[Anti-Vehicle Barrier]]. A swarm of [[Yanme'e]] fly out of the tunnel, but they are easily cut down by the Warthogs.'' | |||
'' | *'''Stacker''': "Marines in Voi really needed my supplies, Chief. But I'm sure they'll be plenty happy to see you. Head on through the tunnel and give those boys a hand." | ||
---- | |||
''If the Chief waits for a while at the barrier:'' | |||
*''' | *'''Stacker (COM)''': "Take down that barrier, Chief. Power supply should be inside the tunnel." | ||
'' | ''or'' | ||
*''' | *'''Stacker (COM)''': "Chief, the barrier only works against vehicles. You should be able to walk right through." | ||
---- | |||
''The Chief walks through the shield, and destroys its power source.'' | |||
*''' | *'''[[Prophet of Truth]] (Hologram)''': "The gods will not begrudge our excavation. By uncovering this relic, we pay homage to their glory. When the dust settles, we will all see what I already know: here lies the Path, the start of our [[Great Journey]]." | ||
'' | ''The Warthogs continue along the Tsavo Highway through the tunnel. When they get out and reach a bridge, a {{Pattern|Ket|battlecruiser}} soars ahead.'' | ||
*'''[[ONI Recon 111]] (COM)''': "Commander. This is ONI Recon | *'''[[ONI Recon 111]] (COM)''': "Commander. This is ONI Recon One-Eleven. The cruisers above-''(static)''. They found-''(static)''" | ||
*''' | *'''Commander Keyes (COM)''': "Say again, Recon? You're breaking up." | ||
*'''ONI Recon 111 (COM)''': "There's something in the crater, Ma'am. Something beneath the storm." | *'''ONI Recon 111 (COM)''': "There's something in the crater, Ma'am. Something beneath the storm." | ||
''The Warthogs reach a gap in the bridge and cannot continue. The Master Chief clambers across broken beams and bars and continues on foot. The | ''The Warthogs reach a gap in the bridge and cannot continue. The Master Chief clambers across broken beams and bars and continues on foot. The Marines follow. A massive Forerunner artifact lies under the middle of the crater, and the [[Anodyne Spirit|Forerunner Dreadnought]] sits in the middle of it. Covenant ships are circling the crater. Banshees fly past the highway, but pay no attention to the UNSC forces.'' | ||
===The Broken Path=== | ===The Broken Path=== | ||
'''''Wraiths and Choppers'''' | '''''Wraiths and Choppers.''''' | ||
*'''Commander Keyes (COM)''': "Master Chief? Finally, a good connection. Truth has excavated a Forerunner artifact; we have to assume it's The Ark." | |||
*'''[[Sergeant Major|Sergeant]] [[Avery Johnson|Johnson]] (COM)''': "Keep pushing to the town of Voi, Chief. Resupply birds will meet you in the next valley." | |||
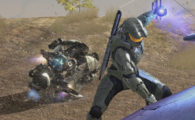
[[File:Tsavo Highway.jpg|thumb|300px|John-117 engaging a Brute pack on foot.]] | |||
''A pair of Marines are under attack by a Jiralhanae and his Unggoy subordinates near a pile of crates. The Chief rescues them and they join him to assault a large group of Covenant that are attacking an outpost at the top of a rise. The Chief and the Marines eventually clear the sector.'' | |||
*'''Marine #5''': "We've got reinforcements, Marines!" | |||
*''' | *'''Marine #6''': "Woohoo! Yeah!" | ||
*''' | *'''Marine #7''': "Booyeah!" | ||
'' | *'''Marine #8''': "Ohhhh-yee-HAH!!" | ||
''A Phantom approaches with reinforcements.'' | |||
*'''Marine''': " | *'''Marine #5''': "Sir, Recon spotted Covenant armor ahead. Pelicans are inbound with heavy weapons; we need to hold out until they arrive." | ||
---- | |||
''If the Chief heads off on foot before the Pelicans arrive:'' | |||
'' | *'''Johnson (COM):''' "You've got hostiles armor ahead, Chief. I rounded up a few resupply birds. Advise you to maintain your position until they arrive." | ||
---- | |||
''The Master Chief | ''The Phantom disgorges a large [[pack]] of Jiralhanae. The pack is soon wiped out by the Master Chief and his allies. A second Phantom swoops in and deploys additional enemy troops, including a [[Jiralhanae War Chieftain]] wielding a fuel rod gun.'' | ||
''After the enemy infantry are defeated, a [[Zurdo-pattern Wraith|Wraith]] appears.'' | |||
'' | *'''Marine #1''': "Wraith! Get to cover!" | ||
''The Chief neutralizes the Wraith.'' | |||
*'''Johnson (COM)''': " | *'''Johnson (COM)''': "Watch it now, Pelicans coming in!" | ||
'' | ''or'' | ||
'' | *'''Marine #5''': "Pelicans coming in." | ||
*''' | *'''Johnson (COM)''': "Brutes have plenty of armor between here and Voi, Chief, but this Warthog should help you punch on through." | ||
''Pelicans arrive and drops off Warthogs, along with some additional Marines. The Master Chief has a choice of taking one of the Warthogs the Pelicans drop off, or the Wraith that previously attacked if not destroyed. The tunnel onward on the Tsavo Highway is closed off, so the Chief goes up the trail where the Wraith came from, and finds a short tunnel leading back to Tsavo Highway. The entrance is guarded by several Jiralhanae Choppers, [[Covenant watchtower]]s, and a pair of Shade turrets (on higher difficulties). The Chief and the Marines clear out the blockade and head through the tunnel.'' | |||
'' | ''If the Chief stalls:'' | ||
*''' | *'''Marine''': "We're getting close to Voi. Keep going!" | ||
*''' | ''The Chief exits the tunnel and comes across a pair of parked Choppers. He eliminates the dismounted drivers before they can get to their vehicles. Two Marines emerge from hiding and greet the Chief.'' | ||
*'''Marine #2''': "Wraith, Master Chief, circling that hill! Brute Choppers too, so stay sharp!" | |||
'' | ''Or'' | ||
*''' | *'''Marine #3''': "Wraith, Master Chief, circling that hill! Brute Choppers too, so watch your back!" | ||
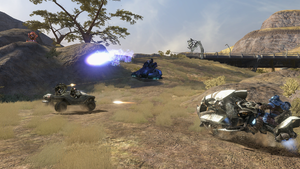
''The | [[File:H3 TsavoBattle.png|thumb|300px|John-117 and his Warthog push through the Covenant blockade at the highway.]] | ||
''Nearly a dozen more Choppers, a few Wraiths and Shade Turrets defend the route back onto the highway. The Chief pushes on, supported by a steady supply of Warthogs. Despite being greatly outnumbered and outgunned, the Chief and the Marines eventually clear the zone. | |||
---- | |||
''If the Chief approaches the cliffside overlooking the massive storm over the vast crater beyond the cliff and there are Marines accompanying the Chief:'' | |||
*'''Chips Dubbo (COM)''': "Look at the size of that thing! Wonder how old it is?" | |||
''' | *'''Marine #8 (COM)''': "Don't know. But I do know that ain't a normal storm." | ||
'' | ''If there are no Marines are accompanying the Chief:'' | ||
*''' | *'''ONI Recon 111 (COM)''': "Commander, I can see most of it now. Readings are all over the EM spectrum." | ||
*''' | *'''Commander Keyes (COM)''': "Roger that, Recon. Shut off your gear, fall back. I'll monitor from [[Kilo 023|Kilo 23]]." | ||
---- | |||
''The Chief continues along the Highway. A large pack of Brutes bar his way.'' | |||
*''' | *'''Johnson (COM)''': "Chief, the gate to Voi is dead ahead. Smash the Brute blockade, open her up!" | ||
''A large number of Jiralhanae wait behind Covenant [[roadblock]]s in anticipation of the approaching UNSC force.'' | |||
''The | *'''Jiralhanae''': "The Demon must not pass!" | ||
*'''[[Prophet of Truth]] (Hologram)''': "My Dreadnought, the vessel that has so long been the focus of our worship, now rests on its true pedestal. Even now, its engines spark greater ones below, relics long without power, yet ready to fulfill their divine purpose. Stand fast! Keep our enemies at bay! Soon, my brothers, we will ''all'' have our reward!" | |||
''The Master Chief and any remaining Marines are forced to abandon their vehicles. They press forward, encountering heavy resistance from the Jiralhanae. Upon entering the next section the team comes under attack from a Shade turret as well as several [[Jiralhanae Jumper]]s. Wiping this force of Covenant out, the Chief attacks the last group of Jiralhanae led by a [[Jiralhanae War Chieftain|War Chieftain]]. He eventually clears the area. The only thing left standing between the [[UNSC]] and Voi is another Anti-Vehicle Barrier in the tunnel.'' | |||
---- | |||
''If the Chief waits for a while at the barrier:'' | |||
*'''Stacker (COM)''': "Take down that barrier, Chief." | |||
---- | |||
''The Chief destroys the power source with ease.'' | |||
[http://www.youtube.com/watch?v=WOxbBvEmaGs '''{''Cutscene''}'''] | |||
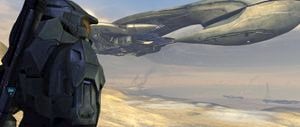
[[File:H3-AssaultCarrier-MasterChief-crop.jpg|thumb|300px|John-117 observes an assault carrier near the Portal.]] | |||
''The Master Chief (and the Arbiter on co-op) leave the tunnel entrance. Two Pelicans, one of which is Kilo 23, arrives to drop off an M12 Warthog LRV and Marines. Commander Keyes, piloting Kilo 023, has Lord Hood on one of the video screens inside the cockpit. The Chief heads towards the cliffside.'' | |||
*'''Commander Keyes''': "[[Lord Hood]]? We made it." | |||
*'''Lord Hood (Video COM)''': "Music to my ears, Commander. What about the Ark?" | |||
*'''Commander Keyes''': "Fully uncovered, sir." | |||
*'''Lord Hood (Video COM)''': "Then we don't have much time." | |||
''Chief observes a {{Class|CAS|assault carrier}} from the cliff.'' | |||
*'''Lord Hood (Video COM)''': "Marines? The [[Prophet of Truth]] doesn't know it yet, but he's about to get kicked right off his throne. We will take our city back. And drive our enemy into the grave they've been so happily digging. One final effort is all that remains." | |||
''The Pelicans fly off. The Master Chief draws his [[MA5C]] and walks to one of the Warthogs to retake Voi from the Covenant.'' | |||
''Fade to black.'' | |||
''Level ends.'' | |||
==Achievements== | |||
The following [[achievement]]s can be unlocked on this mission on the [[Xbox 360]] edition of ''Halo 3''. | |||
{|class="wikitable" | |||
|-align="center" | |||
!Icon | |||
!Name | |||
!Description | |||
!{{Gamerscore|Gamerscore}} | |||
|-align="center" | |||
|[[File:H3 Achievement The Road.png]] | |||
|[[The Road]] | |||
|Finish the third mission of the [[Campaign]] on [[Normal]], [[Heroic]], or [[Legendary]]. | |||
|{{Gamerscore|20}} | |||
|-align="center" | |||
|[[File:H3 Achievement Tough Luck.png]] | |||
|[[Tough Luck (Achievement)|Tough Luck]] | |||
|Find and claim this skull. | |||
|{{Gamerscore|10}} | |||
|} | |||
==Trivia== | ==Trivia== | ||
* | ===Glitches=== | ||
{{Main|Glitches}} | |||
*In the beginning of level, if the player goes to where the Marine is turning on the power, there is a switch. When approached, [http://www.youtube.com/watch?v=0xdvi8SgcPk the switch will move down]. However, when the player moves away, it will go back up. The switch does not appear to do anything. | |||
*On the stretch of road with the Pipe running adjacent to it, if you are in a Warthog and you stop at a certain place so that a metal, curled post is above you, your Warthog will turn black. | |||
*If you look at where the {{Pattern|Ket|battlecruiser}} appears from the cliff after the Drone ambush, a glitch will happen where you will see the side of the cruiser before the ship actually appears. | |||
*Sometimes, Sergeant Stacker's character model will appear instead of Sergeant Reynolds, however all scripted dialogue will remain unchanged. Oddly, even after both Sergeants are together, Reynold's voice will still come from Stacker's model, and vice-versa. However. if Stacker was killed before the players sees Stacker himself, the actual Stacker will have Stacker's character model. | |||
*It is possible to jump the gap in the bridge with a vehicle if you have a [[Gravity Lift]] handy. However, if said vehicle is a Warthog, marines will not mount it, most likely because they were programmed to leaving it once they reached the gap. This can also be done by knocking down a barrier and pushing it around with a Warthog until it turns into a makeshift ramp, although this is slightly time consuming. An easier way to cross the gap is by bringing your Chopper as far forward as you can without falling off and then boosting. | |||
* | *Where you meet Sergeant Stacker, it is possible to find a Brute with a [[Type-50 particle beam rifle]] that will not attack you. He can be found on the Deployable Lookout Tower near the cliff. If an enemy gets too close to him however, he will start attacking you. | ||
*If you look at where the | |||
*Sometimes, Sergeant Stacker's character model will appear instead of Sergeant Reynolds, however all scripted dialogue will remain unchanged. Oddly, even after both | |||
* | |||
* | |||
* | ===Mistakes=== | ||
*At the beginning of the level, if you look at the medic treating the injured marine, he will occasionally move his hand as if clicking on a data pad. However, there is no data pad in his hand to click on. | |||
*At the end of the level, regardless of whether or not you had the destroyed the deployable lookout tower, it will appear as though it was never touched. | |||
*In this level it is stated that the space elevator collapsed when the city was glassed, but actually it fell a day before. It could, however, be possible that the marines didn't know that and had just assumed it fell when New Mombasa was glassed. | |||
*Occasionally, if you have Sergeant Reynolds climb into your Warthog at the beginning of the level, he will appear to be holding no weapons. | |||
== | ===Easter eggs=== | ||
{{Main|Easter eggs}} | |||
*The [[Halo 3 skulls#Tough Luck|Tough Luck Skull]] is found on this level. | |||
*The two cave doors in the beginning of the level are both door number [[Seven|7]]. | |||
*The ''Marathon'' logo is visible on the hangar doors of the Covenant ''Ket''-pattern cruiser that passes overhead. | |||
*In the [[Campaign]] lobby, Mission Start is labeled as "Warning: Hitchhikers may have jet packs". However, no [[Jump Pack Brute]]s appear before Rally Point Alpha. This is also a reference to the last chapter name in the ''Halo: Combat Evolved'' level ''[[The Maw]]'': "Warning: Hitchhikers May Be Escaping Convicts." | |||
*[[Admiral Hood]] says at the end of the level that, "one final effort is all that remains." The [[Prophet of Truth]] says this on the speakers in the ''[[Halo 2]]'' level ''[[High Charity (Level)|High Charity]]''. This is also the name of a song in the [[Halo 3 Original Soundtrack]]. | |||
===Miscellaneous=== | |||
*If you start this level on Rally Point Alpha, you will hear the Halo level soundtrack, "Full Circle". | |||
*It is possible to find more Sniper Rifle ammo in the area after the destroyed bridge where you are forced to dismount. Climb the hill to the left of the area to get to the top of the structure and there is a dead Marine with a Sniper Rifle. | |||
*Certain weapons from the previous level, such as the Fuel Rod Gun or the Gravity Hammer, will not carry over to this level. The loadout will reset to its standard loadout, the Assault Rifle and the Battle Rifle. If the player manages to bring the Plasma Rifle from the previous level, however, the loadout will carry over. | |||
*It is possible to carry over into the beginning of the next level ''[[The Storm]]'' whatever weapons and ammo you retain from the end of this level (e.g. Sniper Rifle and Battle Rifle). Weapons can also be carried over from the previous level, though exactly the same weapon cannot be carried over to ''The Storm''. The player can still carry them over if it is a different weapon. | |||
*This level along with ''[[The Covenant]]'' and ''[[The Storm]]'', are the only three levels in ''Halo 3'' where you can drive a [[Transport Warthog]]. | |||
*Tsavo is a region of Kenya close to where the Tsavo and Athi rivers meet and was the place where the Uganda Railway passed over the Tsavo river. The bridge will not be encountered as it is on the other side of Voi. | |||
*It is the first ''Halo 3'' campaign mission to feature usable vehicles.<ref name="IGN 8/16/07">[http://xbox360.ign.com/articles/813/813454p1.html IGN]</ref> | |||
*Scattered across the savannah are the remains of the [[New Mombasa Orbital Elevator]]. It collapsed after the slipspace rift created by the Prophet of Regret's ship weakened the support structure, and not by the Covenant glassing the city. | |||
*There is a weapons cache on top of the tunnel in the first area where the [[D77H-TCI Pelican Dropship|Pelican]] drops off two [[Warthog]]s, but if you enter it, the [[Zurdo-pattern Wraith|Wraith]] will bombard you from a distance. | |||
*Near the end of the level, you can see the eastern edge of [[Voi]] on the opposite side of the crater. | |||
*This is the only level where Thel 'Vadam is never seen in single player Campaign mode. This is probably because he, in Bungie canon, had been evacuated from Crow's Nest via Landing Pad Bravo when the Brutes disarmed the bomb. | |||
*This is the first level you can encounter {{Pattern|Zurdo|Wraith}}s and [[Barukaza Workshop Chopper|Brute Choppers]]. | |||
*At Bungie's ''Halo 3'' preview event in Seattle, Washington (Close to where Bungie Studios is actually located on the map) Tsavo Highway was first shown to the groups that attended the event's meeting. | |||
*In the [[Halo 3 Epsilon]], no static effects were added to dialogue. It was possible to hear the complete transmissions from Stacker and ONI Recon one-eleven respectively: "We're on the Tsavo Highway, about five klicks east of Voi." and "The cruisers above the crater. They found something." | |||
*This is the only level in ''Halo 3'' where [[John-117]] has no dialogue in the cutscenes related to the level. | |||
*This level along with ''[[The Ark (level)|The Ark]]'' and ''[[Halo (Halo 3 Level)|Halo]]'' are one of the only levels to not feature any Cortana moments. However, ''Halo'' does feature a [[Gravemind]] moment instead. | |||
*After taking down the first shield generator and moving through the tunnel, there is a marine outpost with a single dead marine with a Battle Rifle. There is a fully charged [[Okarda'phaa-pattern plasma rifle|Plasma Rifle]] outside that is the only one unaffected by the Famine Skull. | |||
*This, and the level ''The Covenant'' are the only levels to have Beam Rifles by default on any difficulty. | |||
*The second chapter of the ''Halo 2'' soundtrack, Epilogue, has the name "Road to Voi", this level could be reference to the chapter, or the chapter is a hint to gamers that ''Halo 3'' will have contents that will do with the town of Voi. | |||
*''Tsavo Highway'' was originally a longer mission, large sections were removed due to production limits. | |||
*This level is fairly similar in concept to ''Halo 3: ODST's'' ''[[Uplift Reserve]]''. | |||
==Gallery== | |||
===Concept art=== | |||
<gallery> | |||
File:H3 FallenTether Concept 1.jpg|Concept art of a Warthog in the tether's remains. | |||
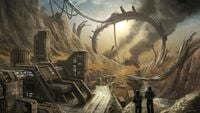
File:H3 FallenTether Concept 2.jpg|Concept art of the tether's remains in the savannah. | |||
File:H3 TsavoConcept3.jpg|More concept of the remains in the savannah. | |||
File:H3 FallenTether Concept 3.jpg|Concept art of a Pelican in the tether's remains. | |||
File:H3 FallenTether Concept 4.jpg|Concept art of a Pelican taking off from the tether's remains. | |||
File:H3 - Manual interior.jpg|Concept art of John-117 in the tether's remains. | |||
File:H3 TsavoConcept1.jpg|Concept art of a human facility amidst the tether's remains. | |||
File:H3 TsavoConcept2.jpg|Concept art of another human structure amidst the remains. | |||
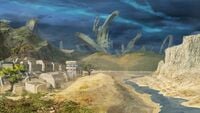
File:H3 TsavoConcept4.jpg|Concept art of the remains as seen from a town. | |||
File:H3 TsavoConcept5.jpg|Concept art of the remains looming in the distance. | |||
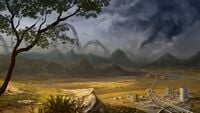
File:H3 TsavoConcept6.jpg|Concept art of the remains behind a town along the highway. | |||
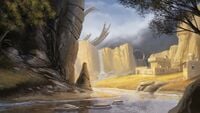
File:H3 TsavoConcept7.jpg|Concept art of the entrance of [[Crow's Nest (location)|Crow's Nest]] at the start of the mission. | |||
File:H3 Concept TsavoStart.jpg|Concept art of the area outside the entrance. | |||
File:H3 Concept TetherRemains.jpg|Concept art of John-117 amidst the tether's remains. | |||
File:H3 TsavoConcept8.jpg|The previous concept art recolored. | |||
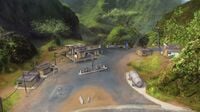
File:H3 Concept RestStop.jpg|Concept art of the rest stop before the highway. | |||
File:H3 HighwayConcept1.jpg|Concept art of the first tunnel on the highway. | |||
File:H3 Concept HighwayBuilding.jpg|Concept art of the municipal building adjacent the tunnel. | |||
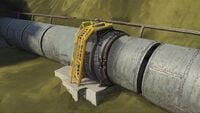
File:H3 Concept HighwayPipe.jpg|Concept art of the pipe that runs alongside the highway. | |||
File:H3 Voi Highway Concept.jpg|Concept sketch of the highway. | |||
File:H3 HighwayConcept2.jpg|Concept art of the broken highway. | |||
File:H3 PumpHouseConcept.jpg|Concept art of [[Voi Municipal Water Pump House 03]]. | |||
File:H3 HighwayConcept3.jpg|Concept art of the construction zone on the highway. | |||
File:H3 Concept TsavoConstructionSite.jpg|More concept art of the construction zone. | |||
File:H3 Concept HighwayTurn.jpg|Concept art of the broken turn in the highway. | |||
File:H3 Concept TractorTrailer.jpg|Concept art of a [[tractor unit]] on the highway. | |||
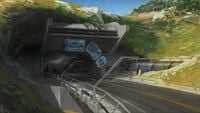
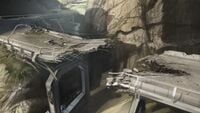
File:H3 HighwayConcept4.jpg|Concept art of the highway tunnel at the end of the mission. | |||
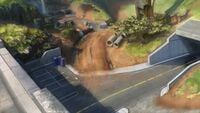
File:H3 Concept FinalTsavoTunnel.jpg|Concept art of the final tunnel and its surroundings. | |||
</gallery> | |||
== | ===Design Documentation=== | ||
<gallery> | <gallery> | ||
File:H3_OutskirtsPaperSketch.jpeg|Early paper sketch titled "(Voi) Outskirts". | |||
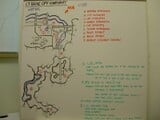
File:H3_DriveOffCovenantWhiteboard.jpeg|Whiteboard mission design titled "1.3 Drive Off Covenant". At this point Tsavo Highway and The Storm seemed to have been the same level. | |||
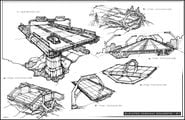
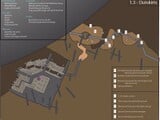
File:H3_OutskirtsDesignDoc.jpeg|Digital design document titled "1.3 - Outskirts". | |||
</gallery> | </gallery> | ||
===Storyboards=== | |||
<gallery> | |||
File:H3 TsavoHighway Storyboard Outro 1.jpg | |||
File:H3 TsavoHighway Storyboard Outro 2.jpg | |||
File:H3 TsavoHighway Storyboard Outro 3.jpg | |||
</gallery> | |||
===Screenshots=== | |||
<gallery> | |||
== | File:H3 Menu 04 Tsavo Highway.png|Preview of the level in ''Halo 3'' menu. | ||
File:H3 Tsavo Skirmish.jpg|Marines fire their weapons at Covenant troops upon leaving the cavern. | |||
'' | File:H3 TsavoTether.png|John-117 observes the wreckage of the New Mombasa Space Elevator. | ||
File:TTHOG.jpg|John-117 driving the Troop Transport Warthog through the space elevator tethers. | |||
File:H3 E3 Tsavo Highway Road.jpg|A Warthog charges into battle with Choppers and Wraiths. | |||
File:H3 ChiefTsavo.PNG|John-117 boards a Wraith at Tsavo Highway. | |||
</gallery> | |||
==Sources== | |||
{{Ref/Sources}} | |||
[[ | {{succession box | before = ''[[Crow's Nest (Level)|Crow's Nest]]'' <br />| title = ''Halo 3'' Campaign Missions | years = '''''Tsavo Highway''''' |after = ''[[The Storm (Level)|The Storm]]''}} | ||
[[ | {{Levels|H3}} | ||
[[Category:Halo 3 campaign]] | |||
Latest revision as of 11:03, November 23, 2024
|
Prev: |
|
|
Next: |
|
| Tsavo Highway | |
|---|---|
| |
|
Game: |
|
|
File name (?): |
|
|
Player: |
|
|
Date: |
|
|
Location: |
|
|
Objective(s): |
|
|
Par Time: |
00:20:00 (Master Chief Collection) |
|
Par Score: |
21,000 (Master Chief Collection) |
 |
Halopedia has a walkthrough guide for this level; see Tsavo Highway/Walkthrough. |
| “ | Mount up, Get to Voi. | ” |
Tsavo Highway[3] is the fourth campaign mission of Halo 3.
Upon completing it on Normal, Heroic, or Legendary the player will unlock The Road achievement, worth 20 Gamerscore. If a player gets more than 15,000 points in the meta-game he or she will unlock the Cavalier achievement, worth 10 Gamerscore. The Tough Luck Skull can be found on this level, unlocking the achievement of the same name. It is worth 10 Gamerscore. By finishing this level on Normal you get the EVA chest. By finishing this level on Heroic the player will receive the Flight chest plate. By finishing this level on Legendary the player will receive the EOD chest plate.
Summary[edit]
After successfully evacuating the upper area of the Crow's Nest base, SPARTAN-117 finds himself in an underground garage containing multiple Warthogs and leads a group of Marines out of an underground tunnel. He then leads the surviving marines towards the town of Voi. A Pelican drops a pair of Troop warthogs and one regular M12 (with M41 LAAG). After fighting his way down the highway, through many Covenant troops, SPARTAN-117 breaches the barrier blocking the path leading to Voi and the ancient Forerunner artifact, buried beneath the Earth's surface.
Transcript[edit]
{Gameplay}
Full Contact Safari[edit]
Warning: Hitchhikers may have Jet Packs.
The Master Chief starts to wake up.
- Gunnery Sergeant Reynolds: "What happened?"
Note that sometimes Stacker will appear in the place of Reynolds but will still say the dialogue.
The Master Chief comes to in the wreckage of the elevator, with wounded Marines being treated and other Marines trying to regroup. The elevator shaft above is engulfed in flames.
- Commander Miranda Keyes (COM) (Signal with much static): "Chief, please respond. What's your status, over? If you can hear me, find transport. Head for the town of Voi."
- Wounded Marine #1: "Ah! I've got a broken rib."
- Marine Corpsman (Chips Dubbo): "Hey. You wanna bleed out?"
- Wounded Marine #1: "No..."
- Marine Corpsman: "Then I've gotta keep pressure on the wound."
- Wounded Marine #2: (coughs) "I think I broke something!"
A squad of Marines are standing directly outside the elevator.
- Marine #1: "Another bombing run?"
or
- Marine #1: "Did we get everyone out, sir?"
or
- Marine #1: "'You think the Brutes know where we are?"
On the other side of the underground vehicle maintenance bay, a Marine Sergeant shows up at the other side of the elevator wreckage and begins to handle the situation. He runs up to the gate, coughs loudly, and fires a battle rifle burst at a security camera to perhaps prevent any remaining Covenant forces from finding the squad of Marines.
- Gunnery Sergeant Reynolds: (coughs) "Settle down, Marines! Somebody hit the emergency power."
- Marine #2: "On it, Sergeant."
The Marine heads to the generator room and activates the emergency power.
- Marine #1: "Any word from Charlie-Two? We got separated."
- Marine #3: "Nah, man. Alpha-Six, they're all gone too."
- Marine Corpsman: "The swelling, could be a fracture. You think you can stand?"
- Wounded Marine #1: "I don't know, doc."
- Gunnery Sergeant Reynolds: "If you can walk, set your boots on the line."
The Master Chief and any Marines fit for duty form up on the other side of the maintenance bay, with an M12 Chaingun Warthog and an M831 Troop Transport Warthog (or two M12 Warthog LRVs on co-op) parked and functional. The Marine Corpsman remains with the wounded Marines. The lights above the two Warthog turn on.
- Marine #1/#3: "What's our situation, Sergeant?"
- Reynolds: "Not sure; can't reach the Commander. Too far underground."
If the Master Chief jumps in either Warthog:
- Reynolds: "Chief's got the right idea.”
- Reynolds: “Let's mount up, get the hell outta these caves."
- Marines: "Yes, sir!"
The Marines get in the Warthogs.
- Marine #1: "I'll get the door, sir."
The Marine opens the door (or the Chief can too), and the Warthogs proceed down the tunnel.
- Reynolds: "Second Squad? We're coming through!"
At the gate leading out of the caves, two Marines from Second Squad are pinned down at a checkpoint by a small group of Kig-Yar and Unggoy. The Warthogs take out the Covenant forces, and head out. Another group of Kig-Yar spot the Warthogs and retreat into the hill away from the base entrance.
- Reynolds: "Don't leave any of 'em standing!"
or
- Reynolds: "Conserve ammo. Run 'em over!"
or
- Marine #1: "Look at the little bastards run!"
or
- Marine #1: "Surprise, crap-face!"
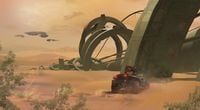
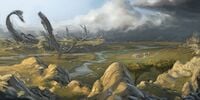
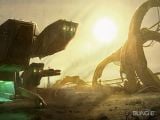
After taking out the fleeing lance they observe the massive wreckage from the New Mombasa Orbital Elevator, along with a crashed Phantom.
If the Chief approaches the cliff and sees a long line of the elevator's wreckage.
- Marine #4 (COM): "The Mombasa Space Elevator."
- Marine #3 (COM): "It collapsed when the city got glassed."
- Marine #4 (COM): "But the tether was thousands of kilometers high!"
- Marine #3 (COM): "Yeah? Well, now it's scattered all over the Savannah."
- Marine #4 (COM): (astonished whisper) "Holy crap..."
The Chief listens to a radio transmission from the wreckage of a crashed Phantom
- Unknown Jiralhanae Commander (COM): "Chieftains! Rally your packs!"
- Unknown Jiralhanae Commander (COM): "Kill all survivors, let none near the crater!"
- Unknown Jiralhanae Commander (COM): "The Prophet will soon complete his blessed task!"
The Warthogs continue on.
- Reynolds (COMS): "Chief, still can't get the Commander. COMs are a mess, Pelicans are scattered. Best thing now, get some distance between us and the base. Brutes are gonna be looking for survivors."
The Warthogs reach another crashed Phantom and kill the Covenant troops around it.
- Unknown Jiralhanae Commander (COM): "I see it, pack brothers! The Holy Relic! What fools, to live so long on hallow ground! Never knowing what lay beneath the surface."
The Warthogs keep pressing on, reaching a Covenant-held dam. A Phantom hovers overhead while many Covenant troops (including Shade turrets and Kig-Yar Snipers on higher difficulties) fire on the UNSC force. The Phantom leaves and it doesn't take long before the Warthogs overpower the Covenant at the dam.
If the Chief stalls:
- Marine #1: "Up and around that dam, sir."
The Chief navigates around the dam.
- Gunnery Sergeant Stacker (COM): "I repeat: My convoy's been hit. I've got wounded-(static). We're on the Tsavo Highway about-(static)-east of Voi. Someone, anyone, please, respond! (Static and cut-off)."
If the Chief stalls:
- Marine #3: "Tsavo Highway is just ahead, Chief."
The Warthogs arrive at the Highway, encountering Jiralhanae Choppers and hostile infantry. One Chopper rams and destroys a fully manned attacking Warthog. Another Chopper soon follows. On higher difficulties, a Jiralhanae War Chieftain armed with a fuel rod gun leads the Covenant troops.
If the player dismounts the vehicle and goes into the small checkpoint where Stacker is located:
- Stacker: "We were en route to Voi, Chief. Banshees jumped us, started strafing... pretty much ruined our day."
Note: If Stacker was the Sergeant the player started the level with, Reynolds will be present instead but may or may not say the above dialogue.
After a pitched battle involving many Unggoy, Jiralhanae and Shade turrets, the UNSC force are victorious. The Warthogs journey forward toward the tunnels, but are blocked off by an Anti-Vehicle Barrier. A swarm of Yanme'e fly out of the tunnel, but they are easily cut down by the Warthogs.
- Stacker: "Marines in Voi really needed my supplies, Chief. But I'm sure they'll be plenty happy to see you. Head on through the tunnel and give those boys a hand."
If the Chief waits for a while at the barrier:
- Stacker (COM): "Take down that barrier, Chief. Power supply should be inside the tunnel."
or
- Stacker (COM): "Chief, the barrier only works against vehicles. You should be able to walk right through."
The Chief walks through the shield, and destroys its power source.
- Prophet of Truth (Hologram): "The gods will not begrudge our excavation. By uncovering this relic, we pay homage to their glory. When the dust settles, we will all see what I already know: here lies the Path, the start of our Great Journey."
The Warthogs continue along the Tsavo Highway through the tunnel. When they get out and reach a bridge, a Ket-pattern battlecruiser soars ahead.
- ONI Recon 111 (COM): "Commander. This is ONI Recon One-Eleven. The cruisers above-(static). They found-(static)"
- Commander Keyes (COM): "Say again, Recon? You're breaking up."
- ONI Recon 111 (COM): "There's something in the crater, Ma'am. Something beneath the storm."
The Warthogs reach a gap in the bridge and cannot continue. The Master Chief clambers across broken beams and bars and continues on foot. The Marines follow. A massive Forerunner artifact lies under the middle of the crater, and the Forerunner Dreadnought sits in the middle of it. Covenant ships are circling the crater. Banshees fly past the highway, but pay no attention to the UNSC forces.
The Broken Path[edit]
Wraiths and Choppers.
- Commander Keyes (COM): "Master Chief? Finally, a good connection. Truth has excavated a Forerunner artifact; we have to assume it's The Ark."
- Sergeant Johnson (COM): "Keep pushing to the town of Voi, Chief. Resupply birds will meet you in the next valley."
A pair of Marines are under attack by a Jiralhanae and his Unggoy subordinates near a pile of crates. The Chief rescues them and they join him to assault a large group of Covenant that are attacking an outpost at the top of a rise. The Chief and the Marines eventually clear the sector.
- Marine #5: "We've got reinforcements, Marines!"
- Marine #6: "Woohoo! Yeah!"
- Marine #7: "Booyeah!"
- Marine #8: "Ohhhh-yee-HAH!!"
A Phantom approaches with reinforcements.
- Marine #5: "Sir, Recon spotted Covenant armor ahead. Pelicans are inbound with heavy weapons; we need to hold out until they arrive."
If the Chief heads off on foot before the Pelicans arrive:
- Johnson (COM): "You've got hostiles armor ahead, Chief. I rounded up a few resupply birds. Advise you to maintain your position until they arrive."
The Phantom disgorges a large pack of Jiralhanae. The pack is soon wiped out by the Master Chief and his allies. A second Phantom swoops in and deploys additional enemy troops, including a Jiralhanae War Chieftain wielding a fuel rod gun.
After the enemy infantry are defeated, a Wraith appears.
- Marine #1: "Wraith! Get to cover!"
The Chief neutralizes the Wraith.
- Johnson (COM): "Watch it now, Pelicans coming in!"
or
- Marine #5: "Pelicans coming in."
- Johnson (COM): "Brutes have plenty of armor between here and Voi, Chief, but this Warthog should help you punch on through."
Pelicans arrive and drops off Warthogs, along with some additional Marines. The Master Chief has a choice of taking one of the Warthogs the Pelicans drop off, or the Wraith that previously attacked if not destroyed. The tunnel onward on the Tsavo Highway is closed off, so the Chief goes up the trail where the Wraith came from, and finds a short tunnel leading back to Tsavo Highway. The entrance is guarded by several Jiralhanae Choppers, Covenant watchtowers, and a pair of Shade turrets (on higher difficulties). The Chief and the Marines clear out the blockade and head through the tunnel.
If the Chief stalls:
- Marine: "We're getting close to Voi. Keep going!"
The Chief exits the tunnel and comes across a pair of parked Choppers. He eliminates the dismounted drivers before they can get to their vehicles. Two Marines emerge from hiding and greet the Chief.
- Marine #2: "Wraith, Master Chief, circling that hill! Brute Choppers too, so stay sharp!"
Or
- Marine #3: "Wraith, Master Chief, circling that hill! Brute Choppers too, so watch your back!"
Nearly a dozen more Choppers, a few Wraiths and Shade Turrets defend the route back onto the highway. The Chief pushes on, supported by a steady supply of Warthogs. Despite being greatly outnumbered and outgunned, the Chief and the Marines eventually clear the zone.
If the Chief approaches the cliffside overlooking the massive storm over the vast crater beyond the cliff and there are Marines accompanying the Chief:
- Chips Dubbo (COM): "Look at the size of that thing! Wonder how old it is?"
- Marine #8 (COM): "Don't know. But I do know that ain't a normal storm."
If there are no Marines are accompanying the Chief:
- ONI Recon 111 (COM): "Commander, I can see most of it now. Readings are all over the EM spectrum."
- Commander Keyes (COM): "Roger that, Recon. Shut off your gear, fall back. I'll monitor from Kilo 23."
The Chief continues along the Highway. A large pack of Brutes bar his way.
- Johnson (COM): "Chief, the gate to Voi is dead ahead. Smash the Brute blockade, open her up!"
A large number of Jiralhanae wait behind Covenant roadblocks in anticipation of the approaching UNSC force.
- Jiralhanae: "The Demon must not pass!"
- Prophet of Truth (Hologram): "My Dreadnought, the vessel that has so long been the focus of our worship, now rests on its true pedestal. Even now, its engines spark greater ones below, relics long without power, yet ready to fulfill their divine purpose. Stand fast! Keep our enemies at bay! Soon, my brothers, we will all have our reward!"
The Master Chief and any remaining Marines are forced to abandon their vehicles. They press forward, encountering heavy resistance from the Jiralhanae. Upon entering the next section the team comes under attack from a Shade turret as well as several Jiralhanae Jumpers. Wiping this force of Covenant out, the Chief attacks the last group of Jiralhanae led by a War Chieftain. He eventually clears the area. The only thing left standing between the UNSC and Voi is another Anti-Vehicle Barrier in the tunnel.
If the Chief waits for a while at the barrier:
- Stacker (COM): "Take down that barrier, Chief."
The Chief destroys the power source with ease.
The Master Chief (and the Arbiter on co-op) leave the tunnel entrance. Two Pelicans, one of which is Kilo 23, arrives to drop off an M12 Warthog LRV and Marines. Commander Keyes, piloting Kilo 023, has Lord Hood on one of the video screens inside the cockpit. The Chief heads towards the cliffside.
- Commander Keyes: "Lord Hood? We made it."
- Lord Hood (Video COM): "Music to my ears, Commander. What about the Ark?"
- Commander Keyes: "Fully uncovered, sir."
- Lord Hood (Video COM): "Then we don't have much time."
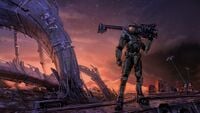
Chief observes a CAS-class assault carrier from the cliff.
- Lord Hood (Video COM): "Marines? The Prophet of Truth doesn't know it yet, but he's about to get kicked right off his throne. We will take our city back. And drive our enemy into the grave they've been so happily digging. One final effort is all that remains."
The Pelicans fly off. The Master Chief draws his MA5C and walks to one of the Warthogs to retake Voi from the Covenant.
Fade to black.
Level ends.
Achievements[edit]
The following achievements can be unlocked on this mission on the Xbox 360 edition of Halo 3.
| Icon | Name | Description | Gamerscore |
|---|---|---|---|

|
The Road | Finish the third mission of the Campaign on Normal, Heroic, or Legendary. | 20 |

|
Tough Luck | Find and claim this skull. | 10 |
Trivia[edit]
Glitches[edit]
- Main article: Glitches
- In the beginning of level, if the player goes to where the Marine is turning on the power, there is a switch. When approached, the switch will move down. However, when the player moves away, it will go back up. The switch does not appear to do anything.
- On the stretch of road with the Pipe running adjacent to it, if you are in a Warthog and you stop at a certain place so that a metal, curled post is above you, your Warthog will turn black.
- If you look at where the Ket-pattern battlecruiser appears from the cliff after the Drone ambush, a glitch will happen where you will see the side of the cruiser before the ship actually appears.
- Sometimes, Sergeant Stacker's character model will appear instead of Sergeant Reynolds, however all scripted dialogue will remain unchanged. Oddly, even after both Sergeants are together, Reynold's voice will still come from Stacker's model, and vice-versa. However. if Stacker was killed before the players sees Stacker himself, the actual Stacker will have Stacker's character model.
- It is possible to jump the gap in the bridge with a vehicle if you have a Gravity Lift handy. However, if said vehicle is a Warthog, marines will not mount it, most likely because they were programmed to leaving it once they reached the gap. This can also be done by knocking down a barrier and pushing it around with a Warthog until it turns into a makeshift ramp, although this is slightly time consuming. An easier way to cross the gap is by bringing your Chopper as far forward as you can without falling off and then boosting.
- Where you meet Sergeant Stacker, it is possible to find a Brute with a Type-50 particle beam rifle that will not attack you. He can be found on the Deployable Lookout Tower near the cliff. If an enemy gets too close to him however, he will start attacking you.
Mistakes[edit]
- At the beginning of the level, if you look at the medic treating the injured marine, he will occasionally move his hand as if clicking on a data pad. However, there is no data pad in his hand to click on.
- At the end of the level, regardless of whether or not you had the destroyed the deployable lookout tower, it will appear as though it was never touched.
- In this level it is stated that the space elevator collapsed when the city was glassed, but actually it fell a day before. It could, however, be possible that the marines didn't know that and had just assumed it fell when New Mombasa was glassed.
- Occasionally, if you have Sergeant Reynolds climb into your Warthog at the beginning of the level, he will appear to be holding no weapons.
Easter eggs[edit]
- Main article: Easter eggs
- The Tough Luck Skull is found on this level.
- The two cave doors in the beginning of the level are both door number 7.
- The Marathon logo is visible on the hangar doors of the Covenant Ket-pattern cruiser that passes overhead.
- In the Campaign lobby, Mission Start is labeled as "Warning: Hitchhikers may have jet packs". However, no Jump Pack Brutes appear before Rally Point Alpha. This is also a reference to the last chapter name in the Halo: Combat Evolved level The Maw: "Warning: Hitchhikers May Be Escaping Convicts."
- Admiral Hood says at the end of the level that, "one final effort is all that remains." The Prophet of Truth says this on the speakers in the Halo 2 level High Charity. This is also the name of a song in the Halo 3 Original Soundtrack.
Miscellaneous[edit]
- If you start this level on Rally Point Alpha, you will hear the Halo level soundtrack, "Full Circle".
- It is possible to find more Sniper Rifle ammo in the area after the destroyed bridge where you are forced to dismount. Climb the hill to the left of the area to get to the top of the structure and there is a dead Marine with a Sniper Rifle.
- Certain weapons from the previous level, such as the Fuel Rod Gun or the Gravity Hammer, will not carry over to this level. The loadout will reset to its standard loadout, the Assault Rifle and the Battle Rifle. If the player manages to bring the Plasma Rifle from the previous level, however, the loadout will carry over.
- It is possible to carry over into the beginning of the next level The Storm whatever weapons and ammo you retain from the end of this level (e.g. Sniper Rifle and Battle Rifle). Weapons can also be carried over from the previous level, though exactly the same weapon cannot be carried over to The Storm. The player can still carry them over if it is a different weapon.
- This level along with The Covenant and The Storm, are the only three levels in Halo 3 where you can drive a Transport Warthog.
- Tsavo is a region of Kenya close to where the Tsavo and Athi rivers meet and was the place where the Uganda Railway passed over the Tsavo river. The bridge will not be encountered as it is on the other side of Voi.
- It is the first Halo 3 campaign mission to feature usable vehicles.[4]
- Scattered across the savannah are the remains of the New Mombasa Orbital Elevator. It collapsed after the slipspace rift created by the Prophet of Regret's ship weakened the support structure, and not by the Covenant glassing the city.
- There is a weapons cache on top of the tunnel in the first area where the Pelican drops off two Warthogs, but if you enter it, the Wraith will bombard you from a distance.
- Near the end of the level, you can see the eastern edge of Voi on the opposite side of the crater.
- This is the only level where Thel 'Vadam is never seen in single player Campaign mode. This is probably because he, in Bungie canon, had been evacuated from Crow's Nest via Landing Pad Bravo when the Brutes disarmed the bomb.
- This is the first level you can encounter Zurdo-pattern Wraiths and Brute Choppers.
- At Bungie's Halo 3 preview event in Seattle, Washington (Close to where Bungie Studios is actually located on the map) Tsavo Highway was first shown to the groups that attended the event's meeting.
- In the Halo 3 Epsilon, no static effects were added to dialogue. It was possible to hear the complete transmissions from Stacker and ONI Recon one-eleven respectively: "We're on the Tsavo Highway, about five klicks east of Voi." and "The cruisers above the crater. They found something."
- This is the only level in Halo 3 where John-117 has no dialogue in the cutscenes related to the level.
- This level along with The Ark and Halo are one of the only levels to not feature any Cortana moments. However, Halo does feature a Gravemind moment instead.
- After taking down the first shield generator and moving through the tunnel, there is a marine outpost with a single dead marine with a Battle Rifle. There is a fully charged Plasma Rifle outside that is the only one unaffected by the Famine Skull.
- This, and the level The Covenant are the only levels to have Beam Rifles by default on any difficulty.
- The second chapter of the Halo 2 soundtrack, Epilogue, has the name "Road to Voi", this level could be reference to the chapter, or the chapter is a hint to gamers that Halo 3 will have contents that will do with the town of Voi.
- Tsavo Highway was originally a longer mission, large sections were removed due to production limits.
- This level is fairly similar in concept to Halo 3: ODST's Uplift Reserve.
Gallery[edit]
Concept art[edit]
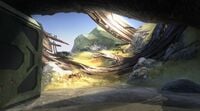
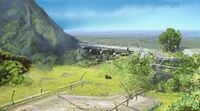
Concept art of the entrance of Crow's Nest at the start of the mission.
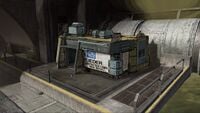
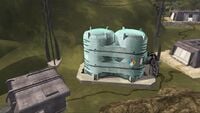
Concept art of Voi Municipal Water Pump House 03.
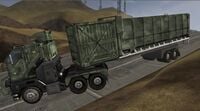
Concept art of a tractor unit on the highway.
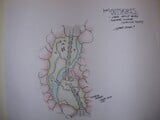
Design Documentation[edit]
Storyboards[edit]
Screenshots[edit]
Sources[edit]
| Preceded by Crow's Nest |
Halo 3 Campaign Missions Tsavo Highway |
Succeeded by The Storm |
| ||||||||||||||||||||||||||||||||||||||||
