Crow's Nest: Difference between revisions
From Halopedia, the Halo wiki
(→Trivia) |
mNo edit summary |
||
| (830 intermediate revisions by more than 100 users not shown) | |||
| Line 1: | Line 1: | ||
{{ | {{Status|Gameplay}} | ||
{{Cleanup}} | |||
{{disambig header|the campaign level|the military base on Earth|Crow's Nest (location)}} | |||
{{Level infobox | {{Level infobox | ||
|prev=''[[ | |pagegamelabel=H3 | ||
|next=''[[ | |prev=''[[Sierra 117]]'' | ||
|next=''[[Tsavo Highway]]'' | |||
|name='''Crow's Nest''' | |||
|image=[[File:H3 CrowsNest Loadscreen.png|300px]] | |||
|game=''[[Halo 3]]'' | |game=''[[Halo 3]]'' | ||
| | |devname=<code>020_base</code>{{Ref/File|Id=H3EK|H3EK|H3EK\tags\levels\solo\020_base\020_base.scenario}} | ||
| | |player=*[[Master_Chief_(gameplay)#Halo_3|Master Chief]] (player 1) | ||
|player | *[[Arbiter_(player_character)#Halo_3|Arbiter]] (player 2) | ||
|date= [[ | *[[Elite (co-op)|N'tho 'Sraom]] (player 3) | ||
|place= [[UNSC]] [[Crow's Nest ( | *[[Elite (co-op)|Usze 'Taham]] (player 4) | ||
| | |date=[[2552#November|November 17, 2552]]<ref>[http://halo.bungie.net/News/content.aspx?type=topnews&cid=16989 '''Bungie.net''': ''Bungie Weekly Update: 01/23/09 - Timeline'']</ref> | ||
| | |place=[[United Nations Space Command|UNSC]] [[Crow's Nest (location)|Underground Facility "Crow's Nest"]] | ||
|objective=*Defend the Base from incoming [[Covenant Empire|Covenant]] troops | |||
*Rearm the bomb and escape the base | |||
|partime=00:20:00 {{C|''Master Chief Collection''}} | |||
|parscore=19,000 {{C|''Master Chief Collection''}}<br/>15,000 {{C|''Halo 3''}} | |||
}} | }} | ||
{{Article | {{Article quote|Clear the base, whatever it takes.}} | ||
'''Crow's Nest''' | '''Crow's Nest''' is the third [[Campaign]] level of ''[[Halo 3]]''.<ref>Bungie Podcast, 8-10-2007</ref> | ||
Upon completing | Upon completing the level on the [[Normal]], [[Heroic]], or [[Legendary]] difficulties, the player will earn the "[[Holdout (Achievement)|Holdout]]" [[achievement]] and 20 [[Gamerscore]]. Upon earning 15,000 points in [[Campaign Scoring]], the player will be awarded with the [[Demon]] achievement and 10 Gamerscore. | ||
==Plot== | |||
The level begins with the [[John-117|Master Chief]], the [[Arbiter]] [[Thel 'Vadam]], and [[Sergeant Major|Sergeant]] [[Avery Junior Johnson|Johnson]] landing in an underground UNSC base. When they disembark, several Marines are amazed to see a [[SPARTAN-II Program|Spartan II]]. As they walk through hallways littered with wounded [[United Nations Space Command|UNSC]] soldiers, [[Commander]] [[Miranda Keyes|Keyes]] informs the Chief and Johnson that [[Prophet of Truth|Truth]] has almost destroyed the [[UNSC Home Fleet]], and only a few ships are left. They soon reach the command center and speak with [[Terrence Hood|Lord Hood]], discussing a plan for an all out attack on Truth's army. | |||
Unfortunately, the Covenant then jam the [[Human]] communications network along with the rest of the base, shutting off the power. Truth appears on the main view screen, telling the Humans that their world will [[Glassing|burn]]. The base is then attacked by a large contingent of [[Covenant Empire|Covenant troops]]. The Master Chief first clears the south hangar, allowing the UNSC personnel to evacuate. Unable to fight off the invaders, Keyes orders a [[Improvised UNSC bomb|bomb]] placed in the operations center. Meanwhile, Jiralhanae capture the barracks and take many Marines prisoner. The Chief and the Arbiter retake the barracks and rescue as many Marines as they can. They then bring the survivors up to the landing pad where Keyes is waiting with a Pelican. After fighting off another group of Jiralhanae, they meet up with Johnson who informs them that Jiralhanae have seized the Ops Center and disarmed the bomb. Keyes orders the Chief to retake the Ops Centers while the others evacuate. The Chief clears out the Covenant inside the Ops Center and rearms the bomb. He then makes his way back to the south hangar, where he finds a service elevator. Moments later, the bomb detonates, sending the elevator into free fall and causing the Chief to black out. | |||
The | |||
==Transcript== | ==Transcript== | ||
[https://www.youtube.com/watch?v=nPEYImyvKBY '''{''Cutscene''}'''] | |||
*'''Crow's Nest Flight Controller''': "Sorry for the tight squeeze. ''(to the other Flight Controller)'' Tell the [[Miranda Keyes|Commander]] her ace is in the hole." | |||
''' | |||
''[[Kilo 023]] touches down. Medics load an injured marine on a stretcher and move. The [[John-117|Master Chief]], [[Thel 'Vadam]] and [[Avery Junior Johnson|Johnson]] get off. [[UNSC Marine Corps|Marines]] sitting by the landing pad see the Chief get out of the [[D77H-TCI Pelican|Pelican]].'' | |||
'' | *'''Marine #1''': "Hey. Check it out." | ||
*''' | *'''Marine #2''': "No way! A [[SPARTAN-II Program|Spartan]]?!" | ||
*''' | *'''Marine #3 (Blind-by-injury)''': "For real? You better not be..." | ||
*''' | *'''Marine #2''': "No man, he's here! We're gonna be alright!" | ||
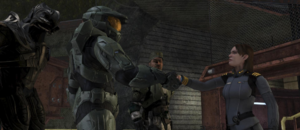
[[File:Crow's Nest - Reunion.png|thumb|300px|Miranda shakes hands with John-117.]] | |||
''Commander Miranda Keyes comes out onto the Landing Pad to meet Johnson, 'Vadam and the Master Chief.'' | |||
''Commander Miranda Keyes | *'''[[Commander]] [[Miranda Keyes]]''': "Where'd you find him?" | ||
*'''[[ | *'''[[Sergeant Major|Sergeant]] [[Avery Junior Johnson]]''': "Napping. Out back." | ||
''They salute, as she salutes back and smiles.'' | |||
*'''Commander Keyes''': Hmm | *'''Commander Keyes''': "Hmm, I'll bet. It's good to see you Chief." | ||
''Keyes shakes the Chief's hand.'' | ''Keyes shakes the Chief's hand.'' | ||
*'''[[Master Chief]]''': "Likewise ma'am." | *'''[[Master Chief Petty Officer]] [[John-117]]''': "Likewise, ma'am." | ||
*'''Commander Keyes''': "Let's get you up to speed." | *'''Commander Keyes''': "Let's get you up to speed." | ||
''Down the hallways of the base, wounded Marines lay against the walls. Two Marines chatting to each other notice Commander Keyes and the Master Chief. They make way and salute. | ''Down the hallways of the base, wounded Marines lay against the walls. Two Marines chatting to each other notice Commander Keyes and the Master Chief. They make way and salute.'' | ||
*'''Commander Keyes''': "The [[Prophet of Truth]]'s ships breached the | *'''Commander Keyes''': "The [[Prophet of Truth]]'s ships breached the [[Luna]]r perimeter. Smashed what was left of the [[UNSC Home Fleet|Home Fleet]]." | ||
''As | ''As 'Vadam walks by, the Marines lower their hands and stare in astonishment.'' | ||
*'''Commander Keyes''': " | *'''Commander Keyes''': "Terrestrial casualties from the subsequent bombardment were..." | ||
''Medics race | ''Medics race by with an injured Marine on a stretcher. Johnson tends to an injured Marine.'' | ||
*'''Commander Keyes''': "..extreme. Truth could've landed anywhere, but he | *'''Commander Keyes''': "...extreme. Truth could've landed anywhere, but he committed all his forces here. East Africa. The ruins of [[New Mombasa]]. Then, they started digging." | ||
*'''Master Chief''': "What about [[ | *'''Master Chief''': "What about [[Installation 05|Halo]]?" | ||
*''' | [[File:UNSC Underground Facility Crow's Nest.PNG|thumb|300px|Keyes lead John-117, Johnson, and 'Vadam to the operations center.]] | ||
*'''Commander Keyes''': "We stopped it, but only temporarily. Now, the Prophet of Truth is looking for something called '[[Installation 00|The Ark]]', where he'll be able to fire all the [[Halo Array|Halo Rings]]. If he succeeds, [[Human]]ity, the Covenant, every sentient being in the Galaxy..." | |||
*''' | *'''John-117''': "The rings will kill us all." | ||
*'''Technician | *'''Technician''': "Ma'am, I have Lord Hood." | ||
*'''Commander Keyes''': "Patch him through." | *'''Commander Keyes''': "Patch him through." | ||
*'''[[Lord Hood]] ( | ''Lord Hood appears on the main screen.'' | ||
*'''[[Fleet Admiral]] [[Terrence Hood|Lord Terrence Hood]] (Video COM)''': "Good news, Commander Keyes?" | |||
*'''Commander Keyes''': "As good as it gets, sir." | *'''Commander Keyes''': "As good as it gets, sir." | ||
*'''Lord Hood ( | *'''Lord Hood (Video COM)''': "So I see. What's your status, son?" | ||
*''' | *'''John-117''': "Green. Sir." | ||
*'''Lord Hood ( | *'''Lord Hood (Video COM)''': "Glad to hear it. The Commander's come up with a good plan. But without you, I wasn't sure we could pull it off." | ||
*'''Commander Keyes''': "Truth's ships are clustered above the excavation site. And his infantry has deployed Anti-Aircraft Batteries around the perimeter. But | *'''Commander Keyes''': "Truth's ships are clustered above the excavation site. And his infantry has deployed [[Skar'wa-pattern Mantis|Anti-Aircraft Batteries]] around the perimeter. But, if we neutralize one of the batteries, punch a hole in Truth's defenses..." | ||
*'''Lord Hood ( | *'''Lord Hood (Video COM)''': "I'll initiate a low-level strike. Hit 'em right where it hurts. I only have a handful of ships, Master Chief. It's a big risk. But I'm confident—" | ||
''The power cuts completely.'' | ''The power cuts completely.'' | ||
*'''Technician | *'''Technician''': "Hell! Not again!" | ||
*'''Commander Keyes''': "Emergency generators! Now!" | *'''Commander Keyes''': "Emergency generators! Now!" | ||
| Line 104: | Line 110: | ||
*'''Marine Technician''': "Shielding failed. They're down and charging." | *'''Marine Technician''': "Shielding failed. They're down and charging." | ||
*'''Commander Keyes''': "As soon as they're up, | *'''Commander Keyes''': "As soon as they're up, re-establish contact with Lord Hood. Let him know that-" | ||
[[File:Truthhack.jpg|thumb|300px|The Prophet of Truth on the screens of the operations center.]] | |||
''The Prophet of Truth suddenly appears on all the screens.'' | |||
*'''[[Prophet of Truth]] (Video COM)''': "You are, all of you, vermin. Cowering in the dirt, thinking what, I wonder? That you might escape the coming fire? No. Your [[Earth|world]] will burn until its surface is but glass! And not even your [[John-117|Demon]] will live to creep, blackened from its hole to mar the reflection of our passage... the culmination of our [[Covenant religion|Journey]]. For your destruction is the will of the gods! And I? I ''am'' their instrument!" | |||
''The power returns.'' | |||
*'''Johnson''': "Cocky bastard. Just loves to run his mouth | *'''Sergeant Johnson''': "Cocky bastard. Just loves to run his mouth!" | ||
*''' | *'''John-117''': "Does he usually mention me?" | ||
''Commander Keyes thinks, and | ''Commander Keyes thinks, and realizes Truth's meaning.'' | ||
*'''Commander Keyes''': "Give the order. We're closing shop." | *'''Commander Keyes''': "Give the order. We're closing shop." | ||
| Line 120: | Line 131: | ||
*'''Commander Keyes''': "We're about to get hit." | *'''Commander Keyes''': "We're about to get hit." | ||
*'''Marine Technician''': "All | *'''Marine Technician (COM)''': "All personnel! Defense code Alpha-one. Prepare for immediate evacuation!" | ||
*''' | *'''Commander Keyes''': "The wounded. We're getting all of them out." | ||
*'''Johnson''': "If I have to carry 'em myself." | *'''Sergeant Johnson''': "If I have to carry 'em myself." | ||
*'''Marine Technician''': "Ma'am, squad leaders are requesting a rally point. Where should they go?" | *'''Marine Technician''': "Ma'am, squad leaders are requesting a rally point. Where should they go?" | ||
''Miranda walks up the stairs and draws | ''Miranda walks up the stairs and draws her [[M6G magnum|pistol]]. She pulls the slide back.'' | ||
*'''Commander Keyes''': "To war." | *'''Commander Keyes''': "To war." | ||
| Line 136: | Line 145: | ||
''She lets go and moves on.'' | ''She lets go and moves on.'' | ||
'''{''Gameplay''}''' | |||
===Know Your Role...=== | |||
'''''Perimeter breach.''''' | |||
*'''Marine Technician''': "We just lost the Perimeter Cameras." | *'''Marine Technician''': "We just lost the Perimeter Cameras." | ||
| Line 144: | Line 154: | ||
*'''Commander Keyes''': "Motion Trackers?" | *'''Commander Keyes''': "Motion Trackers?" | ||
*'''Marine Technician''': "They're down or we're not | *'''Marine Technician''': "They're down or we're not receiving. Can't tell." | ||
*'''Commander Keyes''': "Any of our birds squawking?" | *'''Commander Keyes''': "Any of our [[D77H-TCI Pelican|birds]] squawking?" | ||
*'''Technician | *'''Technician''': "No, ma'am. Wait, Overwatch has contacts. [[Ru'swum-pattern Phantom|Phantoms]], closing in on our position." | ||
*'''Commander Keyes''': "Any birds less than | *'''Commander Keyes''': "Any birds less than five minutes out, bring them in. Tell everything else to scatter." | ||
*'''Technician | *'''Technician''': "Aye aye." | ||
*'''Technician | *'''Technician''': ''(whispering)'' "Who would've thought we'd have this many wounded?" | ||
*'''Technician | *'''Technician''': "Pelicans are gonna take extra time to load." | ||
*'''Commander Keyes''': "We knew they'd find us eventually. But we have a plan, | *'''Commander Keyes''': "We knew they'd find us eventually. But we have a plan, let's make it happen." | ||
*'''All | *'''All personnel''': ''(various affirmations simultaneously)'' "Yes, sir!"/"You got it!"/"Let's go!"/Etc. | ||
*'''Johnson''': " | *'''Sergeant Johnson''': "Arbiter and I will guard the Ops Center. Don't worry about the Commander, Chief. I got her. But the Marines downstairs could use your help." | ||
''([[Cooperative Play|Co-op]] Change)'' '''Sergeant Johnson''': "Chief, move out. You too, Arbiter. The Commander will brief you as you go." | |||
''The Master Chief meets with two Marines from downstairs.'' | ''The Master Chief meets with two Marines from downstairs.'' | ||
*''' | *'''Marine #4''': "Follow me, sir." | ||
*'''Marine # | *'''Marine #5''': "Perimeter's this way." | ||
''(With IWHBYD Skull)'' '''Marine''': "This base was built for some 20th century war, and it's pretty damn cool!" | |||
''The Chief follows the Marines downstairs.'' | ''The Chief follows the Marines downstairs.'' | ||
*'''Marine # | *'''Marine #4''': "Come on, sir. I'll show you the way." | ||
''The Chief finds many weapons to stock up on.'' | ''The Chief finds many weapons to stock up on.'' | ||
*'''Marine # | *'''Marine #5''': "This base was built for some 20th-century war. It's full of old tech, like these door controls." | ||
''The Marine opens the door. The Chief walks on through to find Marines in a large cave setting up defenses for the Ops Center.'' | |||
*'''[[Gunnery Sergeant]] [[Reynolds]]''': "Get those [[AIE-486H machine gun|turret]]s up. You watch your fields of fire!" | |||
'' | ''or'' | ||
*''' | *'''Gunnery Sergeant [[Stacker]]''': "Get those turrets up! Watch your fields of fire!" | ||
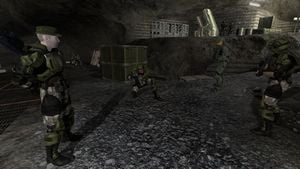
[[File:Marinescrowsnest.jpg|thumb|300px|The Master Chief meets with some Marines on his way to the facility's hangar.]] | |||
*'''Marine # | *'''Marine #6''': "How'd they find us?" | ||
*'''Marine # | *'''Marine #7''': "Probably just smelled you, man." | ||
*'''Marine # | *'''Marine #6''': "Hey, bite me. I'm sick of hiding anyways." | ||
*''' | *'''Gunnery Sergeant (Reynolds or Stacker)''': "Quiet. Cut the chatter." | ||
*'''Marine Sergeant (Reynolds or Stacker)''': "Calm before the | *'''Marine #7''': "What is it, Sergeant?" | ||
*'''Gunnery Sergeant (Reynolds or Stacker)''': "Calm before the storm, Marines. Enjoy it." | |||
''The cave shakes.'' | ''The cave shakes.'' | ||
*''' | *'''Gunnery Sergeant (Reynolds or Stacker)''': "Point of entry, best assessment?" | ||
*'''Marine # | *'''Marine #8''': "The hangar, Sergeant." | ||
*''' | *'''Gunnery Sergeant (Reynolds or Stacker)''': "Agreed. Master Chief, get there." | ||
''(Co-op Change)'' '''Gunnery Sergeant (Reynolds or Stacker)''': "Agreed. Chief, Arbiter. Get there." | |||
''The Master Chief proceeds on, meeting up with two Marines.'' | ''The Master Chief proceeds on, meeting up with two Marines.'' | ||
*''' | *'''[[Private First Class|PFC]] [[Chips Dubbo]]''': "We're with you, Chief." | ||
*'''Marine # | *'''Marine #9''': "Yeah, get some!" | ||
'' | *'''PFC Dubbo''': "Squad guarding the hangar's real shorthanded, Chief." | ||
*''' | *'''Marine #9''': "We don't get there quick, they're gonna get rolled." | ||
''The Chief grabs some [[M9 fragmentation grenade|Fragmentation Grenades]] from a weapons case near the door, then opens it, and lets the Marines lead the way.'' | |||
'' | *'''Commander Keyes (COM)''': "Chief? Good, this channel is secure. My fireteams are spread thin. We can't hold out forever. I need that hangar cleared for evac, ASAP." | ||
*'''Marine''': "Those [[Jiralhanae|Brutes]] secure the hangar, we won't be able to get our birds out." | |||
''The Marines find the vehicle access. A [[M12 Warthog|Warthog]] is in battle with many Covenant soldiers. [[Unggoy]] lob [[Anskum-pattern plasma grenade|plasma grenades]] and destroy it. The Chief and accompanying Marines engage and defeat the Covenant. A Jiralhanae wielding a [[Type-25 Brute Shot|brute shot]] enters the vehicle access with a group of Unggoy. The team eliminate the Covenant troops and push onward. They go through the open door and defeat the Covenant there, which consists of many Unggoy and [[Kig-Yar Sniper]]s. Proceeding, the Chief and Marines reach the hangar.'' | |||
*'''Marine | *'''Marine #10''': "Wipe those bastards off the deck!" | ||
*'''Marine # | *'''Marine #11''': "Pelicans can't launch until the hangar's clear!" | ||
''The Chief and Marines go on the offense and secure the deck. Multiple Phantom dropships enter the hangar, delivering groups of infantry in an effort to retake the stategically important room. From a distance, [[AV-14 Hornet|Hornets]] and [[Type-26 Banshee|Banshees]] are seen engaged in an aerial fight near a {{Pattern|Ket|battlecruiser}} which keeps sending Covenant reinforcements to the base. The Chief and Marines make use of several turrets and defend the hangar. The [[United Nations Space Command|UNSC]] forces eventually prevail and the Phantoms retreat.'' | |||
''The Pelican hanging on a crane in one of the docks slides out and is released. The dropship lands to evac the Marines in the hangar, while the Master Chief restocks on weapons and ammo.'' | |||
---- | |||
''If the player is in the way of where the Pelican lands:'' | |||
*''' | *'''Pelican Pilot''': "Need you to step aside, sir; can't land till you do." | ||
---- | |||
*''' | *'''Sergeant Johnson (COM)''': "Chief, Ops Center. Double time! The Brutes are pressing hard." | ||
'' | ''If the player lingers:'' | ||
*''' | *'''Sergeant Johnson (COM)''': "Come on, Chief, hustle on back!" | ||
''The Chief | ''The Chief heads back to the Ops Center. Marines pass by for evac. Back in the vehicle access, two Marines, staying behind until the next evac, hear a loud banging as well as the sound of insectoid wings beating in the ventilation pipes as [[Yanme'e|something]] makes its way through.'' | ||
*''' | *'''Marine #12''': "Hey. You hear that?" | ||
'' | *'''Marine #13''': "Yeah. And I ''don't'' like it." | ||
*''' | *'''Commander Keyes (Loudspeaker)''': "Attention! Hostiles reported outside the barracks." | ||
''The Chief heads back into the corridors, with the two Marines following.'' | |||
*'''Commander Keyes ( | *'''Commander Keyes (Loudspeaker)''': "Barracks are under attack! All available combat teams, respond!" | ||
''The | ''The COM systems remain silent. The banging and fluttering noises continue on.'' | ||
*'''Commander Keyes ( | *'''Commander Keyes (Loudspeaker)''': "Anyone in the barracks, I need a sit-rep. Now!" | ||
'' | ''The Master Chief meets with the Marines in the cave, defending the Ops Center.'' | ||
*''' | *'''Marine #8''': "Sir, this way." | ||
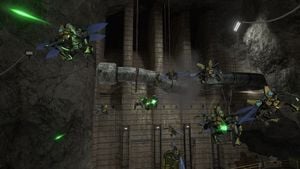
''The | [[File:HTMCC-H3 Drones in Crow's Nest.jpg|thumb|300px|A swarm of Yanme'e outside the operations center.]] | ||
''A single Yanme'e suddenly bursts out of the vent and picks him up. (The Yanme'e can be killed before it picks up the Marine. If it does, he can still be saved by simply shooting the Yanme'e, which will drop the Marine).'' | |||
*'''Marine | *'''Female Marine''': "Look! Coming out of the vents!" | ||
''A | ''A massive swarm of Yanme'e starts pouring out the ventilation shafts, and engulfs the room.'' | ||
*''' | *'''Marine #7''': "Light 'em up! Light 'em up!!" | ||
'' | *'''Female Marine''': "What the hell ''are'' those things, Sergeant?!" | ||
*''' | *'''Gunnery Sergeant (Reynolds or Stacker)''': "Drones! A whole swarm! Take 'em down, short controlled bursts!" | ||
''The Marines open fire on the swarm. The Chief finds a turret and unloads on them. The swarm eventually falls. Several stragglers scurry about on the ground. The Chief easily dispatches them.'' | |||
*''' | *'''Gunnery Sergeant (Reynolds or Stacker)''': "We're good for now, Chief." | ||
'' | ''Marines in the Ops Center below open the doors, letting the Chief in.'' | ||
=== Gift With Purchase === | ===Gift With Purchase=== | ||
'''''Butchers in the barracks.''''' | |||
''The Master Chief meets with Johnson and other defending Marines, but | ''The Master Chief meets with Johnson smoking a cigar and other defending Marines setting up an explosive device, but Thel 'Vadam isn't with them. (Single Player Only)'' | ||
*''' | *'''Gunnery Sergeant (Stacker or Reynolds)''': "If I try to hook up a timer, it might just go off by itself." | ||
*'''Commander Keyes ( | *'''Commander Keyes (Video COM)''': "Johnson." | ||
*'''Johnson''': " | *'''Sergeant Johnson''': "Mm-hmm?" | ||
*'''Commander Keyes ( | *'''Commander Keyes (Video COM)''': "You might wanna put that out." | ||
''Johnson drops his cigar and stamps on it.'' | ''Johnson drops his cigar and stamps on it.'' | ||
*'''Commander Keyes ( | *'''Commander Keyes (Video COM)''': "Chief, have a look. [[Improvised UNSC bomb|A little going-away gift]] for the Covenant. We've linked it to smaller charges throughout the base. Johnson, soon as the evacuation is complete, start the timer." | ||
*'''Johnson''': "Understood." | *'''Sergeant Johnson''': "Understood." | ||
*'''Commander Keyes ( | *'''Commander Keyes (Video COM)''': "Good luck, everyone. See you on the last Pelican out." | ||
''The | ''The feed disconnects.'' | ||
*'''Johnson''': "Follow me, Chief." | *'''Johnson''': "Follow me, Chief." | ||
''(Co-op Change)'' '''Johnson''': "Chief, Arbiter. Follow me." | |||
''Johnson leads the Chief to the back of the room, guarded by four Marines.'' | |||
*'''Sergeant Johnson''': "Brutes have taken the barracks. Marines are trapped inside. Those apes ain't much for mercy, Chief. We both know what they do to prisoners." | |||
''The Master Chief takes weapons and ammo from a weapons locker.'' | |||
*'''Sergeant Johnson''': "Get to the barracks, save those men. Then escort them to the Landing Pad for evac." | |||
''If the player stays near the bomb:'' | |||
*'''Sergeant Johnson''': "I'll guard the bomb, Chief. Get yourself to the Barracks." | |||
''The Chief heads through the corridor to the Motor Pool. While down there, he spots a large [[pack]] of Jiralhanae, led by a [[Jiralhanae Chieftain]] with a [[Gravity hammer (fiction)|gravity hammer]].'' | |||
'' | *'''Jiralhanae''': "A fresh scent! Must be close." | ||
*''' | *'''Jiralhanae Chieftain''': "Spread out! Track it down!" | ||
''The | ''The Jiralhanae disperse, intent on tracking down the source. The Chief surprises them and manages to take several Jiralhanae out. Reinforcements soon enter from an open door near the Chieftain, many wielding [[Type-51 Carbine|Covenant carbines]]. Once most of his pack have been slain, the Chieftain brandishes his hammer and charges at the Chief, usually engaging an [[invincibility]] unit. Regardless, the Chief prevails and completely ousts the Jiralhanae pack.'' | ||
''The Master Chief continues on through a corridor, but it's caved in. Finding a hole in the floor, he jumps down into a shaft. At the bottom are several pipe entrances, which Yanme'e fly in and out of.'' | |||
'' | *'''[[Cortana]] ([[Character interludes|Cortana Moment]])''': "You have been called upon to serve." | ||
''Master Chief jumps down through vertical shafts into a canal, where he finds Thel 'Vadam, fighting off a small group of Yanme'e. (Single Player Only)'' | |||
'' | *'''[[Arbiter]] [[Thel 'Vadam]]''': "Half-wit insects! The [[San'Shyuum|Prophets]] use you like they used me! Reject their lies! Rebel, or ''all'' your hives will perish!" | ||
- | |||
''After | ''After 'Vadam takes care of the Yanme'e, he and the Chief regroup.'' | ||
'' | *'''Thel 'Vadam''': "Spartan, the Brutes have taken your soldiers. As prisoners or meat for their bellies, I do not know. In case some yet live, let us be careful when we shoot." | ||
''The Master Chief and 'Vadam enter the barracks. They see a captive Marine thrown hard into a pillar, where multiple Marine corpses lie. The Marine dies and falls limply to the ground, and the Chief and 'Vadam rush in. One Marine being held by a Jiralhanae begs for mercy as it decides to kill him too.'' | |||
[[File:Saved.jpg|thumb|300px|The Master Chief about to save the Marine prisoner.]] | |||
*''' | *'''Marine Prisoner''': "No! Please!" | ||
'' | *'''Jiralhanae''': "Look, it has soiled itself! These are whelps, not warriors!" | ||
''The Chief can opt to attack the Jiralhanae, which releases the Marine prisoner.'' | |||
''If the player fails to save him, the Jiralhanae breaks his spine and throws him on the ground behind him, laughing.'' | |||
'' | ''If the player saves the Marine:'' | ||
*''' | *'''Marine Prisoner''': "That was close, too close." | ||
''or'' | |||
'' | *'''Marine Prisoner''': "Close, too damn close." | ||
''Further down the corridor a Jiralhanae Captain holds a Marine by the ankle. Another marine is being held by the neck. Their survival depends on how fast the Chief is at attacking their captor(s). (On higher difficulties, the Jiralhanae are reinforced by [[Kig-yar]] infantry).'' | |||
*'''[[Hocus]] (COM)''': "What should I do, ma'am?" | ''The Chief and 'Vadam kill the Jiralhanae and save the prisoners (optional). While the freed Marines rush for weapons, the Chief and 'Vadam move through the barracks, killing more Jiralhanae and freeing another group of prisoners.'' | ||
*'''Gunnery Sergeant (Reynolds or Stacker)''': "Everyone on your feet! Grab a weapon!" | |||
*'''Female Marine #2''': "Payback time! OO-RAH" | |||
*'''Gunnery Sergeant (Reynolds or Stacker)''': "Cover the Chief!" | |||
''After taking out the Brutes, the surviving Marines grab weapons from more piles of corpses, taking a second to grieve for their comrades while the Chief and 'Vadam resupply and reload. They continue their rescue throughout the barracks, defeating the remaining Jiralhanae, including a [[Jiralhanae War Chieftain]] with a detached [[Pek-pattern plasma cannon|plasma turret]], and rescuing (a maximum of) seven Marines.'' | |||
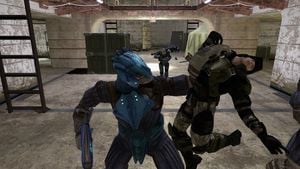
[[File:Marineprisoners.jpg|thumb|300px|Marines being held prisoner by [[Jiralhanae]].]] | |||
''Once the barracks are cleared:'' | |||
*'''Thel 'Vadam''': "We did all we could. Let us move the survivors up to the hangar. There is a lift outside." | |||
''(Co-op Change)'' '''Gunnery Sergeant (Reynolds or Stacker)''': "You did the best you could, sir. Let's get the survivors up to the hangar. There's an elevator just outside the barracks." | |||
''The Chief leads the survivors outside to the lift. He activates it and they wait for it to come down. While they wait, matters get worse.'' | |||
*'''Sergeant Johnson (COM)''': "Commander, we lost the Ops Center. Brutes attacked in force. Couldn't hold them off. We're falling back to the hangar. But don't wait for us." | |||
*'''[[Lieutenant]] [[Hocus]] (COM)''': "What should I do, ma'am?" | |||
*'''Commander Keyes (COM)''': "Hold position! I'm not leaving without him." | *'''Commander Keyes (COM)''': "Hold position! I'm not leaving without him." | ||
''The elevator arrives. The Chief, 'Vadam and the Marines get onboard and take it up to the flight deck. While the team heads up, Kilo 23 gets into trouble.'' | |||
*'''Hocus (COM)''': "Ma'am, I've got movement. Above and below. Brutes! They got jump-packs!" | |||
*'''Commander Keyes (COM)''': "They're going after the thrusters. Shake them off, Lieutenant!" | |||
''Kilo 23 takes off, getting out of the Jiralhanae's reach. Noticing the Chief and 'Vadam, the [[Jiralhanae Jumper]]s attack them. Reinforcements enter from above the observation room as well as from another door. The Chief, along with his allies ultimately defeat the Jiralhanae and secure the flight deck, a door at the road below opens. Johnson arrives, holding an [[M7 SMG|SMG]] and leading a group of surviving Marines. The squad is under fire from a group of Yanme'e.'' | |||
*''' | *'''Sergeant Johnson''': "Drones! Go! I'll cover you!" | ||
'' | ''The Chief and 'Vadam assist Johnson and his squad in killing the aliens. The few Yanme'e are quickly eliminated. Kilo 23 returns for final evac. The barracks survivors and Johnson's squad board the Pelican dropship.'' | ||
*'''Johnson''': " | *'''Sergeant Johnson''': "Brutes. In the Ops Center. They disarmed the bomb. Sorry, Commander, there were too many. Even for me." | ||
'' | *'''Commander Keyes (COM)''': "Chief, get back to the Ops Center. Kill those Brutes. Rearm the bomb. I've gotta get these men out of here. But I'll radio with another exit. Good luck." | ||
''Johnson and Thel 'Vadam board the Pelican, and it takes off. The Master Chief goes along the road Johnson previously came from, passing by destroyed Warthogs and dead Marines. (In Co-op, 'Vadam will accompany the Chief.)'' | |||
===Last One Out, Get the Lights=== | |||
'''''Bomb armed. Time to go.''''' | |||
'' | ''The Chief reaches a door at the end of the road.'' | ||
*'''Cortana (Cortana Moment)''': "You will be the protectors of [[Earth]] and all her colonies." | |||
'' | [[File:1217438061 Jackalsnipers.jpg|thumb|300px|A pair of Kig-Yar snipers defending the upper floor of the Motor Pool.]] | ||
''The Chief walks on through to another roadway, with Covenant [[Pek-pattern plasma cannon|plasma cannons]] set up. Using the Plasma Cannons and/or using all available cover, he clears out a large contingent of Unggoy and Kig-Yar along with a pair of [[Kig-Yar Sniper]]s. The Chief soon gets back to the Motor Pool next door to the Ops Center.'' | |||
''If the player is taking a while:'' | |||
'' | *'''Sergeant Johnson (COM)''': "Chief, follow the service tunnel to the Motor Pool." | ||
''If the player still stalls:'' | |||
''' | |||
'' | *'''Sergeant Johnson (COM)''': "Head through the Motor Pool to get to the Ops Center." | ||
''The Chief heads back up the corridor behind the Ops Center, and sneaks in. Inside, he witnesses a [[Jiralhanae War Chieftain]] communicating with the Prophet of Truth via the Ops Center communications. With the Chieftain are a several Unggoy and a pair of Jiralhanae Captains. (On higher difficulties, another Jiralhanae mans a plasma cannon at the far end of the room.)'' | |||
''If the Chief isn't spotted, he can spy on the conversation between Truth and the Chieftain.'' | |||
*''' | *'''Jiralhanae War Chieftain''': "Success, Holy One! We have taken their Command Center!" | ||
*'''Truth ( | *'''Truth (Video COM)''': "Have you discovered how they plan to stop me?" | ||
*''' | *'''Jiralhanae War Chieftain''': ''(nervously)'' "Not just yet, Noble Prophet." | ||
''Truth | *'''Truth (Video COM)''': "Find me what I need to know, or your place on the path is forfeit. Tell me you understand!" | ||
*''' | *'''Jiralhanae War Chieftain''': "Yes, Holy One! It shall be done." | ||
'' | ''Truth disconnects from the screen.'' | ||
(If | *'''Jiralhanae War Chieftain''': ''(to his subordinates)'' "Have the [[Yanme'e|Drones]] ''scour'' these machines! Find out what these ''heathens'' know about the [[Installation 00|Ark]]!" | ||
*'''Johnson (COM)''': "Hit the switch, Chief. Arm that bomb!" | |||
''As the Unggoy and Jiralhanae Captains get busy, the Chief takes them by surprise and defeats them. The War Chieftain opens fire on the Spartan with a [[Pez'tk-pattern fuel rod gun|fuel rod gun]] but the Chief manages to overcome him, taking back the Ops Center and the bomb.'' | |||
''If the player waits around a bit:'' | |||
*'''Sergeant Johnson (COM)''': "Hit the switch, Chief. Arm that bomb!" | |||
''The Master Chief reactivates the bomb and the alarm sounds.'' | ''The Master Chief reactivates the bomb and the alarm sounds.'' | ||
| Line 415: | Line 472: | ||
*'''Commander Keyes (COM)''': "That did it, Chief! Bomb's armed." | *'''Commander Keyes (COM)''': "That did it, Chief! Bomb's armed." | ||
*'''Johnson (COM)''': "We got your exit. A service elevator in the hangar. | *'''Sergeant Johnson (COM)''': "We got your exit. A service elevator in the hangar. Head downstairs, cut through the caves!" | ||
''The | ''The Chief heads back into the cave, where Unggoy run wildly. He then heads through the corridors.'' | ||
*'''Cortana (Cortana Moment)''': "There will be a great deal of hardship on the road ahead." | *'''Cortana (Cortana Moment)''': "There will be a great deal of hardship on the road ahead." | ||
'' | ''If the Chief stalls:'' | ||
*'''Sergeant Johnson (COM)''': "South hangar, straight through the caves, Chief." | |||
''The Chief continues back out to the vehicle access, witnessing a large swarm of Yanme'e fleeing. Making his way through several panicking Unggoy, the Chief heads back down the corridors to the hangar.'' | |||
*'''Cortana (Cortana Moment)''': "You will become the best we can make you." | *'''Cortana (Cortana Moment)''': "You will become the best we can make you." | ||
''The Chief gets to the hangar, where Phantoms flee, and | ''The Chief gets to the hangar, where [[Ru'swum-pattern Phantom|Phantoms]] flee, abandoning many Unggoy and Kig-Yar to their fates. The doomed Covenant run around in panic, some trying to catch the fleeing Phantoms.'' | ||
*'''Johnson (COM)''': "There isn't much time, Chief. Find that elevator." | *'''Sergeant Johnson (COM)''': "There isn't much time, Chief. Find that elevator." | ||
'' | ''If the player takes their time:'' | ||
*''' | *'''Sergeant Johnson (COM)''': "Bomb's about to blow! Go, go, go!" | ||
'' | ''If the player continues to linger around:'' | ||
*''' | *'''Sergeant Johnson (COM)''': "Get on the elevator, Chief! You're out of time!" | ||
'' | ''The Master Chief makes it to the service elevator, and activates it. The door doesn't fully shut. Something explodes and flames flicker through the gap.'' | ||
*'''Cortana (Cortana Moment)''': "This place will become your home." | |||
''The elevator descends. The Master Chief hears a massive boom. He looks up and sees the flames roar through the open door. The violent shaking disconnects the elevator and sends it plummeting down. It crashes and the Chief blacks out.'' | |||
*'''Cortana (Cortana Moment)''': "This place will become your tomb." | |||
''The screen goes black.'' | |||
''Level ends.'' | |||
==Achievements== | |||
The following [[achievement]]s can be unlocked on this mission on the [[Xbox 360]] edition of ''Halo 3''. | |||
{|class="wikitable" | |||
|-align="center" | |||
!Icon | |||
!Name | |||
!Description | |||
!{{Gamerscore|Gamerscore}} | |||
|-align="center" | |||
|[[File:H3 Achievement Holdout.png]] | |||
|[[Holdout (achievement)|Holdout]] | |||
|Finish the second mission of the [[Campaign]] on [[Normal]], [[Heroic]], or [[Legendary]]. | |||
|{{Gamerscore|20}} | |||
|-align="center" | |||
|[[File:H3 Achievement Black Eye.png]] | |||
|[[Black Eye (Achievement)|Black Eye]] | |||
|Find and claim this skull. | |||
|{{Gamerscore|10}} | |||
|} | |||
==Trivia== | ==Trivia== | ||
===Glitches=== | |||
{{Main|Glitches}} | |||
*On this level, it is possible to find Gunnery Sergeant Stacker or Reynolds in three different places in a short amount of time, although they did not accompany the player throughout the base. They can be found holding position after killing the swarm of Drones outside the Ops Center, then operating the bomb, then being held prisoner in the barracks. | |||
*The [[Arbiter eye glitch|Arbiter Eye Glitch]] occurs at the beginning of this level. | |||
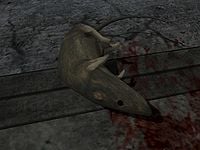
*Occasionally, [[List of animals|rats]] can be seen scurrying across the floor in some parts of the level. They appear on the player's [[Motion tracker]] as small yellow dots — friendlies. Players can kill them and even melee their dead bodies around. If the player turns against the [[UNSC Marine Corps|Marines]], the rats will be shown as red dots on the Motion tracker. | |||
*Players can get into the hangar where the Pelican picks up the remaining marines and takes off. | |||
*If one opens the door to the Motor Pool and doesn't go through, the door to Ops Center will remain open. The player can then lure the [[Jiralhanae|Brutes]], and eventually the [[Jiralhanae Chieftain|Chieftain]], into the Ops Center by attacking them from afar using the [[BR55HB SR Battle Rifle|Battle Rifle]]. However, the Chieftain will not attack the Marines, and vice-versa. The player can even lure the Chieftain downstairs, though he will not chase the player into the large cave area. | |||
*There is a [[Infinite weapons on Crow's Nest|glitch]] that allows the player to get infinite weapons for the battle inside the Motor Pool. | |||
*There is a female Marine in the barracks that has white sleeves under her armor and a backpack, if ones shoots or melees her helmet, it will fly off, but she will still have it on and cannot be taken off. | |||
*By dropping a [[Deployable Cover]] in the small stairway that [[Avery Junior Johnson|Johnson]] and his Marines use to get to the landing pad, players can block off the stairway and Johnson and his Marines will cease to move, stopping [[Miranda Keyes]]'s [[D77H-TCI Pelican|Pelican]] from taking off. | |||
*The [["Friendly" Brutes]] [[Glitches|Glitch]] can be performed on this level. | |||
* | ===Mistakes=== | ||
*If you are playing Co-op on this level, the Arbiter has a melee animation even when he is unarmed. He will melee like a normal [[Sangheili|Elite]]. The melee attack does no damage. It is possible to disarm the AI Arbiter in single player by giving him a support weapon and getting him to ride in a vehicle or killing him and taking his weapon for an empty weapon. However, the AI controlled Arbiter's melee does damage. The same glitch can be performed if you use a glitch to allow an Elite character model to be unarmed in [[forge]]. Also, the Arbiter has a special grenade throw animation similar to the ''Halo: Combat Evolved'' Elites and ''Halo 3'' level ''[[Floodgate]]'' Elites when he is unarmed. The grenade throw can be performed in multiplayer and Co-op if you are playing as an Elite character model. You don't necessarily have to be unarmed. You will need two weapons and grenades. Press the Y button to switch to your secondary weapon and quickly press the LT. If you did it correctly, you should have thrown a grenade like ''Floodgate'' Elites. | |||
*When playing as the Arbiter, [[N’tho ‘Sraom]], or [[Usze ‘Taham]], if you press the '''Y''' when you're unarmed at the beginning of the level, your player model will shuffle its feet. This can be seen only by the person who does it. | |||
*Many of the Marines are the same models with different voices in the opening cutscene, such as one of the injured men and a technician that speaks with the Commander. This is most likely for Bungie to save resources and not create multiple models for Marines. | |||
*After saving the Marines in the Barracks, [[Commander]] [[Miranda Keyes|Keyes]] will pilot a Pelican to evacuate them, if one looks closely, she is holding the controls of the Pelican like the controls of a [[AV-14 Hornet|Hornet]]. | |||
*Sergeant Johnson drops a cigar and steps on it when the player(s) first see the bomb. Upon closer examination, however, one can see that the cigar is still lit. In fact, it is completely unaffected by being stepped on. | |||
*If one manages to save every possible Marine being held captive in Barrack B, the evacuation Pelican will run out of seats leaving [[Thel 'Vadam]] with no other option but to sit in a seat already occupied by a Marine. | |||
*It | ===Easter eggs=== | ||
{{Main|Easter eggs}} | |||
*The [[Halo 3 skulls#Black Eye|Black Eye Skull]] can be found in the beginning of the level. Claiming it would reward the player the "[[Black Eye (achievement)|Black Eye]]" [[achievement]] and 10 [[Gamerscore]]. | |||
*There is an argument between two Marines voiced by various [[Red vs Blue]] voice actors, which changes depending on difficulty level. See [[Password-lacking Marine]]. | |||
*In Theater mode, when Miranda Keyes tells Master Chief about their farewell party to the Brutes, go upstairs next to the computer. It will say MAC and WAC and start playing the Halo theme song with beep sounds. | |||
*The ''Halo 3'' silver skull [[Halo 3 skulls#Grunt Birthday Party|Grunt Birthday Party Skull]] can be found on this level. | |||
*If one looks at the picture on the wrinkled newspaper laying between the generator and tarp covered crates at the beginning of Barrack B, it can be noted that the picture faintly displays the picture of a [[MJOLNIR Powered Assault Armor/Mark V]] alongside a [[Unggoy|Grunt]] from ''[[Halo: Combat Evolved]]''. | |||
*The | ===References=== | ||
[[File:Dead Rat.jpg|A dead rat, an example of many more that have bred within the base.|thumb|200px]] | |||
*The Prophet of Truth's line, ''"...your destruction is the will of the gods. And I... I am their instrument!"'' is a rephrasing of the message sent to [[Battle Group 4]] during the [[First Battle of Harvest]]. Likewise, the line, ''"Your world will burn until its surface is but glass"'' is a restatement of a message sent to the surface of [[Biko]] in [[2526]].<ref>[[Data pads|Data pad 10]]</ref> | |||
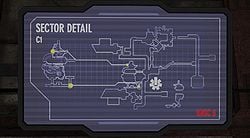
*The "Seventh Column" icon appears in the opening cinematic. Immediately after Commander Keyes says "Give the order, we're closing shop," the screen cuts to a bearded marine who says "Ma'am?" The screen behind him reveals a map of the base, with the Seven Pillars icon appearing in the middle of the lower-right quadrant. | |||
*The men manning the computers at the beginning of the level are Naval personnel, which (aside from Crow's Nest) are only seen in-game in the ''Halo: Combat Evolved'' [[campaign]] levels ''[[The Pillar of Autumn (Halo: Combat Evolved level)|The Pillar of Autumn]]'' and ''[[Halo (Halo: Combat Evolved level)|Halo]]''. | |||
*The third section of this level (Last One Out, Get The Lights) could be a reference to the episode name of Season One finale of Red vs Blue (Last One Out, Hit The Lights). | |||
*When the Drones attack, Sgt. Stacker/Reynolds will say "Take 'em down - short, controlled bursts!" This may be a reference to ''Aliens'', as the ''Halo ''series has had many [[list of references to Aliens in Halo|''Aliens'' references]], and possibly because the Drones and the Xenomorphs share more similarities more than any Covenant species. | |||
[[File:Screens crowsnest schematic.jpg|thumb|250px|The "Seventh Column" icons that appear on the computer readout.]] | |||
*The [[Character interludes|Cortana Moments]] in this level are direct quotes from ''[[Halo: The Fall of Reach]]''. All of them are from [[Catherine Halsey|Doctor Halsey]] as she speaks with the [[SPARTAN-II Program|Spartan-IIs]] about the project they are taking part in. | |||
*On the boxes in the part of the room farthest from the monitors is the number 2401, the number of [[Installation 05]]'s [[2401 Penitent Tangent|Monitor]], and a factor of [[Seven|7]]. Similarly, in the first hangar, there is a generator under the floor marked with the [[EMG|EMG 2401]] logo, likely in reference to said Monitor. | |||
*There are a total of seven Marines players can save in the Barracks. | |||
*On some of the screens at the Ops-Center there is a blue screen titled WAC which the screen is a reference to Microsoft's infamous Blue Screen of Death. | |||
*At the end of the level, a large explosion manages to shoot out of the opening in the elevator's blast doors before it completely closes. This could be a reference to near the ending of ''[[The Maw]]'' from ''Combat Evolved'' in which a near identical occurrence takes place when John enters the service elevator in order to flee from the destruction of the {{UNSCShip|Pillar of Autumn}}. | |||
* | ===Miscellaneous=== | ||
*The Banshees and Hornets outside the hangar aren't real, but part of the backdrop. They lack a physical presence, as one can move through them in Theater mode, they have scripted deaths, and they use very low-resolution textures applied to them. They are unaffected by the player's actions. | |||
*If one takes the camera in Theater mode outside the hangar, the [[Portal Storm]] can be seen forming. | |||
*In the [[ViDoc]] "[[Halo 3 ViDoc: Et Tu, Brute?|Et Tu, Brute?]]", instead of fighting the [[Gravity hammer (fiction)|Gravity Hammer]]-wielding Chieftain in the Motor Pool, the [[Pek-pattern plasma cannon|Plasma Cannon]]-wielding [[Jiralhanae War Chieftain|War Chieftain]] can be seen in combat in the Motor Pool and vice versa | |||
*After facing the Jump-pack Brutes, if one follows the hallway up to where they break out of, equipment and ammo can be found. One of them is Cloaking, which will be effective during the fight with War Chieftain on higher difficulties. | |||
*The [[multiplayer]] level ''[[Rat's Nest]]'' draws many visual inspirations from the design of ''Crow's Nest''. | |||
*This is the only ''Halo 3'' level where the player doesn't have a starting loadout weapon. Once gameplay begins, the player must pick their own loadout on a weapons rack, allowing for a Magnum Pistol, Assault Rifle, SMG or Battle Rifle. | |||
*In spite of what Johnson says, it is possible to just use the active camouflage to sneak in the area and arm the bomb without having to kill the surrounding Covenant. | |||
==Gallery== | |||
===Concept art=== | |||
<gallery> | |||
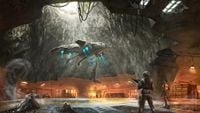
File:H3 Crow'sNest_Interior_Concept 1.jpg|Concept art of the interior of the base. | |||
File:H3 Crow'sNest_Interior_Concept 2.jpg|Concept art of the Pelican bay of the base. | |||
File:H3 Crow'sNest_Interior_Concept 3.jpg|Concept art of the base's Pelican bay, with the savannahs of [[Voi]] stretching out below. | |||
</gallery> | |||
===Design documentation=== | |||
<gallery> | |||
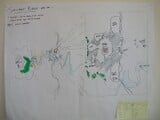
File:H3_SecretBasePaperSketch.jpeg|Early paper sketch titled "Secret Base". | |||
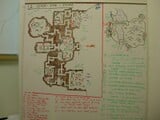
File:H3_DefendBase%2BEscapeWhiteboard.jpeg|Whiteboard mission design titled "1.2 Defend Base + Escape". | |||
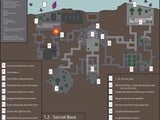
File:H3_SecretBaseDesignDoc.jpeg|Digital design document titled "1.2 Secret Base". | |||
File:H3_Crow'sNest_DesignDoc_1.png|Revised digital design document titled "020 - Secret Base". | |||
File:H3_Crow'sNest_DesignDoc_2.png|A different, later digital design document titled "020_BASE". | |||
</gallery> | |||
===Storyboards=== | |||
<gallery> | |||
File:H3 Crow'sNest Storyboard 1.jpg | |||
File:H3 Crow'sNest Storyboard 2.jpg | |||
File:H3 Crow'sNest Storyboard 3.jpg | |||
File:H3 Crow'sNest Storyboard 4.jpg | |||
File:H3 Crow'sNest Storyboard 5.jpg | |||
File:H3 Crow'sNest Storyboard 6.jpg | |||
File:H3 Crow'sNest Storyboard 7.jpg | |||
</gallery> | |||
===Screenshots=== | |||
<gallery> | |||
File:H3 Menu 03 Crow's Nest.png|Preview of the level in ''Halo 3'' menu. | |||
File:H3 MC& Hood.png|Keyes proposes a plan of attack to Lord Hood. | |||
File:Crow's Nest - Demon.png|John-117, Thel 'Vadam, and Keyes listening to Truth's speech on the monitors. | |||
File:H3 Crows Nest Pelican hanger.jpg|A Pelican begins to evacuate Marines from the hangar bay of Crow's Nest. | |||
File:Halo 3 Crow's Nest.PNG|John-117 fires his Battle Rifle at invading Covenant troops. | |||
File:H3 CrowsNestCaptive.png|A Marine being held captive in the barracks. | |||
File:H3 CoviesinOpsCenter.png|Covenant troops taken over the operations center. | |||
File:H3 CN FleeingPhantom.png|A Phantom retreats from the hangar bay after John-117 reactivated the bomb. | |||
</gallery> | |||
==Sources== | |||
{{Ref/Sources}} | |||
== | |||
{{clear}} | {{clear}} | ||
{{succession box | before = ''[[ | {{succession box | before = ''[[Sierra 117]]'' <br />| title = ''Halo 3'' Campaign Missions | years = '''''Crow's Nest''''' |after = ''[[Tsavo Highway]]''}} | ||
[[Category:Halo 3 | {{Levels|H3}} | ||
[[Category:Halo 3 campaign]] | |||
Latest revision as of 16:27, June 27, 2024
| This article does not meet the wiki's general standards and/or standards on layouts. You can help by cleaning this article. |
|
Prev: |
|
|
Next: |
|
| Crow's Nest | |
|---|---|
| |
|
Game: |
|
|
File name (?): |
|
|
Player: |
|
|
Date: |
|
|
Location: |
|
|
Objective(s): |
|
|
Par Time: |
00:20:00 (Master Chief Collection) |
|
Par Score: |
19,000 (Master Chief Collection) |
 |
Halopedia has a walkthrough guide for this level; see Crow's Nest/Walkthrough. |
| “ | Clear the base, whatever it takes. | ” |
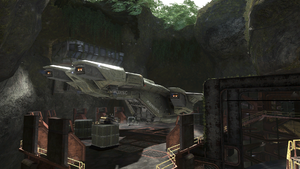
Crow's Nest is the third Campaign level of Halo 3.[3]
Upon completing the level on the Normal, Heroic, or Legendary difficulties, the player will earn the "Holdout" achievement and 20 Gamerscore. Upon earning 15,000 points in Campaign Scoring, the player will be awarded with the Demon achievement and 10 Gamerscore.
Plot[edit]
The level begins with the Master Chief, the Arbiter Thel 'Vadam, and Sergeant Johnson landing in an underground UNSC base. When they disembark, several Marines are amazed to see a Spartan II. As they walk through hallways littered with wounded UNSC soldiers, Commander Keyes informs the Chief and Johnson that Truth has almost destroyed the UNSC Home Fleet, and only a few ships are left. They soon reach the command center and speak with Lord Hood, discussing a plan for an all out attack on Truth's army.
Unfortunately, the Covenant then jam the Human communications network along with the rest of the base, shutting off the power. Truth appears on the main view screen, telling the Humans that their world will burn. The base is then attacked by a large contingent of Covenant troops. The Master Chief first clears the south hangar, allowing the UNSC personnel to evacuate. Unable to fight off the invaders, Keyes orders a bomb placed in the operations center. Meanwhile, Jiralhanae capture the barracks and take many Marines prisoner. The Chief and the Arbiter retake the barracks and rescue as many Marines as they can. They then bring the survivors up to the landing pad where Keyes is waiting with a Pelican. After fighting off another group of Jiralhanae, they meet up with Johnson who informs them that Jiralhanae have seized the Ops Center and disarmed the bomb. Keyes orders the Chief to retake the Ops Centers while the others evacuate. The Chief clears out the Covenant inside the Ops Center and rearms the bomb. He then makes his way back to the south hangar, where he finds a service elevator. Moments later, the bomb detonates, sending the elevator into free fall and causing the Chief to black out.
Transcript[edit]
- Crow's Nest Flight Controller: "Sorry for the tight squeeze. (to the other Flight Controller) Tell the Commander her ace is in the hole."
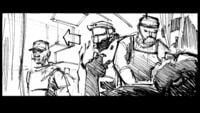
Kilo 023 touches down. Medics load an injured marine on a stretcher and move. The Master Chief, Thel 'Vadam and Johnson get off. Marines sitting by the landing pad see the Chief get out of the Pelican.
- Marine #1: "Hey. Check it out."
- Marine #2: "No way! A Spartan?!"
- Marine #3 (Blind-by-injury): "For real? You better not be..."
- Marine #2: "No man, he's here! We're gonna be alright!"
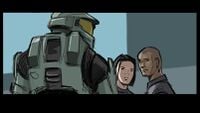
Commander Miranda Keyes comes out onto the Landing Pad to meet Johnson, 'Vadam and the Master Chief.
- Commander Miranda Keyes: "Where'd you find him?"
- Sergeant Avery Junior Johnson: "Napping. Out back."
They salute, as she salutes back and smiles.
- Commander Keyes: "Hmm, I'll bet. It's good to see you Chief."
Keyes shakes the Chief's hand.
- Master Chief Petty Officer John-117: "Likewise, ma'am."
- Commander Keyes: "Let's get you up to speed."
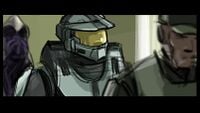
Down the hallways of the base, wounded Marines lay against the walls. Two Marines chatting to each other notice Commander Keyes and the Master Chief. They make way and salute.
- Commander Keyes: "The Prophet of Truth's ships breached the Lunar perimeter. Smashed what was left of the Home Fleet."
As 'Vadam walks by, the Marines lower their hands and stare in astonishment.
- Commander Keyes: "Terrestrial casualties from the subsequent bombardment were..."
Medics race by with an injured Marine on a stretcher. Johnson tends to an injured Marine.
- Commander Keyes: "...extreme. Truth could've landed anywhere, but he committed all his forces here. East Africa. The ruins of New Mombasa. Then, they started digging."
- Master Chief: "What about Halo?"
- Commander Keyes: "We stopped it, but only temporarily. Now, the Prophet of Truth is looking for something called 'The Ark', where he'll be able to fire all the Halo Rings. If he succeeds, Humanity, the Covenant, every sentient being in the Galaxy..."
- John-117: "The rings will kill us all."
- Technician: "Ma'am, I have Lord Hood."
- Commander Keyes: "Patch him through."
Lord Hood appears on the main screen.
- Fleet Admiral Lord Terrence Hood (Video COM): "Good news, Commander Keyes?"
- Commander Keyes: "As good as it gets, sir."
- Lord Hood (Video COM): "So I see. What's your status, son?"
- John-117: "Green. Sir."
- Lord Hood (Video COM): "Glad to hear it. The Commander's come up with a good plan. But without you, I wasn't sure we could pull it off."
- Commander Keyes: "Truth's ships are clustered above the excavation site. And his infantry has deployed Anti-Aircraft Batteries around the perimeter. But, if we neutralize one of the batteries, punch a hole in Truth's defenses..."
- Lord Hood (Video COM): "I'll initiate a low-level strike. Hit 'em right where it hurts. I only have a handful of ships, Master Chief. It's a big risk. But I'm confident—"
The power cuts completely.
- Technician: "Hell! Not again!"
- Commander Keyes: "Emergency generators! Now!"
- Marine Technician: "Shielding failed. They're down and charging."
- Commander Keyes: "As soon as they're up, re-establish contact with Lord Hood. Let him know that-"
The Prophet of Truth suddenly appears on all the screens.
- Prophet of Truth (Video COM): "You are, all of you, vermin. Cowering in the dirt, thinking what, I wonder? That you might escape the coming fire? No. Your world will burn until its surface is but glass! And not even your Demon will live to creep, blackened from its hole to mar the reflection of our passage... the culmination of our Journey. For your destruction is the will of the gods! And I? I am their instrument!"
The power returns.
- Sergeant Johnson: "Cocky bastard. Just loves to run his mouth!"
- John-117: "Does he usually mention me?"
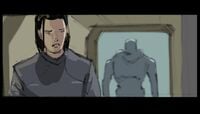
Commander Keyes thinks, and realizes Truth's meaning.
- Commander Keyes: "Give the order. We're closing shop."
- Marine Technician: "Ma'am?"
- Commander Keyes: "We're about to get hit."
- Marine Technician (COM): "All personnel! Defense code Alpha-one. Prepare for immediate evacuation!"
- Commander Keyes: "The wounded. We're getting all of them out."
- Sergeant Johnson: "If I have to carry 'em myself."
- Marine Technician: "Ma'am, squad leaders are requesting a rally point. Where should they go?"
Miranda walks up the stairs and draws her pistol. She pulls the slide back.
- Commander Keyes: "To war."
She lets go and moves on.
{Gameplay}
Know Your Role...[edit]
Perimeter breach.
- Marine Technician: "We just lost the Perimeter Cameras."
- Commander Keyes: "Motion Trackers?"
- Marine Technician: "They're down or we're not receiving. Can't tell."
- Commander Keyes: "Any of our birds squawking?"
- Technician: "No, ma'am. Wait, Overwatch has contacts. Phantoms, closing in on our position."
- Commander Keyes: "Any birds less than five minutes out, bring them in. Tell everything else to scatter."
- Technician: "Aye aye."
- Technician: (whispering) "Who would've thought we'd have this many wounded?"
- Technician: "Pelicans are gonna take extra time to load."
- Commander Keyes: "We knew they'd find us eventually. But we have a plan, let's make it happen."
- All personnel: (various affirmations simultaneously) "Yes, sir!"/"You got it!"/"Let's go!"/Etc.
- Sergeant Johnson: "Arbiter and I will guard the Ops Center. Don't worry about the Commander, Chief. I got her. But the Marines downstairs could use your help."
(Co-op Change) Sergeant Johnson: "Chief, move out. You too, Arbiter. The Commander will brief you as you go."
The Master Chief meets with two Marines from downstairs.
- Marine #4: "Follow me, sir."
- Marine #5: "Perimeter's this way."
(With IWHBYD Skull) Marine: "This base was built for some 20th century war, and it's pretty damn cool!"
The Chief follows the Marines downstairs.
- Marine #4: "Come on, sir. I'll show you the way."
The Chief finds many weapons to stock up on.
- Marine #5: "This base was built for some 20th-century war. It's full of old tech, like these door controls."
The Marine opens the door. The Chief walks on through to find Marines in a large cave setting up defenses for the Ops Center.
- Gunnery Sergeant Reynolds: "Get those turrets up. You watch your fields of fire!"
or
- Gunnery Sergeant Stacker: "Get those turrets up! Watch your fields of fire!"
- Marine #6: "How'd they find us?"
- Marine #7: "Probably just smelled you, man."
- Marine #6: "Hey, bite me. I'm sick of hiding anyways."
- Gunnery Sergeant (Reynolds or Stacker): "Quiet. Cut the chatter."
- Marine #7: "What is it, Sergeant?"
- Gunnery Sergeant (Reynolds or Stacker): "Calm before the storm, Marines. Enjoy it."
The cave shakes.
- Gunnery Sergeant (Reynolds or Stacker): "Point of entry, best assessment?"
- Marine #8: "The hangar, Sergeant."
- Gunnery Sergeant (Reynolds or Stacker): "Agreed. Master Chief, get there."
(Co-op Change) Gunnery Sergeant (Reynolds or Stacker): "Agreed. Chief, Arbiter. Get there."
The Master Chief proceeds on, meeting up with two Marines.
- PFC Chips Dubbo: "We're with you, Chief."
- Marine #9: "Yeah, get some!"
- PFC Dubbo: "Squad guarding the hangar's real shorthanded, Chief."
- Marine #9: "We don't get there quick, they're gonna get rolled."
The Chief grabs some Fragmentation Grenades from a weapons case near the door, then opens it, and lets the Marines lead the way.
- Commander Keyes (COM): "Chief? Good, this channel is secure. My fireteams are spread thin. We can't hold out forever. I need that hangar cleared for evac, ASAP."
- Marine: "Those Brutes secure the hangar, we won't be able to get our birds out."
The Marines find the vehicle access. A Warthog is in battle with many Covenant soldiers. Unggoy lob plasma grenades and destroy it. The Chief and accompanying Marines engage and defeat the Covenant. A Jiralhanae wielding a brute shot enters the vehicle access with a group of Unggoy. The team eliminate the Covenant troops and push onward. They go through the open door and defeat the Covenant there, which consists of many Unggoy and Kig-Yar Snipers. Proceeding, the Chief and Marines reach the hangar.
- Marine #10: "Wipe those bastards off the deck!"
- Marine #11: "Pelicans can't launch until the hangar's clear!"
The Chief and Marines go on the offense and secure the deck. Multiple Phantom dropships enter the hangar, delivering groups of infantry in an effort to retake the stategically important room. From a distance, Hornets and Banshees are seen engaged in an aerial fight near a Ket-pattern battlecruiser which keeps sending Covenant reinforcements to the base. The Chief and Marines make use of several turrets and defend the hangar. The UNSC forces eventually prevail and the Phantoms retreat.
The Pelican hanging on a crane in one of the docks slides out and is released. The dropship lands to evac the Marines in the hangar, while the Master Chief restocks on weapons and ammo.
If the player is in the way of where the Pelican lands:
- Pelican Pilot: "Need you to step aside, sir; can't land till you do."
- Sergeant Johnson (COM): "Chief, Ops Center. Double time! The Brutes are pressing hard."
If the player lingers:
- Sergeant Johnson (COM): "Come on, Chief, hustle on back!"
The Chief heads back to the Ops Center. Marines pass by for evac. Back in the vehicle access, two Marines, staying behind until the next evac, hear a loud banging as well as the sound of insectoid wings beating in the ventilation pipes as something makes its way through.
- Marine #12: "Hey. You hear that?"
- Marine #13: "Yeah. And I don't like it."
- Commander Keyes (Loudspeaker): "Attention! Hostiles reported outside the barracks."
The Chief heads back into the corridors, with the two Marines following.
- Commander Keyes (Loudspeaker): "Barracks are under attack! All available combat teams, respond!"
The COM systems remain silent. The banging and fluttering noises continue on.
- Commander Keyes (Loudspeaker): "Anyone in the barracks, I need a sit-rep. Now!"
The Master Chief meets with the Marines in the cave, defending the Ops Center.
- Marine #8: "Sir, this way."
A single Yanme'e suddenly bursts out of the vent and picks him up. (The Yanme'e can be killed before it picks up the Marine. If it does, he can still be saved by simply shooting the Yanme'e, which will drop the Marine).
- Female Marine: "Look! Coming out of the vents!"
A massive swarm of Yanme'e starts pouring out the ventilation shafts, and engulfs the room.
- Marine #7: "Light 'em up! Light 'em up!!"
- Female Marine: "What the hell are those things, Sergeant?!"
- Gunnery Sergeant (Reynolds or Stacker): "Drones! A whole swarm! Take 'em down, short controlled bursts!"
The Marines open fire on the swarm. The Chief finds a turret and unloads on them. The swarm eventually falls. Several stragglers scurry about on the ground. The Chief easily dispatches them.
- Gunnery Sergeant (Reynolds or Stacker): "We're good for now, Chief."
Marines in the Ops Center below open the doors, letting the Chief in.
Gift With Purchase[edit]
Butchers in the barracks.
The Master Chief meets with Johnson smoking a cigar and other defending Marines setting up an explosive device, but Thel 'Vadam isn't with them. (Single Player Only)
- Gunnery Sergeant (Stacker or Reynolds): "If I try to hook up a timer, it might just go off by itself."
- Commander Keyes (Video COM): "Johnson."
- Sergeant Johnson: "Mm-hmm?"
- Commander Keyes (Video COM): "You might wanna put that out."
Johnson drops his cigar and stamps on it.
- Commander Keyes (Video COM): "Chief, have a look. A little going-away gift for the Covenant. We've linked it to smaller charges throughout the base. Johnson, soon as the evacuation is complete, start the timer."
- Sergeant Johnson: "Understood."
- Commander Keyes (Video COM): "Good luck, everyone. See you on the last Pelican out."
The feed disconnects.
- Johnson: "Follow me, Chief."
(Co-op Change) Johnson: "Chief, Arbiter. Follow me."
Johnson leads the Chief to the back of the room, guarded by four Marines.
- Sergeant Johnson: "Brutes have taken the barracks. Marines are trapped inside. Those apes ain't much for mercy, Chief. We both know what they do to prisoners."
The Master Chief takes weapons and ammo from a weapons locker.
- Sergeant Johnson: "Get to the barracks, save those men. Then escort them to the Landing Pad for evac."
If the player stays near the bomb:
- Sergeant Johnson: "I'll guard the bomb, Chief. Get yourself to the Barracks."
The Chief heads through the corridor to the Motor Pool. While down there, he spots a large pack of Jiralhanae, led by a Jiralhanae Chieftain with a gravity hammer.
- Jiralhanae: "A fresh scent! Must be close."
- Jiralhanae Chieftain: "Spread out! Track it down!"
The Jiralhanae disperse, intent on tracking down the source. The Chief surprises them and manages to take several Jiralhanae out. Reinforcements soon enter from an open door near the Chieftain, many wielding Covenant carbines. Once most of his pack have been slain, the Chieftain brandishes his hammer and charges at the Chief, usually engaging an invincibility unit. Regardless, the Chief prevails and completely ousts the Jiralhanae pack.
The Master Chief continues on through a corridor, but it's caved in. Finding a hole in the floor, he jumps down into a shaft. At the bottom are several pipe entrances, which Yanme'e fly in and out of.
- Cortana (Cortana Moment): "You have been called upon to serve."
Master Chief jumps down through vertical shafts into a canal, where he finds Thel 'Vadam, fighting off a small group of Yanme'e. (Single Player Only)
- Arbiter Thel 'Vadam: "Half-wit insects! The Prophets use you like they used me! Reject their lies! Rebel, or all your hives will perish!"
After 'Vadam takes care of the Yanme'e, he and the Chief regroup.
- Thel 'Vadam: "Spartan, the Brutes have taken your soldiers. As prisoners or meat for their bellies, I do not know. In case some yet live, let us be careful when we shoot."
The Master Chief and 'Vadam enter the barracks. They see a captive Marine thrown hard into a pillar, where multiple Marine corpses lie. The Marine dies and falls limply to the ground, and the Chief and 'Vadam rush in. One Marine being held by a Jiralhanae begs for mercy as it decides to kill him too.
- Marine Prisoner: "No! Please!"
- Jiralhanae: "Look, it has soiled itself! These are whelps, not warriors!"
The Chief can opt to attack the Jiralhanae, which releases the Marine prisoner.
If the player fails to save him, the Jiralhanae breaks his spine and throws him on the ground behind him, laughing.
If the player saves the Marine:
- Marine Prisoner: "That was close, too close."
or
- Marine Prisoner: "Close, too damn close."
Further down the corridor a Jiralhanae Captain holds a Marine by the ankle. Another marine is being held by the neck. Their survival depends on how fast the Chief is at attacking their captor(s). (On higher difficulties, the Jiralhanae are reinforced by Kig-yar infantry).
The Chief and 'Vadam kill the Jiralhanae and save the prisoners (optional). While the freed Marines rush for weapons, the Chief and 'Vadam move through the barracks, killing more Jiralhanae and freeing another group of prisoners.
- Gunnery Sergeant (Reynolds or Stacker): "Everyone on your feet! Grab a weapon!"
- Female Marine #2: "Payback time! OO-RAH"
- Gunnery Sergeant (Reynolds or Stacker): "Cover the Chief!"
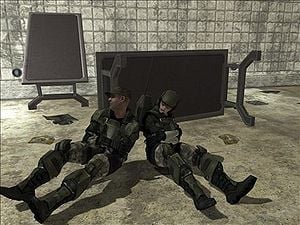
After taking out the Brutes, the surviving Marines grab weapons from more piles of corpses, taking a second to grieve for their comrades while the Chief and 'Vadam resupply and reload. They continue their rescue throughout the barracks, defeating the remaining Jiralhanae, including a Jiralhanae War Chieftain with a detached plasma turret, and rescuing (a maximum of) seven Marines.
Once the barracks are cleared:
- Thel 'Vadam: "We did all we could. Let us move the survivors up to the hangar. There is a lift outside."
(Co-op Change) Gunnery Sergeant (Reynolds or Stacker): "You did the best you could, sir. Let's get the survivors up to the hangar. There's an elevator just outside the barracks."
The Chief leads the survivors outside to the lift. He activates it and they wait for it to come down. While they wait, matters get worse.
- Sergeant Johnson (COM): "Commander, we lost the Ops Center. Brutes attacked in force. Couldn't hold them off. We're falling back to the hangar. But don't wait for us."
- Lieutenant Hocus (COM): "What should I do, ma'am?"
- Commander Keyes (COM): "Hold position! I'm not leaving without him."
The elevator arrives. The Chief, 'Vadam and the Marines get onboard and take it up to the flight deck. While the team heads up, Kilo 23 gets into trouble.
- Hocus (COM): "Ma'am, I've got movement. Above and below. Brutes! They got jump-packs!"
- Commander Keyes (COM): "They're going after the thrusters. Shake them off, Lieutenant!"
Kilo 23 takes off, getting out of the Jiralhanae's reach. Noticing the Chief and 'Vadam, the Jiralhanae Jumpers attack them. Reinforcements enter from above the observation room as well as from another door. The Chief, along with his allies ultimately defeat the Jiralhanae and secure the flight deck, a door at the road below opens. Johnson arrives, holding an SMG and leading a group of surviving Marines. The squad is under fire from a group of Yanme'e.
- Sergeant Johnson: "Drones! Go! I'll cover you!"
The Chief and 'Vadam assist Johnson and his squad in killing the aliens. The few Yanme'e are quickly eliminated. Kilo 23 returns for final evac. The barracks survivors and Johnson's squad board the Pelican dropship.
- Sergeant Johnson: "Brutes. In the Ops Center. They disarmed the bomb. Sorry, Commander, there were too many. Even for me."
- Commander Keyes (COM): "Chief, get back to the Ops Center. Kill those Brutes. Rearm the bomb. I've gotta get these men out of here. But I'll radio with another exit. Good luck."
Johnson and Thel 'Vadam board the Pelican, and it takes off. The Master Chief goes along the road Johnson previously came from, passing by destroyed Warthogs and dead Marines. (In Co-op, 'Vadam will accompany the Chief.)
Last One Out, Get the Lights[edit]
Bomb armed. Time to go.
The Chief reaches a door at the end of the road.
- Cortana (Cortana Moment): "You will be the protectors of Earth and all her colonies."
The Chief walks on through to another roadway, with Covenant plasma cannons set up. Using the Plasma Cannons and/or using all available cover, he clears out a large contingent of Unggoy and Kig-Yar along with a pair of Kig-Yar Snipers. The Chief soon gets back to the Motor Pool next door to the Ops Center.
If the player is taking a while:
- Sergeant Johnson (COM): "Chief, follow the service tunnel to the Motor Pool."
If the player still stalls:
- Sergeant Johnson (COM): "Head through the Motor Pool to get to the Ops Center."
The Chief heads back up the corridor behind the Ops Center, and sneaks in. Inside, he witnesses a Jiralhanae War Chieftain communicating with the Prophet of Truth via the Ops Center communications. With the Chieftain are a several Unggoy and a pair of Jiralhanae Captains. (On higher difficulties, another Jiralhanae mans a plasma cannon at the far end of the room.)
If the Chief isn't spotted, he can spy on the conversation between Truth and the Chieftain.
- Jiralhanae War Chieftain: "Success, Holy One! We have taken their Command Center!"
- Truth (Video COM): "Have you discovered how they plan to stop me?"
- Jiralhanae War Chieftain: (nervously) "Not just yet, Noble Prophet."
- Truth (Video COM): "Find me what I need to know, or your place on the path is forfeit. Tell me you understand!"
- Jiralhanae War Chieftain: "Yes, Holy One! It shall be done."
Truth disconnects from the screen.
- Jiralhanae War Chieftain: (to his subordinates) "Have the Drones scour these machines! Find out what these heathens know about the Ark!"
As the Unggoy and Jiralhanae Captains get busy, the Chief takes them by surprise and defeats them. The War Chieftain opens fire on the Spartan with a fuel rod gun but the Chief manages to overcome him, taking back the Ops Center and the bomb.
If the player waits around a bit:
- Sergeant Johnson (COM): "Hit the switch, Chief. Arm that bomb!"
The Master Chief reactivates the bomb and the alarm sounds.
- Commander Keyes (COM): "That did it, Chief! Bomb's armed."
- Sergeant Johnson (COM): "We got your exit. A service elevator in the hangar. Head downstairs, cut through the caves!"
The Chief heads back into the cave, where Unggoy run wildly. He then heads through the corridors.
- Cortana (Cortana Moment): "There will be a great deal of hardship on the road ahead."
If the Chief stalls:
- Sergeant Johnson (COM): "South hangar, straight through the caves, Chief."
The Chief continues back out to the vehicle access, witnessing a large swarm of Yanme'e fleeing. Making his way through several panicking Unggoy, the Chief heads back down the corridors to the hangar.
- Cortana (Cortana Moment): "You will become the best we can make you."
The Chief gets to the hangar, where Phantoms flee, abandoning many Unggoy and Kig-Yar to their fates. The doomed Covenant run around in panic, some trying to catch the fleeing Phantoms.
- Sergeant Johnson (COM): "There isn't much time, Chief. Find that elevator."
If the player takes their time:
- Sergeant Johnson (COM): "Bomb's about to blow! Go, go, go!"
If the player continues to linger around:
- Sergeant Johnson (COM): "Get on the elevator, Chief! You're out of time!"
The Master Chief makes it to the service elevator, and activates it. The door doesn't fully shut. Something explodes and flames flicker through the gap.
- Cortana (Cortana Moment): "This place will become your home."
The elevator descends. The Master Chief hears a massive boom. He looks up and sees the flames roar through the open door. The violent shaking disconnects the elevator and sends it plummeting down. It crashes and the Chief blacks out.
- Cortana (Cortana Moment): "This place will become your tomb."
The screen goes black.
Level ends.
Achievements[edit]
The following achievements can be unlocked on this mission on the Xbox 360 edition of Halo 3.
| Icon | Name | Description | Gamerscore |
|---|---|---|---|

|
Holdout | Finish the second mission of the Campaign on Normal, Heroic, or Legendary. | 20 |

|
Black Eye | Find and claim this skull. | 10 |
Trivia[edit]
Glitches[edit]
- Main article: Glitches
- On this level, it is possible to find Gunnery Sergeant Stacker or Reynolds in three different places in a short amount of time, although they did not accompany the player throughout the base. They can be found holding position after killing the swarm of Drones outside the Ops Center, then operating the bomb, then being held prisoner in the barracks.
- The Arbiter Eye Glitch occurs at the beginning of this level.
- Occasionally, rats can be seen scurrying across the floor in some parts of the level. They appear on the player's Motion tracker as small yellow dots — friendlies. Players can kill them and even melee their dead bodies around. If the player turns against the Marines, the rats will be shown as red dots on the Motion tracker.
- Players can get into the hangar where the Pelican picks up the remaining marines and takes off.
- If one opens the door to the Motor Pool and doesn't go through, the door to Ops Center will remain open. The player can then lure the Brutes, and eventually the Chieftain, into the Ops Center by attacking them from afar using the Battle Rifle. However, the Chieftain will not attack the Marines, and vice-versa. The player can even lure the Chieftain downstairs, though he will not chase the player into the large cave area.
- There is a glitch that allows the player to get infinite weapons for the battle inside the Motor Pool.
- There is a female Marine in the barracks that has white sleeves under her armor and a backpack, if ones shoots or melees her helmet, it will fly off, but she will still have it on and cannot be taken off.
- By dropping a Deployable Cover in the small stairway that Johnson and his Marines use to get to the landing pad, players can block off the stairway and Johnson and his Marines will cease to move, stopping Miranda Keyes's Pelican from taking off.
- The "Friendly" Brutes Glitch can be performed on this level.
Mistakes[edit]
- If you are playing Co-op on this level, the Arbiter has a melee animation even when he is unarmed. He will melee like a normal Elite. The melee attack does no damage. It is possible to disarm the AI Arbiter in single player by giving him a support weapon and getting him to ride in a vehicle or killing him and taking his weapon for an empty weapon. However, the AI controlled Arbiter's melee does damage. The same glitch can be performed if you use a glitch to allow an Elite character model to be unarmed in forge. Also, the Arbiter has a special grenade throw animation similar to the Halo: Combat Evolved Elites and Halo 3 level Floodgate Elites when he is unarmed. The grenade throw can be performed in multiplayer and Co-op if you are playing as an Elite character model. You don't necessarily have to be unarmed. You will need two weapons and grenades. Press the Y button to switch to your secondary weapon and quickly press the LT. If you did it correctly, you should have thrown a grenade like Floodgate Elites.
- When playing as the Arbiter, N’tho ‘Sraom, or Usze ‘Taham, if you press the Y when you're unarmed at the beginning of the level, your player model will shuffle its feet. This can be seen only by the person who does it.
- Many of the Marines are the same models with different voices in the opening cutscene, such as one of the injured men and a technician that speaks with the Commander. This is most likely for Bungie to save resources and not create multiple models for Marines.
- After saving the Marines in the Barracks, Commander Keyes will pilot a Pelican to evacuate them, if one looks closely, she is holding the controls of the Pelican like the controls of a Hornet.
- Sergeant Johnson drops a cigar and steps on it when the player(s) first see the bomb. Upon closer examination, however, one can see that the cigar is still lit. In fact, it is completely unaffected by being stepped on.
- If one manages to save every possible Marine being held captive in Barrack B, the evacuation Pelican will run out of seats leaving Thel 'Vadam with no other option but to sit in a seat already occupied by a Marine.
Easter eggs[edit]
- Main article: Easter eggs
- The Black Eye Skull can be found in the beginning of the level. Claiming it would reward the player the "Black Eye" achievement and 10 Gamerscore.
- There is an argument between two Marines voiced by various Red vs Blue voice actors, which changes depending on difficulty level. See Password-lacking Marine.
- In Theater mode, when Miranda Keyes tells Master Chief about their farewell party to the Brutes, go upstairs next to the computer. It will say MAC and WAC and start playing the Halo theme song with beep sounds.
- The Halo 3 silver skull Grunt Birthday Party Skull can be found on this level.
- If one looks at the picture on the wrinkled newspaper laying between the generator and tarp covered crates at the beginning of Barrack B, it can be noted that the picture faintly displays the picture of a MJOLNIR Powered Assault Armor/Mark V alongside a Grunt from Halo: Combat Evolved.
References[edit]
- The Prophet of Truth's line, "...your destruction is the will of the gods. And I... I am their instrument!" is a rephrasing of the message sent to Battle Group 4 during the First Battle of Harvest. Likewise, the line, "Your world will burn until its surface is but glass" is a restatement of a message sent to the surface of Biko in 2526.[4]
- The "Seventh Column" icon appears in the opening cinematic. Immediately after Commander Keyes says "Give the order, we're closing shop," the screen cuts to a bearded marine who says "Ma'am?" The screen behind him reveals a map of the base, with the Seven Pillars icon appearing in the middle of the lower-right quadrant.
- The men manning the computers at the beginning of the level are Naval personnel, which (aside from Crow's Nest) are only seen in-game in the Halo: Combat Evolved campaign levels The Pillar of Autumn and Halo.
- The third section of this level (Last One Out, Get The Lights) could be a reference to the episode name of Season One finale of Red vs Blue (Last One Out, Hit The Lights).
- When the Drones attack, Sgt. Stacker/Reynolds will say "Take 'em down - short, controlled bursts!" This may be a reference to Aliens, as the Halo series has had many Aliens references, and possibly because the Drones and the Xenomorphs share more similarities more than any Covenant species.
- The Cortana Moments in this level are direct quotes from Halo: The Fall of Reach. All of them are from Doctor Halsey as she speaks with the Spartan-IIs about the project they are taking part in.
- On the boxes in the part of the room farthest from the monitors is the number 2401, the number of Installation 05's Monitor, and a factor of 7. Similarly, in the first hangar, there is a generator under the floor marked with the EMG 2401 logo, likely in reference to said Monitor.
- There are a total of seven Marines players can save in the Barracks.
- On some of the screens at the Ops-Center there is a blue screen titled WAC which the screen is a reference to Microsoft's infamous Blue Screen of Death.
- At the end of the level, a large explosion manages to shoot out of the opening in the elevator's blast doors before it completely closes. This could be a reference to near the ending of The Maw from Combat Evolved in which a near identical occurrence takes place when John enters the service elevator in order to flee from the destruction of the UNSC Pillar of Autumn.
Miscellaneous[edit]
- The Banshees and Hornets outside the hangar aren't real, but part of the backdrop. They lack a physical presence, as one can move through them in Theater mode, they have scripted deaths, and they use very low-resolution textures applied to them. They are unaffected by the player's actions.
- If one takes the camera in Theater mode outside the hangar, the Portal Storm can be seen forming.
- In the ViDoc "Et Tu, Brute?", instead of fighting the Gravity Hammer-wielding Chieftain in the Motor Pool, the Plasma Cannon-wielding War Chieftain can be seen in combat in the Motor Pool and vice versa
- After facing the Jump-pack Brutes, if one follows the hallway up to where they break out of, equipment and ammo can be found. One of them is Cloaking, which will be effective during the fight with War Chieftain on higher difficulties.
- The multiplayer level Rat's Nest draws many visual inspirations from the design of Crow's Nest.
- This is the only Halo 3 level where the player doesn't have a starting loadout weapon. Once gameplay begins, the player must pick their own loadout on a weapons rack, allowing for a Magnum Pistol, Assault Rifle, SMG or Battle Rifle.
- In spite of what Johnson says, it is possible to just use the active camouflage to sneak in the area and arm the bomb without having to kill the surrounding Covenant.
Gallery[edit]
Concept art[edit]
Concept art of the base's Pelican bay, with the savannahs of Voi stretching out below.
Design documentation[edit]
Storyboards[edit]
Screenshots[edit]
Sources[edit]
- ^ Halo 3 Editing Kit, game file
H3EK\tags\levels\solo\020_base\020_base.scenario - ^ Bungie.net: Bungie Weekly Update: 01/23/09 - Timeline
- ^ Bungie Podcast, 8-10-2007
- ^ Data pad 10
| Preceded by Sierra 117 |
Halo 3 Campaign Missions Crow's Nest |
Succeeded by Tsavo Highway |
| ||||||||||||||||||||||||||||||||||||||||
