Flood containment facility: Difference between revisions
From Halopedia, the Halo wiki
m (Text replacement - "{{[Ee]ra\|[^}\n]*(Forerunner|Covenant|Human|UNSC|HCW|Post)[^}\n]*}}" to "{{Status|Canon}}") |
|||
| (139 intermediate revisions by 90 users not shown) | |||
| Line 1: | Line 1: | ||
{{Status|Canon}} | |||
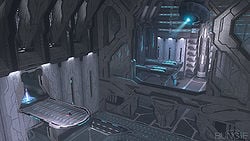
[[File:343GS lvl 01.jpg|thumb|300px|The Flood containment facility on Installation 04.]] | |||
'''Flood containment facilities''' were facilities used by the [[Forerunner]]s to contain the [[Flood]] while studying them. The Flood specimens themselves were held in stasis in the wake of the [[Forerunner-Flood war]].<ref>'''[[Halo 2]] Instruction Manual''', ''page 2''</ref> | |||
== | ==Installation 04== | ||
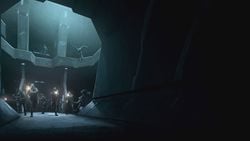
[[File:HCEA-terminal-flood escape.jpg|thumb|250px|Marines fight off Flood in Alpha Halo's containment facility.]] | |||
The Flood containment facility on [[Installation 04]] was hidden deep under a swamp. During the [[Battle of Installation 04]], it was secured initially by [[Covenant]] forces, who, upon discovering the Flood, were massacred and forced to lock down the facility. In the ensuing melee, (what appears to be) all [[Sangheili]] were either killed or infected, with only a few [[lance]]s of [[Unggoy]] and [[Kig-Yar]] remaining. | |||
Later, [[Captain (Navy)|Captain]] [[Jacob Keyes]], in desperate need of weapons to arm his troops for their potentially long guerrilla war, went to the facility with [[Avery Junior Johnson|Sgt. Johnson]] and a part of [[Fire Team Charlie]] under the assumption that it was a weapons cache after the UNSC forces had interrogated a Sangheili named [['Qualomee]], who had lied to them that it was. After losing two [[UNSC Marine Corps|Marines]], the first squad with Captain Keyes and Johnson continued until they found a locked door, which they eventually got through. All team members were directly infected by the Flood except Sgt. Johnson. The routine recovery mission was tossed into utter chaos, with both [[human]] and Covenant forces being destroyed by the horrors that had been imprisoned for countless centuries.<ref>'''[[Halo: The Flood]]'''</ref> | |||
By the time [[John-117]] arrived at the location, the initial battle was over, with the remaining Covenant forces scattered and disorganized and the remaining human forces holed up in the entrances, lashing out at anything that came near. The Flood itself, as if sensing a potentially new victim, quietly withdrew to the hole in which they sprang and prepared to attack their new enemy, leaving only hideous remains of their earlier killing spree. After the Master Chief made his way through the swamp and into the facility, he encountered scattered Covenant, grisly remains of a terrible battle, a crazed Marine who was scared out of his mind and a single recording chip that told the entire story. | |||
Inside the facility, a small three-man Marine fire team was found. They were the only other Marines to leave the main containment building besides Sgt. Johnson. They were found by the Chief, but immediately came under attack by the Flood.<ref>'''[[Halo: Combat Evolved]]''', level ''[[343 Guilty Spark (level)|343 Guilty Spark]]''</ref> | |||
After fighting back the Flood and making his way back to the surface, the Master Chief regrouped with what remained of Corporal [[Lovik]]'s [[Second squad (Pillar of Autumn)|second squad]] and valiantly led them to the center of the swamp, fighting back Flood by the dozen. As he reached the center, the [[Monitor]] of the installation, [[343 Guilty Spark]], who was patrolling the area with [[Sentinel]]s in an attempt to contain the outbreak of Flood, came across the Chief and his Marines. Identifying him as a [[Reclaimer]], he abducted him, [[Slipspace translocation|teleporting]] the Chief away from the swamp into the [[Library]] to retrieve the [[Activation Index|Index]]. | |||
This area was destroyed, along with the rest of Installation 04, when [[John-117]] detonated the crashed {{UNSCShip|Pillar of Autumn}}'s reactor cores. | |||
==Threshold== | |||
During the [[Sesa 'Refumee's heretic faction|Heretic]] uprising, the [[Thel 'Vadam|Arbiter]], while on the [[Threshold gas mine|gas mine]] in the atmosphere of [[Threshold]], came across a Flood containment facility which had been compromised by the Heretics. This explained the presence of [[Sentinel]]s, which had previously been unexplained. The Sentinels at this facility were under the command of 343 Guilty Spark, who had escaped the ''Pillar of Autumn'' mere moments before it and Installation 04 detonated.<ref>'''[[Halo: Combat Evolved]]''', last scene</ref> The Flood at this facility were presumably killed when the facility went into [[Raid on the Threshold gas mine|free fall]].<ref>'''[[Halo 2]]''', campaign level ''[[The Oracle]]''</ref> | |||
==Other appearances== | |||
[[File:Cold Storage v2.jpg|thumb|250px|[[Cold Storage|A Flood containment facility]] on Installation 05.]] | |||
Flood containment facilities appear in copious locations. It is also likely that there is a Flood containment facility at each ring, as there was one on both [[Installation 04|Alpha Halo]] and [[Installation 05|Delta Halo]]; however, the one located on Delta Halo had a massive Flood outbreak, spawning the ''[[Halo 2]]'' campaign missions ''[[Sacred Icon]]'' and ''[[Quarantine Zone]]'', as well as the ''Halo 2'' multiplayer maps [[Lockout]], [[Backwash]] and [[Containment]]. | |||
The ''[[Halo 3]]'' map [[Isolation]] also features contained Flood, but rather than being inside a containment facility, it is instead inside a part of the land that has been blocked off with a small [[Sentinel Wall]]. The ''Halo 3'' map [[Cold Storage]] is also located in a cryogenic containment facility located on Delta Halo. The ''[[Halo Wars]]'' [[Skirmish]] map [[Release (level)|Release]] is located in an area that has a containment facility being overrun by the Flood, evidenced by the external Flood biomass. This facility can be exploited by the players by releasing the Flood against the opponent's base. | |||
==List of appearances== | |||
*''[[Halo: Combat Evolved]]'' {{1st}} | |||
*''[[Halo: The Flood]]'' | |||
*''[[Halo 2]]'' | |||
*''[[Halo Graphic Novel]] | |||
**''[[Breaking Quarantine]] | |||
*''[[Halo 3]]'' | |||
*''[[Halo Wars]]'' | |||
*''[[Halo: Combat Evolved Anniversary]]'' | |||
*''[[Halo 2: Anniversary]]'' | |||
*''[[Halo: Official Spartan Field Manual]]'' {{Mo}} | |||
[[Category: | ==Sources== | ||
{{Ref/Sources}} | |||
{{Forerunner|array}} | |||
[[Category:Forerunner buildings]] | |||
Latest revision as of 19:34, March 19, 2022
Flood containment facilities were facilities used by the Forerunners to contain the Flood while studying them. The Flood specimens themselves were held in stasis in the wake of the Forerunner-Flood war.[1]
Installation 04[edit]
The Flood containment facility on Installation 04 was hidden deep under a swamp. During the Battle of Installation 04, it was secured initially by Covenant forces, who, upon discovering the Flood, were massacred and forced to lock down the facility. In the ensuing melee, (what appears to be) all Sangheili were either killed or infected, with only a few lances of Unggoy and Kig-Yar remaining.
Later, Captain Jacob Keyes, in desperate need of weapons to arm his troops for their potentially long guerrilla war, went to the facility with Sgt. Johnson and a part of Fire Team Charlie under the assumption that it was a weapons cache after the UNSC forces had interrogated a Sangheili named 'Qualomee, who had lied to them that it was. After losing two Marines, the first squad with Captain Keyes and Johnson continued until they found a locked door, which they eventually got through. All team members were directly infected by the Flood except Sgt. Johnson. The routine recovery mission was tossed into utter chaos, with both human and Covenant forces being destroyed by the horrors that had been imprisoned for countless centuries.[2]
By the time John-117 arrived at the location, the initial battle was over, with the remaining Covenant forces scattered and disorganized and the remaining human forces holed up in the entrances, lashing out at anything that came near. The Flood itself, as if sensing a potentially new victim, quietly withdrew to the hole in which they sprang and prepared to attack their new enemy, leaving only hideous remains of their earlier killing spree. After the Master Chief made his way through the swamp and into the facility, he encountered scattered Covenant, grisly remains of a terrible battle, a crazed Marine who was scared out of his mind and a single recording chip that told the entire story.
Inside the facility, a small three-man Marine fire team was found. They were the only other Marines to leave the main containment building besides Sgt. Johnson. They were found by the Chief, but immediately came under attack by the Flood.[3]
After fighting back the Flood and making his way back to the surface, the Master Chief regrouped with what remained of Corporal Lovik's second squad and valiantly led them to the center of the swamp, fighting back Flood by the dozen. As he reached the center, the Monitor of the installation, 343 Guilty Spark, who was patrolling the area with Sentinels in an attempt to contain the outbreak of Flood, came across the Chief and his Marines. Identifying him as a Reclaimer, he abducted him, teleporting the Chief away from the swamp into the Library to retrieve the Index.
This area was destroyed, along with the rest of Installation 04, when John-117 detonated the crashed UNSC Pillar of Autumn's reactor cores.
Threshold[edit]
During the Heretic uprising, the Arbiter, while on the gas mine in the atmosphere of Threshold, came across a Flood containment facility which had been compromised by the Heretics. This explained the presence of Sentinels, which had previously been unexplained. The Sentinels at this facility were under the command of 343 Guilty Spark, who had escaped the Pillar of Autumn mere moments before it and Installation 04 detonated.[4] The Flood at this facility were presumably killed when the facility went into free fall.[5]
Other appearances[edit]

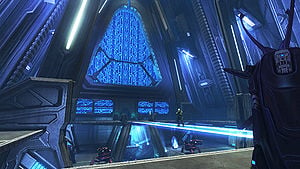
Flood containment facilities appear in copious locations. It is also likely that there is a Flood containment facility at each ring, as there was one on both Alpha Halo and Delta Halo; however, the one located on Delta Halo had a massive Flood outbreak, spawning the Halo 2 campaign missions Sacred Icon and Quarantine Zone, as well as the Halo 2 multiplayer maps Lockout, Backwash and Containment.
The Halo 3 map Isolation also features contained Flood, but rather than being inside a containment facility, it is instead inside a part of the land that has been blocked off with a small Sentinel Wall. The Halo 3 map Cold Storage is also located in a cryogenic containment facility located on Delta Halo. The Halo Wars Skirmish map Release is located in an area that has a containment facility being overrun by the Flood, evidenced by the external Flood biomass. This facility can be exploited by the players by releasing the Flood against the opponent's base.
List of appearances[edit]
- Halo: Combat Evolved (First appearance)
- Halo: The Flood
- Halo 2
- Halo Graphic Novel
- Halo 3
- Halo Wars
- Halo: Combat Evolved Anniversary
- Halo 2: Anniversary
- Halo: Official Spartan Field Manual (Mentioned only)
Sources[edit]
- ^ Halo 2 Instruction Manual, page 2
- ^ Halo: The Flood
- ^ Halo: Combat Evolved, level 343 Guilty Spark
- ^ Halo: Combat Evolved, last scene
- ^ Halo 2, campaign level The Oracle

