Another Day at the Beach: Difference between revisions
From Halopedia, the Halo wiki
m (→Synopsis) |
m (Final tweaks) Tag: Mobile edit |
||
| (110 intermediate revisions by 55 users not shown) | |||
| Line 1: | Line 1: | ||
{{ | {{Status|RealWorld}} | ||
{{ | {{#widget:YouTube|id=VIwLWRJ-kWI|width=300|right}} | ||
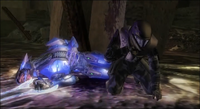
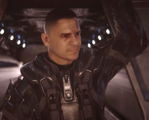
'''''Another Day at the Beach''''' is a bonus video on the ''[[Halo 2]]'' [[Halo 2 Multiplayer Map Pack|Multiplayer Map Pack]]. It is a pre-rendered [[Cutscene|cinematic]] that depicts the events following [[Second Squad]]'s [[D77-TC Pelican|Pelican]] after it was shot down by the [[Protos-pattern Scarab|Scarab]] in the opening cinematic of the ''[[Halo 2]]'' campaign level [[Outskirts]]. The map pack disc also contains ''[[Halo 2: Killtacular]]'', which goes over the making of the cinematic. | |||
A remastered version of ''Another Day at the Beach'', animated by [[Blur Studio]], was released alongside ''[[Halo 2: Anniversary]]''. The cinematic was initially hosted on [[Halo Channel]] before the latter was shut down; the cinematic was then made available through the [[main menu|menu]] in ''[[Halo: The Master Chief Collection]]''.{{Ref/Game|MCC|Main menu|Detail=Extras - Videos - Halo 2: Anniversary Cinematics}}{{Ref/Site|URL= https://support.halowaypoint.com/hc/en-us/articles/4402601893268-Halo-The-Master-Chief-Collection-MCC-Patch-Notes-June-2021|Site=Halo Support|Page=Halo: The Master Chief Collection (MCC) Patch Notes - June 2021|D=21|M=06|Y=2021}} | |||
== | ==Plot synopsis== | ||
{{#widget:YouTube|id=GYDklklJYog|width=300|right}} | |||
Three Pelicans are flying low above a highway in [[Old Mombasa]] when they are ambushed by a Scarab. One of the Pelicans, carrying Sergeant [[Marcus Stacker]]'s unit, is shot down by the Scarab; it flies over [[Hotel Zanzibar]], where it is spotted by a Sangheili. Private [[O'Brien (Mombasa)|O'Brien]] and the Pelican's [[pilot]]s are killed in the crash. The survivors (Stacker, [[Butkus]], [[Fones]], and [[Walpole]]) decide to seek refuge in the ruins of Hotel Zanzibar. | |||
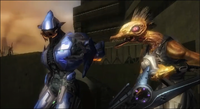
The Sangheili sends in two Unggoy Minors and a Kig-Yar Sniper to prepare an ambush, and the sniper nearly hits Butkus. Walpole, the squad's sharpshooter, easily takes out the Kig-Yar. The Kig-Yar's body falls from the ledge and lands next to the two Unggoy; frightened by the body, the Unggoy drop their weapons and flee. The Sangheili then activates his [[active camouflage]] and leaps down towards the ODSTs. | |||
The cloaked Sangheili surprises the ODSTs; he slashes his [[Pelosus-pattern energy sword|energy sword]] at Butkus, cutting his battle rifle in half. He picks up one of the Unggoy's discarded plasma pistol. The ODSTS then scan for the Sangheili, who throws a [[Anskum-pattern plasma grenade|plasma grenade]] at Fones' helmet. The ODST takes the helmet off and throws it back at the Sangheili; the explosion disables his active camouflage. Revealed, the Sangheili jumps down and grabs Walpole, using him as a hostage, with the energy sword at his throat. Butkus fires an overcharged burst at the signal of Fones (Stacker in ''Halo 2: Anniversary''), who then fires a burst of his battle rifle to kill the Sangheili after the plasma bolt disables the Sangheili's shields. | |||
As the ODSTs recover from their encounter, [[Cortana]] contacts Stacker, who reports on their situation. Cortana tells him to find a safe spot and that they will come to him. | |||
* | == Appearances == | ||
*[[ | {{Featurelist|secondcolumn=title-5 | ||
|title-1=Characters| | |||
;Human | |||
*[[Avery Johnson]] | |||
*[[Butkus]] {{1st}} | |||
*[[John-117]] | |||
*[[Fones]] {{1st}} | |||
*[[Marcus Stacker]] | |||
*[[O'Brien (Mombasa)|O'Brien]] {{1st}} | |||
*[[Walpole]] {{1st}} | |||
;AI | |||
*[[Cortana]] | |||
*[[ | |title-2=Species and entities| | ||
*[[Human]] | |||
*[[Kig-Yar]] (''Ruuhtian'') | |||
**[[Kig-Yar Sniper|Sniper]] | |||
*[[Sangheili]] | |||
*[[Unggoy]] | |||
**[[Unggoy Minor|Minor]] | |||
|title-3=Organizations| | |||
*[[ | *[[Covenant]] | ||
*[[ | **[[Covenant military]] | ||
*[[ | *[[UEG]] | ||
*[[ | **[[United Nations Space Command]] | ||
*[[ | ***[[UNSC Marine Corps]] | ||
* | ****[[Orbital Drop Shock Troopers]] | ||
* | |||
= | |title-4=Locations| | ||
[[ | *[[Sol system]] | ||
[[ | **[[Earth]] | ||
**[[Africa]] | |||
***[[East African Protectorate]] | |||
****[[Mombasa]] | |||
*****[[New Mombasa]] | |||
*****[[Old Mombasa]] | |||
******[[Hotel Zanzibar]] | |||
|title-5=Events| | |||
*[[Human-Covenant War]] | |||
**[[Battle for Earth]] | |||
***[[Battle of Mombasa]] | |||
|title-6=Vehicles| | |||
====UNSC==== | |||
*[[D77-TC Pelican]] | |||
====Covenant==== | |||
*[[Scarab]] | |||
**{{Pattern|Protos|Scarab}} | |||
|title-7=Weapons| | |||
====UNSC==== | |||
*[[BR55 battle rifle]] | |||
*[[M6C magnum]] | |||
*[[M9 fragmentation grenade]] | |||
*[[SRS99C-S2 AM sniper rifle]] | |||
== | ====Covenant==== | ||
*[[Energy sword]] | |||
**{{Pattern|Pelosus|energy sword}} | |||
*[[Focus cannon]] | |||
*[[Heavy plasma repeater]] | |||
*[[Plasma grenade]] | |||
**{{Pattern|Anskum|plasma grenade}} | |||
*[[Plasma pistol]] | |||
**{{Pattern|Eos'Mak|plasma pistol}} | |||
*[[Beam rifle]] | |||
**{{Pattern|Sulok|beam rifle}} | |||
|title-8=Equipment and technology| | |||
;Armor | |||
*[[Kig-Yar combat harness]] | |||
*[[MJOLNIR Powered Assault Armor]] | |||
**[[MJOLNIR Powered Assault Armor/Mark VI|Mark VI]] | |||
*[[ODST armor]] | |||
*[[Sangheili harness]] | |||
**[[Combat harness]] | |||
*[[Unggoy combat harness]] | |||
;Equipment | |||
*[[Active camouflage]] | |||
*[[Energy shield]] | |||
**[[Sangheili personal energy shield]] | |||
}} | |||
''' | ==Transcript== | ||
*'''Marine (COM)''': "Immediate; [[Grid Kilo 23]] is hot. Recommend mission abort." | |||
''The [[Bungie]] logo is shown.'' | |||
''' | *'''Pilot (COM)''': "Roger, recon. ''(To Sergeant Johnson)'' It's your call, Sarge." | ||
*'''[[Sergeant Major]] [[Avery Johnson]]''': "We're going in. Get tactical, Marines!" | |||
''' | ''Five [[ODST]]s from [[Second Squad#Battle of Mombasa|second squad]] are inside one of the Pelican's troop bay. Marcus Stacker is standing between the troop bay and the cockpit. [[O'Brien (Mombasa)|O'Brien]] and [[Fones]] to the left, [[Walpole]] and [[Butkus]] to the right.'' | ||
*'''Gunnery Sergeant Marcus Stacker''': "You heard the man, boys. It's time for some hazard pay!" | |||
''The | ''The ODSTs enthusiastically prepare for combat. Butkus cocks his battle rifle, while O'Brien hits Fones'arm. Walpole is sitting in the corner with his [[SRS99C-S2 AM sniper rifle|sniper rifle]].'' | ||
( | *'''Pilot (COM)''': "Thirty seconds out... stand by to... woah..." | ||
''The pilot goes silent as a huge [[Protos-pattern Scarab|Scarab]] comes into view. Its leg spears a truck which explodes, then its main gun focuses and fires, destroying the lead Pelican. The two other Pelicans veer off, as the Scarab's front [[heavy plasma repeater]] track them. The rightward dropship containing Stacker and the fireteam of ODSTs catches a burst of plasma on its left engine.'' | |||
''Cuts to a Sangheili outside of the Hotel Zanzibar. He looks up and sees the ODSTs' Pelican, with its engines screaming and burning, flying fast over the Hotel Zanzibar. He points at the Pelican, looking at the [[lance]] he is commanding: two [[Unggoy Minor]]s and a [[Kig-Yar Sniper]].'' | |||
''' | *'''Sangheili''': "Wort, wort, wort!" | ||
''The three subordinates head towards Hotel Zanzibar, with the two Unggoy mumbling. Cuts to the Pelican swerving towards the ground. Its starboard engine explodes and begins to flame, and the dropship crash lands on the beach behind Hotel Zanzibar. Butkus stands up from being moved from the right to the left side of the Pelican. Fones is sitting in the same place checking on O'Brien to his right. Walpole is on the left side on the ground crawling to the cockpit. Stacker, bleeding at the temple, stumbles to the Pelican's wall for support.'' | |||
*'''Stacker''': ''(coughs)'' "Status!" | |||
''' | ''Cuts to Fones looking up from O'Brien's body.'' | ||
*'''Fones''': "Sir, O'Brien's down." | |||
'' | ''Cuts to Walpole looks towards Stacker after peering inside the cockpit.'' | ||
*'''Walpole''': "We lost our pilots, too." | |||
''' | *'''Stacker''': "Grab their tags and ammo." | ||
''Stacker joins Butkus, who exits the Pelican and looking towards Hotel Zanzibar.'' | |||
''' | *'''Butkus''': "Sarge, we better get moving." | ||
'''Stacker | *'''Stacker''': "Agreed. We'll find better cover in those buildings. Butkus, you take point." | ||
''Cuts to the Sangheili standing on the building and looking at the crashed Pelican. He points at the Pelican, and the two Unggoy jump down. The Kig-Yar is about to walk down too, but the Sangheili stops it, and signals the Kig-Yar to stay back and take the high ground in the destroyed building. The Kig-Yar looks up, says something similar to "yay" sarcastically, and walks away. The Sangheili walks down.'' | |||
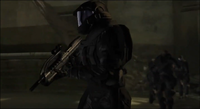
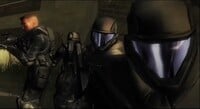
''Cuts to the ODSTs. They find cover behind a wall. Stacker signals to Butkus, who moves out of cover and almost shot by the Kig-Yar sniper.'' | |||
( | *'''Butkus''': "Hello! ''(turns back to Walpole)'' Sniper... Third floor to the left." | ||
''' | *'''Walpole''': "Here, let me give him my "Welcome to [[Earth]]" gift basket." | ||
''' | ''Walpole puts his sniper rifle above cover. The Kig-Yar takes a second shot but misses again, and is killed by Walpole. The Kig-Yar's body falls from the ledge and lands next to the two Unggoy, causing one of them to drop his [[Eos'Mak-pattern plasma pistol|pistol]] and flee. A [[M9 frag grenade|frag grenade]] explodes nearby, and the second Unggoy drops its weapon and flees as well. The first Unggoy runs by the Sangheili, who then grabs the second one by the neck, and growls loudly at the Unggoy before throwing it aside. The Sangheili then activates its [[active camouflage]] and jumps down towards the ODSTs. Cuts to the ODSTs walking slowly toward the ground floor of the hotel. Suddenly, the Sangheili activates its energy sword and lunges at Butkus, cutting his [[BR55 battle rifle|battle rifle]] in half.'' | ||
''Butkus yells in surprise and falls down. He stands up, picking up one of the plasma pistols.'' | |||
*'''Walpole''': "Damn, where is he? Anybody see him?" | |||
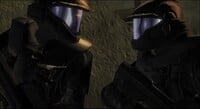
''The ODSTs sweep the area in a defensive position, sweeping for the Sangheili. A [[Anskum-pattern plasma grenade|plasma grenade]] is seen flying through the air and sticks to Fones' helmet. He grunts in surprise and throws the helmet away. It explodes near the Sangheili, deactivating its active camouflage. Crying in surprise, the Sangheili jumps down and grabs Walpole by the head, using him as a hostage, with the energy sword now activated. Butkus charges his plasma pistol, while Stacker and Fones aim their battle rifles at the Sangheili, who growls incomprehensibly at them.'' | |||
( | *'''Walpole''': ''(strained, groans)'' "Take him, guys...!" | ||
'' | ''The Sangheili roars.'' | ||
*'''Fones''':{{Ref/Note|Id=H2A|In ''Halo 2'', it was Fones who said, "Cook the bastard" to Butkus, and shot the Sangheili with his battle rifle. In ''Halo 2: Anniversary'', the role was given to Stacker. See this article's [[#Production notes|production notes]] section.}} ''(quietly)'' "Cook the bastard." | |||
''' | ''Butkus discharges the plasma pistol, taking down the Sangheili's energy shielding. Fones{{Ref/NoteReuse|H2A}} fires a burst at the Sangheili, killing it. The body and Walpole fall to the ground. The Sangheili's hand slowly unclenches the energy sword, deactivating it. With the Sangheili's blood splattered across his helmet, a gasping Walpole rubs his neck.'' | ||
( | *'''[[Cortana]] (COM)''': "Second squad, this is Cortana. What is your status, over?" | ||
( | ''Stacker (Butkus in ''Halo 2: Anniversary'') helps Walpole stand up.'' | ||
*'''Stacker''': "We're operational, ma'am...barely. Our pilots didn't make it." | |||
( | ''Fones kicks the Sangheili's body over and stares at it. (In ''Halo 2: Anniversary'', Fones looks around the surrounding area).'' | ||
''' | *'''Cortana (COM)''': "Find a hole, stay put. We'll come to you." | ||
''The camera slowly pans away from the ODSTs, towards [[New Mombasa]], and fades to black.'' | |||
''' | ==Production notes== | ||
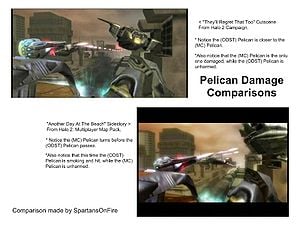
[[File:Pelican Damage Comparisons.jpg|300px|thumb|A comparison between the two cinematics, featuring different damaged Pelicans.]] | |||
{{Quote|We looked at the way we combined animation and sound and everything else into the cinematics in ''Halo 2'', and how we can make that process better.|[[Nathan Walpole]]{{Ref/Game|Id=Killtacular|H2MMP|Halo 2: Killtacular}}}} | |||
''Another Day at the Beach'' was produced by the [[Bungie]]'s animation team — along with Cinematic Designer [[CJ Cowan]] and the audio team — at the same time as the development of the [[Bonus Map Pack|Bonus]], [[Killtacular Pack|Killtacular]] and [[Maptacular Pack|Maptacular]] map packs. The team used the development as an opportunity to review the production pipeline for cinematics and develop new tools for the process. The cinematic is rendered in the [[Blam engine]]; though, since it is not rendered in real-time, the team could incorporate additional audio as well as particle and lighting effects that would not be possible in-game.{{Ref/Reuse|Killtacular}} | |||
The cinematic's title is a reference to the second chapter title of the level Outskirts, titled "A Day At The Beach". Rather than creating an entirely new narrative, CJ Cowan wanted the narrative to parallel the in-game events; thus, he decided on a story that follows Sergeant Stacker's unit from Outskirts, as Cowan could then connect both the beginning and the end to the in-game narrative.{{Ref/Reuse|Killtacular}} This les to a minor retcon; whereas Stacker's Pelican was not shot by the Scarab's heavy plasma repeater in the original cinematic, ''Another Day at the Beach'' depicts the Pelican's left engines briefly taking fire from the heavy plasma repeater, which then proceeds to shoot down the Pelican carrying the Master Chief. Additionally, Stacker and his marines are wearing [[ODST armor]]s, despite wearing the [[UNSC Marine Corps Battle Dress Uniform|Marine BDU]] in-game. Other than Stacker, the ODSTs are named after the animators: [[John Butkus]], [[Bill O'Brien]], Jeremy Fones, and [[Nathan Walpole]]. They were not voiced by the animators.{{Ref/Twitter|Anim8rJB|1794523914196127943|John Butkus|Quote=another oldie Halo 2 sequence I did from Another Day the Beach - matched up the audio best I could...the ODSTs were all animators working on the game, and no I didn't voice Butkus.}} | |||
''' | The ''Halo 2: Anniversary'' version of the cinematic created by Blur made the following: | ||
* Since the cinematic was created concurrently with the cinematic in Outskirts, the cinematic reuses scenes from the Outskirts cinematic; subsequently, both cinematics correctly depict Stacker's Pelican taking fire from the Scarab's heavy plasma repeater. | |||
* The Covenant characters do not use the unique dialogue created for the cinematic, reusing in-game dialogue instead. The Sangheili notably does not order his troops with "Wort, wort, wort!" and does not roar while holding Walpole hostage. | |||
* Walpole does not discard his sniper rifle for his sidearm after taking out the Kig-Yar Sniper. | |||
* When the Unggoy flee, the Sangheili picks up and growls at the first one rather than the second one. | |||
* The Sangheili is already charging for the ODSTs when Fones throw his helmet and the primed grenade back. | |||
* Fones has a unique face model that featured a blonde mohawk, rather than sharing the same face model with Stacker, who was originally distinguished by his bloodied cheeks. | |||
* While being held hostage, Walpole pulls down on the Sangheili to create an opening for his allies to fire at the Sangheili. | |||
* Stacker, rather than Fones, works with Butkus to eliminate the Sangheili. In addition, it is also Stacker, instead of Butkus, who helps Walpole to his feet afterwards. | |||
* Fones does not kick the Sangheili's body at the end. | |||
== Trivia == | |||
The Sangheili's [[combat harness]] is colored blue, which typically denotes the rank of [[Sangheili Minor|Minor]]; however, Sangheili of this rank are generally not permitted to use the energy sword.{{Ref/Book|Enc09|Page=335}} | |||
''' | ==Gallery== | ||
===''Halo 2''=== | |||
<gallery> | |||
File:H2 AnotherDayAtTheBeach Pelican Walpole&Butkus.png|Walpole (left) and Butkus (right) onboard the Pelican. | |||
File:H2 AnotherDayAtTheBeach Pelican OBrien&Fones.png|O'Brien (left) and Fones (right) onboard the Pelican. | |||
File:H2 AnotherDayAtTheBeach Stacker.png|An injured Stacker in the Pelican. | |||
File:H2 AnotherDayAtTheBeach Cockpit.png|Walpole reports the pilots' deaths. | |||
File:H2 AnotherDayAtTheBeach Stacker&Butkus.png|Stacker and Butkus exit the Pelican. | |||
File:H2 AnotherDayAtTheBeach CrashSite.png|The crashed Pelican on the beach. | |||
File:H2 AnotherDayAtTheBeach EliteOrder.png|The Sangheili commanding a pair of Unggoy. | |||
File:H2 AnotherDayAtTheBeach Elite&Jackal.png|The Sangheili and the Kig-Yar Sniper. | |||
File:H2 AnotherDayAtTheBeach Fones.png|Fones secures the squad's rear. | |||
File:H2 AnotherDayAtTheBeach Butkus.jpg|Butkus, with the rest of second squad behind him. | |||
File:H2 AnotherDayAtTheBeach Walpole&Butkus.jpg|Butkus (right) tells Walpole (left) the location of an enemy sniper. | |||
File:H2 AnotherDayAtTheBeach Walpole.jpg|Walpole takes aim while the Kig-Yar sniper missed him. | |||
File:H2 AnotherDayAtTheBeach BackToBack.png|The ODSTs sweeping the area for the Sangheili. | |||
File:H2 AnotherDayAtTheBeach Hostage.png|The Sangheili takes Walpole hostage. | |||
File:H2 AnotherDayAtTheBeach Combo.png|Fones aiming his battle rifle while Butkus overcharges his plasma pistol. | |||
File:H2 AnotherDayAtTheBeach Defeated.png|The Sangheili's blood splattered on Walpole's helmet. | |||
</gallery> | |||
(Walpole | ===''Halo 2: Anniversary''=== | ||
<gallery> | |||
File:H2A Beach Stacker.png|Stacker prior to the Pelican crash. | |||
File:H2A-OutskirtsODST.jpg|One of the ODSTs before the crash. | |||
File:H2A Beach - Pelican Crash.jpg|The crashed Pelican on the beach. | |||
File:H2A Beach - SpecOps Orders.jpg|The Sangheili commanding the Unggoy. | |||
File:H2A Beach - Elite and Jackal.jpg|The Sangheili and the Kig-Yar Sniper. | |||
File:H2A-AnotherDay1.jpg|Stacker secure the squad's rear. | |||
File:H2A Beach - Sniper.jpg|The Kig-Yar Sniper takes aim. | |||
File:H2A Beach - Taking Cover.jpg|Butkus (right) tells Walpole (center) the location of an enemy sniper. | |||
File:H2A Beach - Jones Sniper.jpg|Walpole takes aim. | |||
File:H2A Beach - Jones and Elite.jpg|The Sangheili takes Walpole hostage. | |||
File:H2A Beach - Noob Combo.jpg|Butkus and Fones raise their weapons. | |||
File:StackerBattleRifle.png|Stacker tells Butkus to fire. | |||
</gallery> | |||
==Notes== | |||
{{Ref/Notes}} | |||
== | ==Sources== | ||
{{Ref/Sources}} | |||
[[Category:Cinematics]] | [[Category:Cinematics]] | ||
[[Category: Halo 2]] | [[Category:Halo 2 Multiplayer Map Pack]] | ||
Latest revision as of 12:45, November 30, 2024
A remastered version of Another Day at the Beach, animated by Blur Studio, was released alongside Halo 2: Anniversary. The cinematic was initially hosted on Halo Channel before the latter was shut down; the cinematic was then made available through the menu in Halo: The Master Chief Collection.[1][2]
Plot synopsis[edit]
The Sangheili sends in two Unggoy Minors and a Kig-Yar Sniper to prepare an ambush, and the sniper nearly hits Butkus. Walpole, the squad's sharpshooter, easily takes out the Kig-Yar. The Kig-Yar's body falls from the ledge and lands next to the two Unggoy; frightened by the body, the Unggoy drop their weapons and flee. The Sangheili then activates his active camouflage and leaps down towards the ODSTs.
The cloaked Sangheili surprises the ODSTs; he slashes his energy sword at Butkus, cutting his battle rifle in half. He picks up one of the Unggoy's discarded plasma pistol. The ODSTS then scan for the Sangheili, who throws a plasma grenade at Fones' helmet. The ODST takes the helmet off and throws it back at the Sangheili; the explosion disables his active camouflage. Revealed, the Sangheili jumps down and grabs Walpole, using him as a hostage, with the energy sword at his throat. Butkus fires an overcharged burst at the signal of Fones (Stacker in Halo 2: Anniversary), who then fires a burst of his battle rifle to kill the Sangheili after the plasma bolt disables the Sangheili's shields.
As the ODSTs recover from their encounter, Cortana contacts Stacker, who reports on their situation. Cortana tells him to find a safe spot and that they will come to him.
Appearances[edit]
Characters
Organizations |
VehiclesWeaponsEquipment and technology
|
Transcript[edit]
- Marine (COM): "Immediate; Grid Kilo 23 is hot. Recommend mission abort."
The Bungie logo is shown.
- Pilot (COM): "Roger, recon. (To Sergeant Johnson) It's your call, Sarge."
- Sergeant Major Avery Johnson: "We're going in. Get tactical, Marines!"
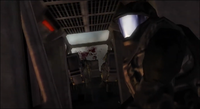
Five ODSTs from second squad are inside one of the Pelican's troop bay. Marcus Stacker is standing between the troop bay and the cockpit. O'Brien and Fones to the left, Walpole and Butkus to the right.
- Gunnery Sergeant Marcus Stacker: "You heard the man, boys. It's time for some hazard pay!"
The ODSTs enthusiastically prepare for combat. Butkus cocks his battle rifle, while O'Brien hits Fones'arm. Walpole is sitting in the corner with his sniper rifle.
- Pilot (COM): "Thirty seconds out... stand by to... woah..."
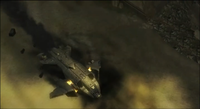
The pilot goes silent as a huge Scarab comes into view. Its leg spears a truck which explodes, then its main gun focuses and fires, destroying the lead Pelican. The two other Pelicans veer off, as the Scarab's front heavy plasma repeater track them. The rightward dropship containing Stacker and the fireteam of ODSTs catches a burst of plasma on its left engine.
Cuts to a Sangheili outside of the Hotel Zanzibar. He looks up and sees the ODSTs' Pelican, with its engines screaming and burning, flying fast over the Hotel Zanzibar. He points at the Pelican, looking at the lance he is commanding: two Unggoy Minors and a Kig-Yar Sniper.
- Sangheili: "Wort, wort, wort!"
The three subordinates head towards Hotel Zanzibar, with the two Unggoy mumbling. Cuts to the Pelican swerving towards the ground. Its starboard engine explodes and begins to flame, and the dropship crash lands on the beach behind Hotel Zanzibar. Butkus stands up from being moved from the right to the left side of the Pelican. Fones is sitting in the same place checking on O'Brien to his right. Walpole is on the left side on the ground crawling to the cockpit. Stacker, bleeding at the temple, stumbles to the Pelican's wall for support.
- Stacker: (coughs) "Status!"
Cuts to Fones looking up from O'Brien's body.
- Fones: "Sir, O'Brien's down."
Cuts to Walpole looks towards Stacker after peering inside the cockpit.
- Walpole: "We lost our pilots, too."
- Stacker: "Grab their tags and ammo."
Stacker joins Butkus, who exits the Pelican and looking towards Hotel Zanzibar.
- Butkus: "Sarge, we better get moving."
- Stacker: "Agreed. We'll find better cover in those buildings. Butkus, you take point."
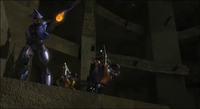
Cuts to the Sangheili standing on the building and looking at the crashed Pelican. He points at the Pelican, and the two Unggoy jump down. The Kig-Yar is about to walk down too, but the Sangheili stops it, and signals the Kig-Yar to stay back and take the high ground in the destroyed building. The Kig-Yar looks up, says something similar to "yay" sarcastically, and walks away. The Sangheili walks down.
Cuts to the ODSTs. They find cover behind a wall. Stacker signals to Butkus, who moves out of cover and almost shot by the Kig-Yar sniper.
- Butkus: "Hello! (turns back to Walpole) Sniper... Third floor to the left."
- Walpole: "Here, let me give him my "Welcome to Earth" gift basket."
Walpole puts his sniper rifle above cover. The Kig-Yar takes a second shot but misses again, and is killed by Walpole. The Kig-Yar's body falls from the ledge and lands next to the two Unggoy, causing one of them to drop his pistol and flee. A frag grenade explodes nearby, and the second Unggoy drops its weapon and flees as well. The first Unggoy runs by the Sangheili, who then grabs the second one by the neck, and growls loudly at the Unggoy before throwing it aside. The Sangheili then activates its active camouflage and jumps down towards the ODSTs. Cuts to the ODSTs walking slowly toward the ground floor of the hotel. Suddenly, the Sangheili activates its energy sword and lunges at Butkus, cutting his battle rifle in half.
Butkus yells in surprise and falls down. He stands up, picking up one of the plasma pistols.
- Walpole: "Damn, where is he? Anybody see him?"
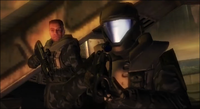
The ODSTs sweep the area in a defensive position, sweeping for the Sangheili. A plasma grenade is seen flying through the air and sticks to Fones' helmet. He grunts in surprise and throws the helmet away. It explodes near the Sangheili, deactivating its active camouflage. Crying in surprise, the Sangheili jumps down and grabs Walpole by the head, using him as a hostage, with the energy sword now activated. Butkus charges his plasma pistol, while Stacker and Fones aim their battle rifles at the Sangheili, who growls incomprehensibly at them.
- Walpole: (strained, groans) "Take him, guys...!"
The Sangheili roars.
- Fones:[Note 1] (quietly) "Cook the bastard."
Butkus discharges the plasma pistol, taking down the Sangheili's energy shielding. Fones[Note 1] fires a burst at the Sangheili, killing it. The body and Walpole fall to the ground. The Sangheili's hand slowly unclenches the energy sword, deactivating it. With the Sangheili's blood splattered across his helmet, a gasping Walpole rubs his neck.
- Cortana (COM): "Second squad, this is Cortana. What is your status, over?"
Stacker (Butkus in Halo 2: Anniversary) helps Walpole stand up.
- Stacker: "We're operational, ma'am...barely. Our pilots didn't make it."
Fones kicks the Sangheili's body over and stares at it. (In Halo 2: Anniversary, Fones looks around the surrounding area).
- Cortana (COM): "Find a hole, stay put. We'll come to you."
The camera slowly pans away from the ODSTs, towards New Mombasa, and fades to black.
Production notes[edit]
- "We looked at the way we combined animation and sound and everything else into the cinematics in Halo 2, and how we can make that process better."
- — Nathan Walpole[3]
Another Day at the Beach was produced by the Bungie's animation team — along with Cinematic Designer CJ Cowan and the audio team — at the same time as the development of the Bonus, Killtacular and Maptacular map packs. The team used the development as an opportunity to review the production pipeline for cinematics and develop new tools for the process. The cinematic is rendered in the Blam engine; though, since it is not rendered in real-time, the team could incorporate additional audio as well as particle and lighting effects that would not be possible in-game.[3]
The cinematic's title is a reference to the second chapter title of the level Outskirts, titled "A Day At The Beach". Rather than creating an entirely new narrative, CJ Cowan wanted the narrative to parallel the in-game events; thus, he decided on a story that follows Sergeant Stacker's unit from Outskirts, as Cowan could then connect both the beginning and the end to the in-game narrative.[3] This les to a minor retcon; whereas Stacker's Pelican was not shot by the Scarab's heavy plasma repeater in the original cinematic, Another Day at the Beach depicts the Pelican's left engines briefly taking fire from the heavy plasma repeater, which then proceeds to shoot down the Pelican carrying the Master Chief. Additionally, Stacker and his marines are wearing ODST armors, despite wearing the Marine BDU in-game. Other than Stacker, the ODSTs are named after the animators: John Butkus, Bill O'Brien, Jeremy Fones, and Nathan Walpole. They were not voiced by the animators.[4]
The Halo 2: Anniversary version of the cinematic created by Blur made the following:
- Since the cinematic was created concurrently with the cinematic in Outskirts, the cinematic reuses scenes from the Outskirts cinematic; subsequently, both cinematics correctly depict Stacker's Pelican taking fire from the Scarab's heavy plasma repeater.
- The Covenant characters do not use the unique dialogue created for the cinematic, reusing in-game dialogue instead. The Sangheili notably does not order his troops with "Wort, wort, wort!" and does not roar while holding Walpole hostage.
- Walpole does not discard his sniper rifle for his sidearm after taking out the Kig-Yar Sniper.
- When the Unggoy flee, the Sangheili picks up and growls at the first one rather than the second one.
- The Sangheili is already charging for the ODSTs when Fones throw his helmet and the primed grenade back.
- Fones has a unique face model that featured a blonde mohawk, rather than sharing the same face model with Stacker, who was originally distinguished by his bloodied cheeks.
- While being held hostage, Walpole pulls down on the Sangheili to create an opening for his allies to fire at the Sangheili.
- Stacker, rather than Fones, works with Butkus to eliminate the Sangheili. In addition, it is also Stacker, instead of Butkus, who helps Walpole to his feet afterwards.
- Fones does not kick the Sangheili's body at the end.
Trivia[edit]
The Sangheili's combat harness is colored blue, which typically denotes the rank of Minor; however, Sangheili of this rank are generally not permitted to use the energy sword.[5]
Gallery[edit]
Halo 2[edit]
Halo 2: Anniversary[edit]
Notes[edit]
- ^ a b In Halo 2, it was Fones who said, "Cook the bastard" to Butkus, and shot the Sangheili with his battle rifle. In Halo 2: Anniversary, the role was given to Stacker. See this article's production notes section.
Sources[edit]
- ^ Halo: The Master Chief Collection, Main menu: Extras - Videos - Halo 2: Anniversary Cinematics
- ^ Halo Support, Halo: The Master Chief Collection (MCC) Patch Notes - June 2021 (Retrieved on Jun 21, 2021) [archive]
- ^ a b c Halo 2 Multiplayer Map Pack, Halo 2: Killtacular
- ^ Twitter, John Butkus (@Anim8rJB): "another oldie Halo 2 sequence I did from Another Day the Beach - matched up the audio best I could...the ODSTs were all animators working on the game, and no I didn't voice Butkus."
- ^ Halo Encyclopedia (2009 edition), page 335
