Crater: Difference between revisions
From Halopedia, the Halo wiki
m (Text replacement - "{{Article Quote" to "{{Article quote") |
No edit summary |
||
| (4 intermediate revisions by 3 users not shown) | |||
| Line 1: | Line 1: | ||
{{Status|Gameplay}} | {{Status|Gameplay}} | ||
{{Multiplayer map infobox | {{Multiplayer map infobox | ||
|pagelabel=Firefight map | |pagelabel=Firefight map | ||
| Line 8: | Line 7: | ||
|game =[[Halo 3: ODST]] | |game =[[Halo 3: ODST]] | ||
|devname=<code>sc100</code> | |devname=<code>sc100</code> | ||
|location =[[Tayari Plaza (location)|Tayari Plaza]], [[New Mombasa]], [[Kenya]] | |location =[[Tayari Plaza (location)|Tayari Plaza]], [[New Mombasa]], [[Kenya]] | ||
|terrain =Urban | |terrain =Urban | ||
| | |gametypes =[[Firefight (Halo 3: ODST)|Firefight]] | ||
|playernumber =1-4 | |||
|playernumber =1 - 4 | |||
}} | }} | ||
{{Article quote|Fight in [[Veronica Dare|Dare]]'s sunken crash-site.}} | {{Article quote|Fight in [[Veronica Dare|Dare]]'s sunken crash-site.}} | ||
'''Crater '''is a [[Firefight (Halo 3: ODST)|Firefight]] map in ''[[Halo 3: ODST]]'', based on Dare's crash site in [[ | '''Crater '''is a [[Firefight (Halo 3: ODST)|Firefight]] map in ''[[Halo 3: ODST]]'', based on Dare's crash site in the campaign level [[Tayari Plaza]], set in the city of [[New Mombasa]].{{Ref/Site|URL=http://www.bungie.net/News/content.aspx?type=topnews&link=BWU061909|Site=Bungie.net|Page=Bungie Weekly Update: 06.19.09|D=19|M=06|Y=2009}} | ||
==Universe and lore== | |||
Crater is set in [[Tayari Plaza (location)|Tayari Plaza]] in [[New Mombasa Sector 5|Sector 5]] in [[New Mombasa]], [[Kenya]]. After the [[New Mombasa Slipspace Event]], [[Captain (NAVCOM)|Captain]] [[Veronica Dare]]'s [[M8900 drop pod]] crashed into plaza's bottom floor.{{Ref/Level|HR|Tayari Plaza}} | |||
==Layout== | ==Layout== | ||
Crater is a relatively small map, with elevated outer edges surrounding a center area placed considerably lower than the rest, creating a crater shape. In this map, [[ | Crater is a relatively small map, with elevated outer edges surrounding a center area placed considerably lower than the rest, creating a crater shape. In this map, [[Covenant]] spawn from [[Kez'katu-pattern Phantom|Phantoms]] which drop enemies at the side of the map across from the player spawn point, as well as doorways placed around the courtyard. | ||
The player's spawning area consists of two connected parallel tunnels which lead out to a small elevated area. Enemy access to this location is provided by two staircases on the left and right sides of the player area, which also contains a turret in the center. The machine gun turret has a broad field of fire, and is capable of shooting at almost any point on the map, but the location is greatly exposed. | The player's spawning area consists of two connected parallel tunnels which lead out to a small elevated area. Enemy access to this location is provided by two staircases on the left and right sides of the player area, which also contains a turret in the center. The machine gun turret has a broad field of fire, and is capable of shooting at almost any point on the map, but the location is greatly exposed. | ||
There are two versions of this map, one taking place during the day, and the other taking place at night. The night version contains [[Huragok|Engineers]], while the day contains [[Kig-yar Sniper|Jackal Snipers]], who are | There are two versions of this map, one taking place during the day, and the other taking place at night. The night version contains [[Huragok|Engineers]], while the day contains [[Kig-yar Sniper|Jackal Snipers]], who are located on the buildings across from the player spawn point, making pistol counter-sniping difficult. | ||
<!--Strategies sections are being re-evaluated for inclusion - they may be removed in the future. | |||
==Strategies== | ==Strategies== | ||
===Standard Firefight=== | ===Standard Firefight=== | ||
| Line 52: | Line 44: | ||
*Keep the turret intact, as it would be very useful against Pure Forms lurking in the wall. | *Keep the turret intact, as it would be very useful against Pure Forms lurking in the wall. | ||
**If possible, refrain from using it unless necessary. | **If possible, refrain from using it unless necessary. | ||
--> | |||
==Gallery== | ==Gallery== | ||
{{Linkbox|gallery=yes}} | {{Linkbox|gallery=yes}} | ||
<gallery | <gallery> | ||
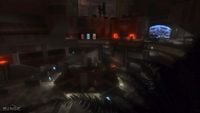
File: | File:Crater.png|The map of Crater in VISR mode. | ||
File:ODST Firefight CraterNight.jpg|The nighttime version of Crater. | File:ODST Firefight CraterNight.jpg|The nighttime version of Crater. | ||
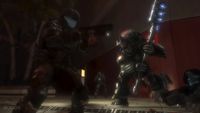
File:H3ODST Firefight Crater.jpg|A [[Jiralhanae Chieftain|Chieftain]] | File:H3ODST Firefight Crater.jpg|A [[Jiralhanae Chieftain|Chieftain]] about to attack an ODST. | ||
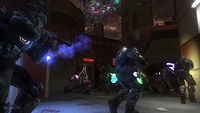
File:H3ODST Firefight Crater2.jpg| | File:H3ODST Firefight Crater2.jpg|Four ODSTs fighting near the top of the staircase | ||
File:H3ODST Firefight Crater3.jpg|A [[lance]] of [[Kig- | File:H3ODST Firefight Crater3.jpg|A [[lance]] of [[Kig-Yar]] approaches the ODSTs. | ||
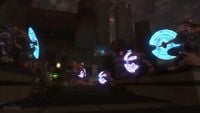
File:DareCrash.jpg|Dare's crashed [[ | File:H3ODST PK Crater 1.jpg|ODSTs taking on a pair of Mgalekgolo. | ||
File:Crater.png| | File:H3ODST PK Crater 2.jpg|An ODST firing a detached [[AIE-486H machine gun|machine gun]] at a group of Kig-Yar. | ||
File:Crater - | File:DareCrash.jpg|Dare's crashed [[M8900 drop pod|SOEIV]] with VISR enabled and disabled. | ||
File:Crater- | File:Crater - Day Weapons.png|Weapon and ammo locations for the daytime variant. | ||
File:Crater-Night Weapons.png|Weapon and ammo locations for the nighttime variant. | |||
File:HMCC H3ODST Crater Map.jpg|Map of Crater (Day) in ''[[Halo: The Master Chief Collection]]''. | |||
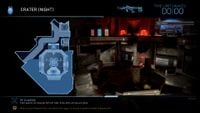
File:HMCC H3ODST CraterNight Map.jpg|Map of Crater (Night) in ''Halo: The Master Chief Collection''. | |||
File:HTMCC-H3ODST-Specopsbuddies.png|Two [[Special Operations Sangheili|Specops Sangheili]] being deployed in ''Halo: The Master Chief Collection''. | |||
</gallery> | </gallery> | ||
Latest revision as of 16:24, November 24, 2024
| Crater | |
|---|---|
| |
| Map overview | |
|
Game: |
|
|
Map file name (?): |
|
| Lore information | |
|
Location: |
|
| Gameplay overview | |
|
Terrain: |
Urban |
|
Recommended number of players: |
1-4 |
|
Recommended gametype(s): |
|
| “ | Fight in Dare's sunken crash-site. | ” |
Crater is a Firefight map in Halo 3: ODST, based on Dare's crash site in the campaign level Tayari Plaza, set in the city of New Mombasa.[1]
Universe and lore[edit]
Crater is set in Tayari Plaza in Sector 5 in New Mombasa, Kenya. After the New Mombasa Slipspace Event, Captain Veronica Dare's M8900 drop pod crashed into plaza's bottom floor.[2]
Layout[edit]
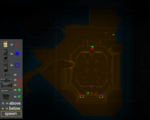
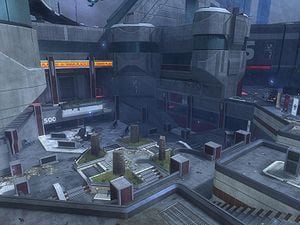
Crater is a relatively small map, with elevated outer edges surrounding a center area placed considerably lower than the rest, creating a crater shape. In this map, Covenant spawn from Phantoms which drop enemies at the side of the map across from the player spawn point, as well as doorways placed around the courtyard.
The player's spawning area consists of two connected parallel tunnels which lead out to a small elevated area. Enemy access to this location is provided by two staircases on the left and right sides of the player area, which also contains a turret in the center. The machine gun turret has a broad field of fire, and is capable of shooting at almost any point on the map, but the location is greatly exposed.
There are two versions of this map, one taking place during the day, and the other taking place at night. The night version contains Engineers, while the day contains Jackal Snipers, who are located on the buildings across from the player spawn point, making pistol counter-sniping difficult.
Gallery[edit]

|
Browse more images in this article's gallery page. |
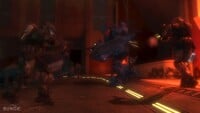
A Chieftain about to attack an ODST.
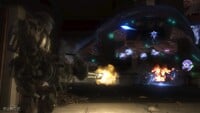
An ODST firing a detached machine gun at a group of Kig-Yar.
Dare's crashed SOEIV with VISR enabled and disabled.
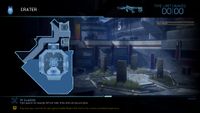
Map of Crater (Day) in Halo: The Master Chief Collection.
Two Specops Sangheili being deployed in Halo: The Master Chief Collection.
Sources[edit]
- ^ Bungie.net, Bungie Weekly Update: 06.19.09 (Retrieved on Jun 19, 2009) [archive]
- ^ Halo: Reach, campaign level Tayari Plaza
| |||||||||||||||||
