Fire Team Charlie: Difference between revisions
From Halopedia, the Halo wiki
No edit summary |
m (Changed the Jenkins link to go to Wallace Jenkin's page directly, instead of the disambiguation page) |
||
| (7 intermediate revisions by 7 users not shown) | |||
| Line 1: | Line 1: | ||
{{ | {{Status|Canon}} | ||
{{Military infobox | {{Military infobox | ||
|image=[[File:Halo-09.jpg|center|300px]] | |image=[[File:Halo-09.jpg|center|300px]] | ||
| Line 23: | Line 23: | ||
{{Main|Fall of Reach}} | {{Main|Fall of Reach}} | ||
During the final stages of the of [[Fall of Reach|Fall of]] [[Reach]], an element of Fire Team Charlie, consisting of [[Sergeant Johnson]] and Privates [[O'Brien (Reach)|O'Brien]], [[Bisenti]] and [[Jenkins]] were stationed aboard [[Gamma Station]] above the planet. The team were struggling to take out a large group of [[Kig-Yar]] [[Kig-Yar Ranger|Rangers]] when a group of [[SPARTAN-II program|SPARTAN- | During the final stages of the of [[Fall of Reach|Fall of]] [[Reach]], an element of Fire Team Charlie, consisting of [[Sergeant Johnson]] and Privates [[O'Brien (Reach)|O'Brien]], [[Bisenti]] and [[Wallace Jenkins|Jenkins]] were stationed aboard [[Gamma Station]] above the planet. The team were struggling to take out a large group of [[Kig-Yar]] [[Kig-Yar Ranger|Rangers]] when a group of [[SPARTAN-II program|SPARTAN-IIs]] led by [[John-117]] intervened. The Marines assisted the SPARTANs with their objective, destroying the NAV database of the [[UNSC Circumference|UNSC ''Circumference'']] which was docked in the station. After this was accomplished, the Marines left the station and boarded the ''Pillar of Autumn''. The ''Autumn'', with Fire Team Charlie aboard, then [[slipstream space|jumped]] away from the battle.{{Ref/Novel|Halo: The Fall of Reach|Chapter=37}} | ||
===Battle of Installation 04=== | ===Battle of Installation 04=== | ||
| Line 30: | Line 30: | ||
When the ''Autumn'' arrived at [[Installation 04]], it found itself under immediate attack from the [[Covenant]], who had followed the ship from Reach. In response, Captain [[Jacob Keyes]] ordered all personnel to evacuate the ship and make landfall on the ring. Fire Team Charlie managed to repel the enemy long enough for them to escape via a [[Bumblebee escape pod]]. | When the ''Autumn'' arrived at [[Installation 04]], it found itself under immediate attack from the [[Covenant]], who had followed the ship from Reach. In response, Captain [[Jacob Keyes]] ordered all personnel to evacuate the ship and make landfall on the ring. Fire Team Charlie managed to repel the enemy long enough for them to escape via a [[Bumblebee escape pod]]. | ||
Some | Some pods had been destroyed on impact, killing the unprotected Marines within.{{Ref/Level|HCE|The Pillar of Autumn (Halo: Combat Evolved level)|The Pillar of Autumn}} The escape pods who had survived were spread out, and as a result, the Covenant located them quickly, attacking the Marine survivors. Fire Team Charlie soon found themselves under attack by Covenant strike teams. Thankfully, the Master Chief, who had landed in a nearby valley, arrived to provide assistance. The SPARTAN helped the Marines hold out until a [[Echo 419|Pelican]] dropship arrived to pick them up. The team was brought to [[Alpha Base (Installation 04)|Alpha Base]] while the Master Chief went on a mission to rescue other surviving Marines. Part of Fire Team Charlie was assigned to board and rescue Captain Keyes, who had been captured by the Covenant and was being held aboard the {{Pattern|Ket|battlecruiser}} ''[[Truth and Reconciliation]]''. The team was deployed to assist the Master Chief and a team of [[Orbital Drop Shock Trooper|ODSTs]] who had secured the ship's [[gravity lift]].{{Ref/Level|Id=TnR|HCE|The Truth and Reconciliation}} | ||
During the assault on the ''Truth and Reconciliation'', Fire Team Charlie, led by [[Sergeant]] [[Parker]] remained at the | During the assault on the ''Truth and Reconciliation'', Fire Team Charlie, led by [[Sergeant]] [[Parker]], remained at the ship's bridge while the Master Chief continued alone to rescue Keyes. Once separated from the SPARTAN, the team were killed by [[Stealth Sangheili]] armed with [[Type-1 energy sword|energy swords]]. However, from Cortana's reports, the Marines put up a good fight against their attackers, as John-117 came across several Covenant [[Sangheili]] corpses ridden with bullet holes. Fire Team Charlie did not die in vain: Captain Keyes was freed from his Covenant prison cell by the Chief and successfully extracted from the ship.{{Ref/Reuse|Id=TnR}} | ||
The remaining portion of Fire Team Charlie | The remaining portion of Fire Team Charlie, led by [[Staff Sergeant]] [[Avery Johnson]], went with Captain Keyes to search for a [[weapons]] cache that turned out to be a [[Flood containment facility]].{{Ref/Level|HCE|343 Guilty Spark (level)|343 Guilty Spark}} Fire Team Charlie's Marines were either turned into [[Flood]] [[Flood combat form|combat forms]] or went [[Missing in action|MIA]]. Sergeant Johnson managed to escape from the facility, killing several of his infected comrades. PFC [[Chips Dubbo]] managed to link up with Corporal [[Lovik|Lovik's]] [[Second squad (Pillar of Autumn)|squad]] and was extracted by Echo 419. The only other known "survivor" of the expedition to search for the "weapons" was Jenkins, who was controlled by a weaker Pod infector. | ||
Jenkins proceeded to alert the Marines of the Flood's presence below Alpha Base, allowing them to exterminate them. Later he was brought onboard the newly captured ''Truth and Reconciliation''. His actions lead to the destruction of the ship, preventing the Flood from escaping Halo. The victims of the [[Pod infector]]s were either killed by Johnson during his flight from the weapons cache, destroyed by the Master Chief during his escape from the facility, defeated by [[Melissa McKay|McKay]]'s ODST Platoon, destroyed aboard the ''[[Infinite Succor]]'', killed either by [[Covenant]] troops, when the ''Truth and Reconciliation'' crashed, or during the destruction of [[Installation 04|Halo]]. | Jenkins proceeded to alert the Marines of the Flood's presence below Alpha Base, allowing them to exterminate them. Later he was brought onboard the newly captured ''Truth and Reconciliation''. His actions lead to the destruction of the ship, preventing the Flood from escaping Halo. The victims of the [[Pod infector]]s were either killed by Johnson during his flight from the weapons cache, destroyed by the Master Chief during his escape from the facility, defeated by [[Melissa McKay|McKay]]'s ODST Platoon, destroyed aboard the ''[[Infinite Succor]]'', killed either by [[Covenant Empire|Covenant]] troops, when the ''Truth and Reconciliation'' crashed, or during the destruction of [[Installation 04|Halo]]. | ||
==Known Members== | ==Known Members== | ||
| Line 63: | Line 63: | ||
<gallery> | <gallery> | ||
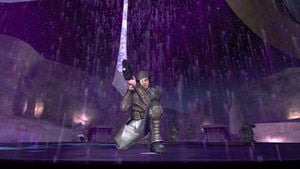
File:HCEA Johnson&Marines.jpg|Fire Team Charlie stand at attention as Sergeant Johnson rallies the Marines. | File:HCEA Johnson&Marines.jpg|Fire Team Charlie stand at attention as Sergeant Johnson rallies the Marines. | ||
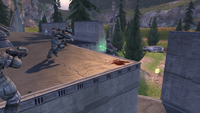
File:HCEA FireTeamCharlieVsCovies.png|Fire Team Charlie engaging Covenant forces on the surface of Installation 04. | |||
File:TRGravLiftCEA.jpg|Fire Team Charlie and John-117 about to board ''Truth and Reconciliation''. | File:TRGravLiftCEA.jpg|Fire Team Charlie and John-117 about to board ''Truth and Reconciliation''. | ||
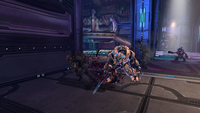
File:HCEA Lat'RavameeSlash.png|A member of Fire Team Charlie is killed by [[Lat 'Ravamee]]. | |||
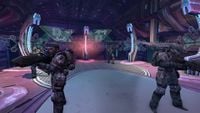
File:HTMCC-HCEA Terminal 3.jpg|Members of Fire Team Charlie onboard ''Truth and Reconciliation''. | File:HTMCC-HCEA Terminal 3.jpg|Members of Fire Team Charlie onboard ''Truth and Reconciliation''. | ||
</gallery> | </gallery> | ||
Latest revision as of 04:10, September 18, 2023
| Fire Team Charlie | |
|---|---|
|
Active: |
|
|
Affiliation: |
|
|
Branch: |
|
|
Size: |
20+ |
|
Engagements: |
|
|
Notable commanders: |
|
Fire Team Charlie was a United Nations Space Command Marine unit stationed aboard the UNSC Pillar of Autumn that actively participated in the Battle of Installation 04.[1][2]
History[edit]
Fall of Reach[edit]
- Main article: Fall of Reach
During the final stages of the of Fall of Reach, an element of Fire Team Charlie, consisting of Sergeant Johnson and Privates O'Brien, Bisenti and Jenkins were stationed aboard Gamma Station above the planet. The team were struggling to take out a large group of Kig-Yar Rangers when a group of SPARTAN-IIs led by John-117 intervened. The Marines assisted the SPARTANs with their objective, destroying the NAV database of the UNSC Circumference which was docked in the station. After this was accomplished, the Marines left the station and boarded the Pillar of Autumn. The Autumn, with Fire Team Charlie aboard, then jumped away from the battle.[3]
Battle of Installation 04[edit]
- Main article: Battle of Installation 04
When the Autumn arrived at Installation 04, it found itself under immediate attack from the Covenant, who had followed the ship from Reach. In response, Captain Jacob Keyes ordered all personnel to evacuate the ship and make landfall on the ring. Fire Team Charlie managed to repel the enemy long enough for them to escape via a Bumblebee escape pod.
Some pods had been destroyed on impact, killing the unprotected Marines within.[4] The escape pods who had survived were spread out, and as a result, the Covenant located them quickly, attacking the Marine survivors. Fire Team Charlie soon found themselves under attack by Covenant strike teams. Thankfully, the Master Chief, who had landed in a nearby valley, arrived to provide assistance. The SPARTAN helped the Marines hold out until a Pelican dropship arrived to pick them up. The team was brought to Alpha Base while the Master Chief went on a mission to rescue other surviving Marines. Part of Fire Team Charlie was assigned to board and rescue Captain Keyes, who had been captured by the Covenant and was being held aboard the Ket-pattern battlecruiser Truth and Reconciliation. The team was deployed to assist the Master Chief and a team of ODSTs who had secured the ship's gravity lift.[5]
During the assault on the Truth and Reconciliation, Fire Team Charlie, led by Sergeant Parker, remained at the ship's bridge while the Master Chief continued alone to rescue Keyes. Once separated from the SPARTAN, the team were killed by Stealth Sangheili armed with energy swords. However, from Cortana's reports, the Marines put up a good fight against their attackers, as John-117 came across several Covenant Sangheili corpses ridden with bullet holes. Fire Team Charlie did not die in vain: Captain Keyes was freed from his Covenant prison cell by the Chief and successfully extracted from the ship.[5]
The remaining portion of Fire Team Charlie, led by Staff Sergeant Avery Johnson, went with Captain Keyes to search for a weapons cache that turned out to be a Flood containment facility.[6] Fire Team Charlie's Marines were either turned into Flood combat forms or went MIA. Sergeant Johnson managed to escape from the facility, killing several of his infected comrades. PFC Chips Dubbo managed to link up with Corporal Lovik's squad and was extracted by Echo 419. The only other known "survivor" of the expedition to search for the "weapons" was Jenkins, who was controlled by a weaker Pod infector.
Jenkins proceeded to alert the Marines of the Flood's presence below Alpha Base, allowing them to exterminate them. Later he was brought onboard the newly captured Truth and Reconciliation. His actions lead to the destruction of the ship, preventing the Flood from escaping Halo. The victims of the Pod infectors were either killed by Johnson during his flight from the weapons cache, destroyed by the Master Chief during his escape from the facility, defeated by McKay's ODST Platoon, destroyed aboard the Infinite Succor, killed either by Covenant troops, when the Truth and Reconciliation crashed, or during the destruction of Halo.
Known Members[edit]
- Staff Sergeant Avery Junior Johnson
- Sergeant Parker
- Private First Class Chips Dubbo
- Private First Class Wallace A. Jenkins
- Private First Class M. Fitzgerald
- Private Manuel Mendoza
- Private Kappus (technical specialist)
- Private Bisenti
- Private Riley
- Private O'Brien
- "Paranoid Marine"
Gallery[edit]
Halo: Combat Evolved[edit]
Halo: Combat Evolved Anniversary[edit]
A member of Fire Team Charlie is killed by Lat 'Ravamee.
List of appearances[edit]
- Halo: Combat Evolved (First appearance)
- Halo: The Flood
- Halo Graphic Novel
- Halo: Combat Evolved Anniversary
Sources[edit]
- ^ Halo: Combat Evolved
- ^ Halo: The Flood
- ^ Halo: The Fall of Reach, chapter 37
- ^ Halo: Combat Evolved, campaign level The Pillar of Autumn
- ^ a b Halo: Combat Evolved, campaign level The Truth and Reconciliation
- ^ Halo: Combat Evolved, campaign level 343 Guilty Spark


