Attack on Crow's Nest: Difference between revisions
From Halopedia, the Halo wiki
m (→Covenant assault intensifies: Link clearup) |
m (Text replacement - "\bthe the\b" to "the") |
||
| (25 intermediate revisions by 7 users not shown) | |||
| Line 1: | Line 1: | ||
{{ | {{Status|Canon}} | ||
{{Battle | {{Battle infobox | ||
|prev=[[Recovery of John-117]] | |prev=[[Recovery of John-117]] | ||
|conc= | |conc= | ||
|next=[[Assault on the Tsavo Highway]] | |next=[[Assault on the Tsavo Highway]] | ||
|name=Attack on Crow's Nest | |name=Attack on Crow's Nest | ||
|image=[[File:Halo 3 Crow's Nest.PNG|350px]] | |image=[[File:Halo 3 Crow's Nest.PNG|350px]] | ||
|conflict=[[Human-Covenant War]] | |conflict=*[[Human-Covenant War]] | ||
**[[Battle for Earth]] | |||
***[[Battle of Kenya]] | |||
|date=[[2552#November|November 17, 2552]] | |date=[[2552#November|November 17, 2552]] | ||
|place=[[Crow's Nest (location)|Crow's Nest]], [[Kenya]], [[East African Protectorate]] | |place=[[Crow's Nest (location)|Crow's Nest]], [[Kenya]], [[East African Protectorate]] | ||
|result=Strategic [[United Nations Space Command|UNSC]] victory | |result='''Strategic [[United Nations Space Command|UNSC]] victory''' | ||
*Base personnel extracted | *Base personnel extracted | ||
*Crow's Nest destroyed | *Crow's Nest destroyed | ||
|side1=[[United Nations Space Command]] | |side1=*{{Icon|UNSC HCW}} [[United Nations Space Command]] | ||
|side2=[[Covenant]] | **[[UNSC Air Force]] | ||
|commanders1=*[[ | **[[UNSC Marine Corps]] | ||
*[[ | ---- | ||
*[[ | *{{Icon|Covenant FB}} [[Covenant separatists]] | ||
*[[Arbiter]] [[Thel 'Vadam]] | **[[Fleet of Retribution]] | ||
|commanders2=[[ | |side2 = *{{Icon|Covenant FB}} [[Covenant]] | ||
*Unnamed Jiralhanae [[War Chieftain]]† | |commanders1= | ||
|forces1=*[[ | *[[Commander|CMR]] [[Miranda Keyes]]{{Ref/Reuse|crows}} | ||
*[[ | *[[Sergeant Major|SGTMAJ]] [[Avery Johnson]]{{Ref/Reuse|crows}} | ||
*[[M12 Chaingun Warthog|Chaingun Warthogs]] | *[[Master Chief Petty Officer|MCPO]] [[John-117]]{{Ref/Reuse|crows}} | ||
|forces2=*[[ | *[[Arbiter]] [[Thel 'Vadam]]{{Ref/Reuse|crows}} | ||
|commanders2=[[Hierarchs|High]] [[Prophet of Truth]]{{Ref/Reuse|crows}} | |||
*Unnamed Jiralhanae [[War Chieftain]]†{{Ref/Reuse|crows}} | |||
|forces1= | |||
*Several air vehicles | |||
**[[D77H-TCI Pelican]]s{{Ref/Reuse|crows}} | |||
**Multiple [[AV-14 Hornet]]s{{Ref/Reuse|crows}} | |||
*[[M12 Chaingun Warthog|Chaingun Warthogs]]{{Ref/Reuse|crows}} | |||
|forces2=*[[Truth's fleet]] | |||
**1+ {{Pattern|Ket|battlecruiser}}{{Ref/Reuse|crows}} | |||
*Many air vehicles | |||
**Several {{Pattern|Ru'swum|Phantom}}s{{Ref/Reuse|crows}} | |||
**Multiple {{Pattern|Irdnekt|Banshee}}s{{Ref/Reuse|crows}} | |||
*Many ground forces | |||
**[[Jiralhanae]] | **[[Jiralhanae]] | ||
**[[Unggoy]] | **[[Unggoy]] | ||
**[[Kig-Yar]] | **[[Kig-Yar]] | ||
**[[Yanme'e]] | **[[Yanme'e]] | ||
|casual1=Heavy | |||
|casual1= | |||
|casual2=Heavy | |casual2=Heavy | ||
}} | }} | ||
{{Quote|multi=yes|q1="Ma'am, squad leaders are requesting a rally point. Where should they go?|Marine Technician|q2=To war.|Commander Miranda Keyes|Miranda leading the defense of Crow's Nest while pulling the slide of her [[ | {{Quote|multi=yes|q1="Ma'am, squad leaders are requesting a rally point. Where should they go?|Marine Technician|q2=To war.|Commander Miranda Keyes|[[Miranda Keyes|Miranda]] leading the defense of [[Crow's Nest]] while pulling the slide of her [[M6G2 magnum]] back.{{Ref/Reuse|crows}}}} | ||
The '''Attack on Crow's Nest''' was an engagement during the [[Battle of Kenya]] in which [[Covenant]] forces assaulted the [[UNSC]] local command center [[Crow's Nest (location)|Crow's Nest]] in [[Kenya]], [[Africa]] on [[2552#November|November 17, 2552]], shortly after UNSC forces [[Recovery of John-117|recovered]] [[John-117]] from the jungles of nearby [[Tanzania]]. | The '''Attack on Crow's Nest''' was an [[battle|engagement]] during the [[Battle of Kenya]] in which [[Covenant]] forces assaulted the [[UNSC]] local command center [[Crow's Nest (location)|Crow's Nest]] in [[Kenya]], [[Africa]] on [[2552#November|November 17, 2552]], shortly after UNSC forces [[Recovery of John-117|recovered]] [[John-117]] from the jungles of nearby [[Tanzania]].{{Ref/Level|Id=crows|H3|[[Crow's Nest]]}} | ||
==Background== | ==Background== | ||
During the [[Battle of Kenya|Battle]] of [[Kenya]] in [[2552#November|November 2552]], the re-purposed 20th century [[military base]] was serving as the command post for [[UNSC]] forces fighting the [[Covenant]], as well as a holding area for the numerous [[UNSC Marine Corps|Marines]] wounded during the continuous fighting.{{Ref/Reuse|crows}} On the morning of November 17, 2552, the [[Hierarch|High Prophet]] of [[Prophet of Truth|Truth]] arrived at [[Earth]] on board the [[Forerunner]] [[keyship]] ''[[Anodyne Spirit]]'' along with a [[Truth's fleet|swarm]] of [[Covenant starship|Covenant warships]] under his command, including the [[Great Schism|splintered]] [[High Charity defense fleet]], which routed the [[UNSC Home Fleet]] and the orbital defense grid in orbit upon Truth's arrival on the planet.{{Ref/Reuse|crows}}{{Ref/Level|Id=TGJ|H2|Level=[[The Great Journey]]}} | |||
Overwelmed by the Covenant forces during the Battle of Kenya, many wounded UNSC personnel were brought into Crow's Nest.{{Ref/Reuse|crows}} As the keyship descended towards the newly-excavated [[Portal at Voi|portal]] beneath [[Mombasa]] that would lead to the [[Installation 00|Ark]], [[SPARTAN-II program|Spartan-II]] [[John-117]], who had been on board, was [[Scramble onboard Forerunner Dreadnought|forced]] to exit the ship.{{Ref/Level|H3|[[Arrival]]}} The Spartan made landfall in a jungle south of [[Mount Kilimanjaro]] in [[Tanzania]]. His re-entry point was acquired by UNSC forces [[Battle of Sector Six|fighting]] in [[Sector Six]], [[Asia]] allowing several squads of Marines led by [[Sergeant Major]] [[Avery Johnson]] and [[Arbiter]] [[Thel 'Vadam]] to easily locate him. After [[Recovery of John-117|recovering]] the Master Chief, the Spartan, Thel and Johnson were extracted by [[D77H-TCI Pelican|Pelican]] ''[[Kilo 023]]'' and delivered to Crow's Nest, which was under the command of [[Commander]] [[Miranda Keyes]] following her return from [[Installation 05]].<ref>''[[Halo: Landfall]]'', ''[[Halo: Last One Standing|Last One Standing]]''</ref>{{Ref/Level|H3|[[Sierra 117]]}} | |||
== | ==Battle== | ||
===Beginning=== | ===Beginning=== | ||
{{Quote|You are, all of you, vermin. Cowering in the dirt, thinking what, I wonder? That you might escape the coming fire? No. Your world will burn until its surface is but glass! And not even your demon will live to creep, blackened from its hole to mar the reflection of our passage... the culmination of our journey. For your destruction is the will of the gods! And I? I ''am'' their instrument!|[[Prophet of Truth|The Prophet of Truth]] threatening the base's personnel, prior to the attack. | {{Quote|You are, all of you, vermin. Cowering in the dirt, thinking what, I wonder? That you might escape the coming fire? No. Your world will burn until its surface is but glass! And not even your demon will live to creep, blackened from its hole to mar the reflection of our passage... the culmination of our journey. For your destruction is the will of the gods! And I? I ''am'' their instrument!|[[Prophet of Truth|The Prophet of Truth]] threatening the base's personnel, prior to the attack.{{Ref/Reuse|crows}}}} | ||
[[File:H3 MC& Hood.png|thumb|left|250px|John-117 reporting to Admiral Hood.]] | [[File:H3 MC& Hood.png|thumb|left|250px|John-117 reporting to Admiral Hood.]] | ||
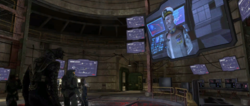
[[Miranda Keyes|Commander Miranda Keyes]] arrived at Crow's Nest's landing pad to meet [[John-117]], [[Avery Johnson|Sergeant Johnson]] and [[Thel 'Vadam]] off ''[[Kilo 023]]'' following their successful extraction from the [[Tanzania]]n jungle on the morning of November 17, 2552. As the three stepped off the Pelican, several nearby injured Marines spotted the Spartan and were motivated by his presence. The group met with Keyes who shook the Spartan's hand in greeting and expressed happiness at his arrival before briefing him on recent events. As the group walked through the corridors of the base towards the operations center, passing numerous injured Marines, Keyes told the Spartan that the fleet that had arrived with Truth's [[Anodyne Spirit|ship]] had decimated the remaining vessels of the [[UNSC Home Fleet]], which had been depleted by the [[Battle for Earth|constant fighting]] on the globe over the last month, before carrying out a heavy bombardment which inflicted extreme casualties on | [[Miranda Keyes|Commander Miranda Keyes]] arrived at Crow's Nest's landing pad to meet [[John-117]], [[Avery Johnson|Sergeant Johnson]] and [[Thel 'Vadam]] off ''[[Kilo 023]]'' following their successful extraction from the [[Tanzania]]n jungle on the morning of November 17, 2552. As the three stepped off the Pelican, several nearby injured Marines spotted the Spartan and were motivated by his presence. The group met with Keyes who shook the Spartan's hand in greeting and expressed happiness at his arrival before briefing him on recent events. As the group walked through the corridors of the base towards the operations center, passing numerous injured Marines, Keyes told the Spartan that the fleet that had arrived, along with Truth's [[Anodyne Spirit|ship]], had breached the [[Luna]]r perimeter and decimated the remaining vessels of the [[UNSC Home Fleet|Home Fleet]], which had been depleted by the [[Battle for Earth|constant fighting]] on the globe over the last month, before carrying out a heavy [[Orbital bombardment|bombardment]] which inflicted extreme terrestrial casualties on Earth. She informed John that the Prophet of Truth was committing most of their forces to Kenya, and were in the process of completing excavation on an [[Portal at Voi|artifact]] that they had uncovered by [[glassing]] the majority of the city of [[Mombasa]] which they suspected was the [[Installation 00|Ark]]. Knowing that if the Covenant were able to activate the [[Halo Array]], they would wipe out all sentient life in the galaxy, Keyes formulated a plan to destroy Covenant [[Skar'wa-pattern Mantis|anti-aircraft cannons]] in the city of [[Voi]], allowing [[Battle Group Victory]] to obliterate Truth's vessel. In the operations center, the group established a connection with [[Terrence Hood|Admiral Terrence Hood]], who was confident in following Keyes' plan with the aid of the Master Chief. The Prophet of Truth hijacked the base's communications, promising to glass the entire planet and the [[Covenant religion#Demons|"Demon"]] along with it. After the feed cut out, Keyes realized that the Covenant knew the facility's location and would be coming to attack and so she ordered the evacuation of all UNSC personnel, foremost being the wounded Marines in the base.{{Ref/Reuse|crows}} | ||
[[File:H3 Crows Nest Pelican hanger.jpg|thumb|left|250px|A Pelican ferrying Marines out of Crow's Nest's southern hangar bay.]] | [[File:H3 Crows Nest Pelican hanger.jpg|thumb|left|250px|A Pelican ferrying Marines out of Crow's Nest's southern hangar bay.]] | ||
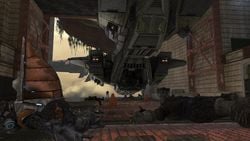
The Covenant soon began their assault, first neutralizing the base's perimeter cameras before sending multiple [[ | The Covenant soon began their assault, first neutralizing the base's perimeter cameras before sending multiple [[Kez'katu-pattern Phantom|Phantoms]] loaded with troops towards the facility. Crow's Nest's Overwatch soon detected their approach and prepared to meet the attackers. Aware that the sheer number of wounded would take the Pelicans longer to evacuate, the base's defenders opted to engage the Covenant until the injured were safely out before evacuating themselves. John opted to go the facility's south hangar bay, the most likely point of entry for Covenant forces while Sergeant Johnson and Thel 'Vadam remained to defend the operations center. Several Marines led John into a large cave adjacent to the operations center, where defensive barriers and [[AIE-486H machine gun|machine gun turrets]] were being deployed. As the Covenant attacked the base, several Marines joined the Spartan for his push to the south hangar. As John moved down a corridor to the facility's vehicle access tunnel, Commander Keyes radioed him, warning her that the base's Marine complement was spread thin and urged him to reach the hangar as quickly as possible. The Covenant had already established a foothold in the vehicle access tunnel, and John arrived just as a fully-manned [[M12 Chaingun Warthog|Chaingun Warthog]] was destroyed by Covenant [[Anskum-pattern plasma grenade|plasma grenades]]. John quickly neutralized the perpetrators, before he and the Marines began their push against a large number of [[Unggoy]] and [[Kig-Yar]] led by a [[Jiralhanae]] [[Jiralhanae Captain|Captain]]. After leaving the vehicle access tunnel, the Spartan fought past a group of [[Vostu-pattern carbine|carbine]]-wielding Kig-Yar marksmen before arriving at the south hangar where the Marine defenders were engaged in combat with a group of Unggoy and Kig-Yar. After these were dealt with, the Covenant began a concerted push to take the hangar, with Phantoms dispatched from a nearby {{Pattern|Ket|battlecruiser}} deploying groups of Jiralhanae-led Covenant troops into the hangar. With the assistance of the Marines and several machine gun turrets, John was able to successfully repel the enemy assault waves. With the room clear, a Pelican that was docked in a crane in the hangar was able to take off, allowing the Marines in the room to safely extract from the facility.{{Ref/Reuse|crows}} | ||
===Covenant assault intensifies=== | ===Covenant assault intensifies=== | ||
{{Quote|Brutes have taken the barracks. Marines are trapped inside. Those apes ain't much for mercy, Chief. We both know what they do to prisoners.|[[Sergeant Johnson]] telling [[John-117]] to rescue the prisoners in the barracks.}} | {{Quote|Brutes have taken the barracks. Marines are trapped inside. Those apes ain't much for mercy, Chief. We both know what they do to prisoners.|[[Sergeant Johnson]] telling [[John-117]] to rescue the prisoners in the barracks.}} | ||
[[File:Crow's Nest bomb.jpg|thumb|left|250px|The bomb in Crow's Nest's operations center]] | [[File:Crow's Nest bomb.jpg|thumb|left|250px|The bomb in Crow's Nest's operations center]] | ||
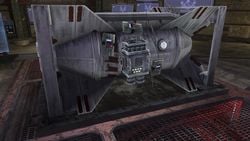
After their failure to take the south hangar, Covenant forces began to heavily assault the base from alternate approaches. They dispatched swarms of [[Yanme'e]] into | After their failure to take the south hangar, Covenant forces began to heavily assault the base from alternate approaches. They dispatched swarms of [[Yanme'e]] into the facility's ventilation shafts while simultaneously attacking several key areas of the base such as the operations center and motor pool. A large pack of Jiralhanae led by a [[Pek-pattern plasma cannon|plasma cannon]]-wielding [[Jiralhanae War Chieftain|War Chieftain]] stormed the barracks, massacring most of the men inside and taking the survivors captive for sport and for food. As the Covenant assault intensified, Johnson urged the Chief to return to the operations center. Back in the vehicle access corridor, a pair of Marines waiting for the next evacuation Pelican heard loud banging in the pipes above them as a large group of Yanme'e made their way through towards the operations center. The Marines opted to follow John as he returned to the control room. In the cave before the operations center, a Marine waving to John in greeting was suddenly lifted into the air by a Drone as an entire swarm of the insectoid Covenant soldiers poured into the room from the piping behind the Marine's defences. As the panicking Marines opened fire on the Yanme'e, their sergeant ordered them to use short, controlled bursts of weapons fire to effectively put down each Drone. Despite the large number of Drones, John and the defending Marines were able to use superior cover, accurate gunfire and a nearby turret to wipe out the majority of the swarm before Marines entering from the operations center killed off the stragglers. In the control room, the base's personnel were in the process of wiring a [[Improvised UNSC bomb|bomb]] that would be used to destroy Crow's Nest after all of it's personnel had extracted, in order to deny the base to the Covenant. Commander Keyes, now on board Pelican ''Kilo 023'' wished them good luck before cutting the feed. Johnson, knowing that the Covenant had captured the barracks and [[Recovery of John-117#Rescuing Sergeant Johnson|familiar]] with Jiralhanae treatment of [[Prisoner of war|captives]], told John to rescue what survivors he could and escort the survivors to the nearby landing pad for extraction.{{Ref/Reuse|crows}} | ||
[[File:H3 Brute Chieftain and Bodyguards.jpg|thumb | [[File:H3 Brute Chieftain and Bodyguards.jpg|thumb|250px|A Jiralhanae Chieftain and his bodyguards in Crow's Nest's motor pool.]] | ||
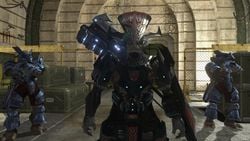
John left the operations center and arrived in the base's motor pool, which had recently fallen to the Covenant. The [[Jiralhanae Chieftain]] in the room detected the Spartan's scent, and ordered his [[pack]] to find him. As the Jiralhanae dispersed, John begun his assault. Despite the arrival of reinforcements, John continued to prevail. As the Jiralhanae's numbers started to dwindle, the Chieftain charged John with his [[ | John left the operations center and arrived in the base's motor pool, which had recently fallen to the Covenant. The [[Jiralhanae Chieftain]] in the room detected the Spartan's scent, and ordered his [[pack]] to find him. As the Jiralhanae dispersed, John begun his assault. Despite the arrival of reinforcements, John continued to prevail. As the Jiralhanae's numbers started to dwindle, the Chieftain charged John with his [[Gravity hammer (fiction)|gravity hammer]] but he fell along with the rest of his pack. Victorious, John moved across the motor pool and entered another corridor. A cave in forced the Spartan to drop down through a hole in the floor, landing in an area with opened maintenance pipes through which Yanme'e were traversing. Here, John experienced a [[Character interludes|hallucination]] of [[Cortana]] repeating a line made by [[Catherine Halsey|Doctor Halsey]] to him and the other [[SPARTAN-II program|Spartan-II]] candidates at the age of six, immediately following his abduction by the [[Office of Naval Intelligence]]. Beyond the vents, John arrived in time to witness Thel 'Vadam attempting to convince several Yanme'e to rebel against the Covenant, to no avail. After assisting the Arbiter in killing the Drones, Thel told him that the Jiralhanae had taken several Marines in the barracks prisoner. Knowing the barbarity of their foes, the two moved into the barracks while watching for survivors. They arrived just as a Marine was thrown head-first into a concrete pillar. The rest of the barracks was filled with Jiralhanae, many of them holding Marines up by their necks or ankles. Acting fast, John managed to save a Marine moments before he was killed. The Marine armed himself as John and Thel continued to push down the barracks, killing large numbers of Jiralhanae and rescuing several more Marines. The War Chieftain and his [[Jiralhanae Bodyguard|bodyguards]] stood in their path to the exit but they were eventually slain. With as many UNSC personnel saved as possible, John and Thel left the barracks where the Spartan called down a service elevator that would take them up to the landing pad where ''Kilo 023'' was waiting to extract them.{{Ref/Reuse|crows}} | ||
[[File:H3 CrowsNestCaptive.png|thumb|left|250px|A UNSC Marine held captive by Jiralhanae in Crow's Nest's barracks.]] | [[File:H3 CrowsNestCaptive.png|thumb|left|250px|A UNSC Marine held captive by Jiralhanae in Crow's Nest's barracks.]] | ||
Unfortunately for the UNSC, the situation was deteriorating. A large Jiralhanae-led Covenant force succeeded in capturing the operations center, managing to disarm the bomb and forcing Sergeant Johnson and several surviving Marines to fall back. Meanwhile, a group of [[Jiralhanae Jumper]]s arrived on the landing pad and assaulted the parked Pelican, attempting to sabotage the dropship's thrusters and forcing her [[pilot]], [[Hocus]] to take off out of reach. At this time, John, Thel and the survivors from the barracks arrived on the landing pad, repelling the Jumper squad and allowing ''Kilo 023'' to return. Johnson and his men arrived at the landing pad while under fire from Yanme'e; the sergeant providing covering fire to allow his soldiers to make it to the Pelican. Unwilling to allow Crow's Nest to fall to the Covenant, Commander Keyes ordered John to return to the operations center and re-arm the bomb, promising to send another Pelican for the Spartan. Johnson and his squad, along with Thel 'Vadam and the Marines from the barracks boarded ''Kilo 023'' and the Pelican departed the base, leaving John as the only human left in Crow's Nest. | Unfortunately for the UNSC, the situation was deteriorating. A large Jiralhanae-led Covenant force succeeded in capturing the operations center, managing to disarm the bomb and forcing Sergeant Johnson and several surviving Marines to fall back. Meanwhile, a group of [[Jiralhanae Jumper]]s arrived on the landing pad and assaulted the parked Pelican, attempting to sabotage the dropship's thrusters and forcing her [[pilot]], [[Hocus]] to take off out of reach. At this time, John, Thel and the survivors from the barracks arrived on the landing pad, repelling the Jumper squad and allowing ''Kilo 023'' to return. Johnson and his men arrived at the landing pad while under fire from Yanme'e; the sergeant providing covering fire to allow his soldiers to make it to the Pelican. Unwilling to allow Crow's Nest to fall to the Covenant, Commander Keyes ordered John to return to the operations center and re-arm the bomb, promising to send another Pelican for the Spartan. Johnson and his squad, along with Thel 'Vadam and the Marines from the barracks boarded ''Kilo 023'' and the Pelican departed the base, leaving John as the only human left in Crow's Nest.{{Ref/Reuse|crows}} | ||
{{clear|left}} | |||
===Re-arming the bomb=== | ===Re-arming the bomb=== | ||
{{Quote|Chief, get back to the Ops Center. Kill those Brutes. Rearm the bomb. I've gotta get these men out of here. But I'll radio with another exit. Good luck.|[[Miranda Keyes|Commander Keyes]] ordering [[John-117]] to re-arm the bomb.}} | {{Quote|Chief, get back to the Ops Center. Kill those Brutes. Rearm the bomb. I've gotta get these men out of here. But I'll radio with another exit. Good luck.|[[Miranda Keyes|Commander Keyes]] ordering [[John-117]] to re-arm the bomb.}} | ||
[[File:H3 CoviesinOpsCenter.png|thumb | [[File:H3 CoviesinOpsCenter.png|thumb|250px|The Covenant-occupied operations center.]] | ||
John made his way along the vehicle access corridor that Johnson had came from, passing by numerous destroyed Warthogs and dead Marines testifying to the losing battle the UNSC had been fighting. As he approached the door to the road that would lead back to the motor pool he experienced another vision of Cortana reciting part of Dr Halsey's induction speech to the Spartan-IIs. The roadway to the motor pool was heavily fortified by [[ | John made his way along the vehicle access corridor that Johnson had came from, passing by numerous destroyed Warthogs and dead Marines testifying to the losing battle the UNSC had been fighting. As he approached the door to the road that would lead back to the motor pool he experienced another vision of Cortana reciting part of Dr Halsey's induction speech to the Spartan-IIs. The roadway to the motor pool was heavily fortified by [[Pek-pattern plasma cannon|plasma cannons]] and numerous Unggoy and Kig-Yar patrols, forcing John to fight his way through. He eventually made it back to the operations center, where he overheard a conversation between the Prophet of Truth and the commanding War Chieftain in the room. When the Chieftain nervously reported that he had not yet discovered the UNSC's plan to stop Truth, the Prophet angrily told him to find the information he needed or be left behind on the [[Covenant religion#The Great Journey|"Great Journey"]] before cutting the feed. As the War Chieftain ordered his subordinates to tell the Yanme'e to search the machines for information, John-117 attacked. The War Chieftain unlimbered his [[Pez'tk-pattern fuel rod gun|fuel rod gun]] and returned fire but the Master Chief eventually defeated all of the Covenant in the operations center and managed to re-activate the bomb. As the now-active bomb was linked to many other smaller charges throughout Crow's Nest, the entire base began to explode.{{Ref/Reuse|crows}} | ||
[[File:H3 CN FleeingPhantom.png|thumb|left|250px|A Phantom abandoning Unggoy in the exploding Crow's Nest]] | [[File:H3 CN FleeingPhantom.png|thumb|left|250px|A Phantom abandoning Unggoy in the exploding Crow's Nest]] | ||
Sergeant Johnson urged the Master Chief to go to the south hangar, where a service elevator would allow him to escape from the facility. Retracing his steps to the hangar, John made his way past a group of panicking Unggoy in the nearby cave while echoes of Halsey's speech repeated by Cortana continued to assail him through his [[Spartan neural interface|neural interface]]. As Unggoy and Yanme'e in the vehicle access corridor desperately attempted to escape from the exploding base, John pushed through, eventually arriving in the south hangar as Phantoms took off from the base, abandoning many Covenant troops to their fates. The Spartan made his way to the elevator and entered just as flames roared into the hangar bay. As the elevator descended into an underground vehicle bay, the base detonated above him and the elevator was shaken loose, plummeting to the ground below. As it slammed into the ground and John lost consciousness, the final thing he heard was Cortana's voice telling him that "this place" would become his tomb. | Sergeant Johnson urged the Master Chief to go to the south hangar, where a service elevator would allow him to escape from the facility. Retracing his steps to the hangar, John made his way past a group of panicking Unggoy in the nearby cave while echoes of Halsey's speech repeated by Cortana continued to assail him through his [[Spartan neural interface|neural interface]]. As Unggoy and Yanme'e in the vehicle access corridor desperately attempted to escape from the exploding base, John pushed through, eventually arriving in the south hangar as Phantoms took off from the base, abandoning many Covenant troops to their fates. The Spartan made his way to the elevator and entered just as flames roared into the hangar bay. As the elevator descended into an underground vehicle bay, the base detonated above him and the elevator was shaken loose, plummeting to the ground below. As it slammed into the ground and John lost consciousness, the final thing he heard was Cortana's voice telling him that "this place" would become his tomb.{{Ref/Reuse|crows}} | ||
{{clear|left}} | |||
==Aftermath== | ==Aftermath== | ||
After waking up in the underground vehicle bay, John regrouped with a number of Marines led by [[ | After waking up in the underground vehicle bay, John regrouped with a number of Marines led by [[Gunnery Sergeant]] [[Reynolds]] who had escaped Crow's Nests's destruction. The Spartan along with any Marines still fit for duty mounted up on several surviving Warthogs and left the base. They would go on to re-establish radio contact with Commander Keyes and Sergeant Johnson and rally a number of Marines scattered across the Kenyan savanna before launching [[Assault on the Tsavo Highway|an assault]] on the Covenant-held [[Tsavo highway (location)|Tsavo Highway]], opening up a route into the city of [[Voi]] where they would go on to assault the Prophet of Truth's anti-aircraft defenses.{{Ref/Level|H3|[[Tsavo Highway]]}}{{Ref/Level|H3|[[The Storm]]}} | ||
==Participants== | |||
{{col-begin}} | |||
{{col-2}} | |||
===UNSC=== | |||
===Naval assets=== | |||
====Military personnel==== | |||
{| class="wikitable sortable " style="width: 75%;" cellspacing="1" cellpadding="1" border="0" | |||
|- | |||
! Branch | |||
! Rank | |||
! Name | |||
! Status<!--This refers to their status after the battle, not their overall status--> | |||
|- | |||
| rowspan="3" |[[UNSC Navy]] | |||
|[[Commander]] | |||
|[[Miranda Keyes]]{{Ref/Reuse|crows}} | |||
|Survived | |||
|- | |||
|[[Sergeant Major]] | |||
|[[Avery Johnson]] | |||
|Survived | |||
|- | |||
|[[Master Chief Petty Officer]] | |||
|[[John-117]] | |||
|Survived | |||
|} | |||
===Covenant separatists=== | |||
===Naval assets=== | |||
====Military personnel==== | |||
{| class="wikitable sortable " style="width: 75%;" cellspacing="1" cellpadding="1" border="0" | |||
|- | |||
! Branch | |||
! Rank | |||
! Name | |||
! Status<!--This refers to their status after the battle, not their overall status--> | |||
|- | |||
| rowspan="3" |Unknown | |||
|[[Arbiter]] | |||
|[[Thel 'Vadam]] | |||
|Survived | |||
|- | |||
| rowspan="2" |[[Special Operations Sangheili|Special Operations]] | |||
|[[Usze 'Taham]]{{Ref/Site|Id=Coop|D=14|M=11|Y=2014|URL=http://halo.bungie.net/News/content.aspx?type=topnews&link=thesoundofsack|Site=bungie.net|Page=The Tru7h About Co-Op in Halo 3}} | |||
|Survived | |||
|- | |||
|[[N'tho 'Sraom]]{{Ref/Reuse|Coop}} | |||
|Survived | |||
|} | |||
===Units=== | |||
====Ground forces==== | |||
*[[Special Warfare Group|Fleet of Retribution Special Warfare Group]] | |||
{{col-2}} | |||
===Covenant=== | |||
===Naval assets=== | |||
====Non-combatants==== | |||
{| class="wikitable sortable " style="width: 75%;" cellspacing="1" cellpadding="1" border="0" | |||
|- | |||
! Branch | |||
! Rank | |||
! Name | |||
! Status<!--This refers to their status after the battle, not their overall status--> | |||
|- | |||
|[[High Council]] | |||
|[[Hierarchs|Hierach]] | |||
|[[Prophet of Truth]] | |||
|Survived | |||
|} | |||
===Units=== | |||
====Naval forces==== | |||
*[[Truth's fleet]] | |||
{{col-end}} | |||
==List of appearances== | ==List of appearances== | ||
| Line 71: | Line 164: | ||
==Sources== | ==Sources== | ||
{{Ref/Sources}} | {{Ref/Sources}} | ||
{{Engagements in the Battle for Earth}} | {{Engagements in the Battle for Earth}} | ||
Latest revision as of 20:48, June 6, 2024
|
Previous: |
|||||||||||||||||||
|
Next: |
|||||||||||||||||||
| Attack on Crow's Nest | |||||||||||||||||||
|---|---|---|---|---|---|---|---|---|---|---|---|---|---|---|---|---|---|---|---|
| |||||||||||||||||||
|
Conflict: |
|||||||||||||||||||
|
Date: |
|||||||||||||||||||
|
Location: |
|||||||||||||||||||
|
Outcome: |
Strategic UNSC victory
| ||||||||||||||||||
| |||||||||||||||||||
- Marine Technician: ""Ma'am, squad leaders are requesting a rally point. Where should they go?"
- Commander Miranda Keyes: "To war."
- — Miranda leading the defense of Crow's Nest while pulling the slide of her M6G2 magnum back.[1]
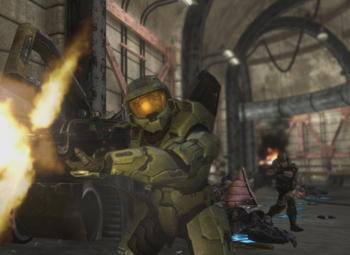
The Attack on Crow's Nest was an engagement during the Battle of Kenya in which Covenant forces assaulted the UNSC local command center Crow's Nest in Kenya, Africa on November 17, 2552, shortly after UNSC forces recovered John-117 from the jungles of nearby Tanzania.[1]
Background[edit]
During the Battle of Kenya in November 2552, the re-purposed 20th century military base was serving as the command post for UNSC forces fighting the Covenant, as well as a holding area for the numerous Marines wounded during the continuous fighting.[1] On the morning of November 17, 2552, the High Prophet of Truth arrived at Earth on board the Forerunner keyship Anodyne Spirit along with a swarm of Covenant warships under his command, including the splintered High Charity defense fleet, which routed the UNSC Home Fleet and the orbital defense grid in orbit upon Truth's arrival on the planet.[1][2]
Overwelmed by the Covenant forces during the Battle of Kenya, many wounded UNSC personnel were brought into Crow's Nest.[1] As the keyship descended towards the newly-excavated portal beneath Mombasa that would lead to the Ark, Spartan-II John-117, who had been on board, was forced to exit the ship.[3] The Spartan made landfall in a jungle south of Mount Kilimanjaro in Tanzania. His re-entry point was acquired by UNSC forces fighting in Sector Six, Asia allowing several squads of Marines led by Sergeant Major Avery Johnson and Arbiter Thel 'Vadam to easily locate him. After recovering the Master Chief, the Spartan, Thel and Johnson were extracted by Pelican Kilo 023 and delivered to Crow's Nest, which was under the command of Commander Miranda Keyes following her return from Installation 05.[4][5]
Battle[edit]
Beginning[edit]
- "You are, all of you, vermin. Cowering in the dirt, thinking what, I wonder? That you might escape the coming fire? No. Your world will burn until its surface is but glass! And not even your demon will live to creep, blackened from its hole to mar the reflection of our passage... the culmination of our journey. For your destruction is the will of the gods! And I? I am their instrument!"
- — The Prophet of Truth threatening the base's personnel, prior to the attack.[1]
Commander Miranda Keyes arrived at Crow's Nest's landing pad to meet John-117, Sergeant Johnson and Thel 'Vadam off Kilo 023 following their successful extraction from the Tanzanian jungle on the morning of November 17, 2552. As the three stepped off the Pelican, several nearby injured Marines spotted the Spartan and were motivated by his presence. The group met with Keyes who shook the Spartan's hand in greeting and expressed happiness at his arrival before briefing him on recent events. As the group walked through the corridors of the base towards the operations center, passing numerous injured Marines, Keyes told the Spartan that the fleet that had arrived, along with Truth's ship, had breached the Lunar perimeter and decimated the remaining vessels of the Home Fleet, which had been depleted by the constant fighting on the globe over the last month, before carrying out a heavy bombardment which inflicted extreme terrestrial casualties on Earth. She informed John that the Prophet of Truth was committing most of their forces to Kenya, and were in the process of completing excavation on an artifact that they had uncovered by glassing the majority of the city of Mombasa which they suspected was the Ark. Knowing that if the Covenant were able to activate the Halo Array, they would wipe out all sentient life in the galaxy, Keyes formulated a plan to destroy Covenant anti-aircraft cannons in the city of Voi, allowing Battle Group Victory to obliterate Truth's vessel. In the operations center, the group established a connection with Admiral Terrence Hood, who was confident in following Keyes' plan with the aid of the Master Chief. The Prophet of Truth hijacked the base's communications, promising to glass the entire planet and the "Demon" along with it. After the feed cut out, Keyes realized that the Covenant knew the facility's location and would be coming to attack and so she ordered the evacuation of all UNSC personnel, foremost being the wounded Marines in the base.[1]
The Covenant soon began their assault, first neutralizing the base's perimeter cameras before sending multiple Phantoms loaded with troops towards the facility. Crow's Nest's Overwatch soon detected their approach and prepared to meet the attackers. Aware that the sheer number of wounded would take the Pelicans longer to evacuate, the base's defenders opted to engage the Covenant until the injured were safely out before evacuating themselves. John opted to go the facility's south hangar bay, the most likely point of entry for Covenant forces while Sergeant Johnson and Thel 'Vadam remained to defend the operations center. Several Marines led John into a large cave adjacent to the operations center, where defensive barriers and machine gun turrets were being deployed. As the Covenant attacked the base, several Marines joined the Spartan for his push to the south hangar. As John moved down a corridor to the facility's vehicle access tunnel, Commander Keyes radioed him, warning her that the base's Marine complement was spread thin and urged him to reach the hangar as quickly as possible. The Covenant had already established a foothold in the vehicle access tunnel, and John arrived just as a fully-manned Chaingun Warthog was destroyed by Covenant plasma grenades. John quickly neutralized the perpetrators, before he and the Marines began their push against a large number of Unggoy and Kig-Yar led by a Jiralhanae Captain. After leaving the vehicle access tunnel, the Spartan fought past a group of carbine-wielding Kig-Yar marksmen before arriving at the south hangar where the Marine defenders were engaged in combat with a group of Unggoy and Kig-Yar. After these were dealt with, the Covenant began a concerted push to take the hangar, with Phantoms dispatched from a nearby Ket-pattern battlecruiser deploying groups of Jiralhanae-led Covenant troops into the hangar. With the assistance of the Marines and several machine gun turrets, John was able to successfully repel the enemy assault waves. With the room clear, a Pelican that was docked in a crane in the hangar was able to take off, allowing the Marines in the room to safely extract from the facility.[1]
Covenant assault intensifies[edit]
- "Brutes have taken the barracks. Marines are trapped inside. Those apes ain't much for mercy, Chief. We both know what they do to prisoners."
- — Sergeant Johnson telling John-117 to rescue the prisoners in the barracks.
After their failure to take the south hangar, Covenant forces began to heavily assault the base from alternate approaches. They dispatched swarms of Yanme'e into the facility's ventilation shafts while simultaneously attacking several key areas of the base such as the operations center and motor pool. A large pack of Jiralhanae led by a plasma cannon-wielding War Chieftain stormed the barracks, massacring most of the men inside and taking the survivors captive for sport and for food. As the Covenant assault intensified, Johnson urged the Chief to return to the operations center. Back in the vehicle access corridor, a pair of Marines waiting for the next evacuation Pelican heard loud banging in the pipes above them as a large group of Yanme'e made their way through towards the operations center. The Marines opted to follow John as he returned to the control room. In the cave before the operations center, a Marine waving to John in greeting was suddenly lifted into the air by a Drone as an entire swarm of the insectoid Covenant soldiers poured into the room from the piping behind the Marine's defences. As the panicking Marines opened fire on the Yanme'e, their sergeant ordered them to use short, controlled bursts of weapons fire to effectively put down each Drone. Despite the large number of Drones, John and the defending Marines were able to use superior cover, accurate gunfire and a nearby turret to wipe out the majority of the swarm before Marines entering from the operations center killed off the stragglers. In the control room, the base's personnel were in the process of wiring a bomb that would be used to destroy Crow's Nest after all of it's personnel had extracted, in order to deny the base to the Covenant. Commander Keyes, now on board Pelican Kilo 023 wished them good luck before cutting the feed. Johnson, knowing that the Covenant had captured the barracks and familiar with Jiralhanae treatment of captives, told John to rescue what survivors he could and escort the survivors to the nearby landing pad for extraction.[1]
John left the operations center and arrived in the base's motor pool, which had recently fallen to the Covenant. The Jiralhanae Chieftain in the room detected the Spartan's scent, and ordered his pack to find him. As the Jiralhanae dispersed, John begun his assault. Despite the arrival of reinforcements, John continued to prevail. As the Jiralhanae's numbers started to dwindle, the Chieftain charged John with his gravity hammer but he fell along with the rest of his pack. Victorious, John moved across the motor pool and entered another corridor. A cave in forced the Spartan to drop down through a hole in the floor, landing in an area with opened maintenance pipes through which Yanme'e were traversing. Here, John experienced a hallucination of Cortana repeating a line made by Doctor Halsey to him and the other Spartan-II candidates at the age of six, immediately following his abduction by the Office of Naval Intelligence. Beyond the vents, John arrived in time to witness Thel 'Vadam attempting to convince several Yanme'e to rebel against the Covenant, to no avail. After assisting the Arbiter in killing the Drones, Thel told him that the Jiralhanae had taken several Marines in the barracks prisoner. Knowing the barbarity of their foes, the two moved into the barracks while watching for survivors. They arrived just as a Marine was thrown head-first into a concrete pillar. The rest of the barracks was filled with Jiralhanae, many of them holding Marines up by their necks or ankles. Acting fast, John managed to save a Marine moments before he was killed. The Marine armed himself as John and Thel continued to push down the barracks, killing large numbers of Jiralhanae and rescuing several more Marines. The War Chieftain and his bodyguards stood in their path to the exit but they were eventually slain. With as many UNSC personnel saved as possible, John and Thel left the barracks where the Spartan called down a service elevator that would take them up to the landing pad where Kilo 023 was waiting to extract them.[1]
Unfortunately for the UNSC, the situation was deteriorating. A large Jiralhanae-led Covenant force succeeded in capturing the operations center, managing to disarm the bomb and forcing Sergeant Johnson and several surviving Marines to fall back. Meanwhile, a group of Jiralhanae Jumpers arrived on the landing pad and assaulted the parked Pelican, attempting to sabotage the dropship's thrusters and forcing her pilot, Hocus to take off out of reach. At this time, John, Thel and the survivors from the barracks arrived on the landing pad, repelling the Jumper squad and allowing Kilo 023 to return. Johnson and his men arrived at the landing pad while under fire from Yanme'e; the sergeant providing covering fire to allow his soldiers to make it to the Pelican. Unwilling to allow Crow's Nest to fall to the Covenant, Commander Keyes ordered John to return to the operations center and re-arm the bomb, promising to send another Pelican for the Spartan. Johnson and his squad, along with Thel 'Vadam and the Marines from the barracks boarded Kilo 023 and the Pelican departed the base, leaving John as the only human left in Crow's Nest.[1]
Re-arming the bomb[edit]
- "Chief, get back to the Ops Center. Kill those Brutes. Rearm the bomb. I've gotta get these men out of here. But I'll radio with another exit. Good luck."
- — Commander Keyes ordering John-117 to re-arm the bomb.
John made his way along the vehicle access corridor that Johnson had came from, passing by numerous destroyed Warthogs and dead Marines testifying to the losing battle the UNSC had been fighting. As he approached the door to the road that would lead back to the motor pool he experienced another vision of Cortana reciting part of Dr Halsey's induction speech to the Spartan-IIs. The roadway to the motor pool was heavily fortified by plasma cannons and numerous Unggoy and Kig-Yar patrols, forcing John to fight his way through. He eventually made it back to the operations center, where he overheard a conversation between the Prophet of Truth and the commanding War Chieftain in the room. When the Chieftain nervously reported that he had not yet discovered the UNSC's plan to stop Truth, the Prophet angrily told him to find the information he needed or be left behind on the "Great Journey" before cutting the feed. As the War Chieftain ordered his subordinates to tell the Yanme'e to search the machines for information, John-117 attacked. The War Chieftain unlimbered his fuel rod gun and returned fire but the Master Chief eventually defeated all of the Covenant in the operations center and managed to re-activate the bomb. As the now-active bomb was linked to many other smaller charges throughout Crow's Nest, the entire base began to explode.[1]
Sergeant Johnson urged the Master Chief to go to the south hangar, where a service elevator would allow him to escape from the facility. Retracing his steps to the hangar, John made his way past a group of panicking Unggoy in the nearby cave while echoes of Halsey's speech repeated by Cortana continued to assail him through his neural interface. As Unggoy and Yanme'e in the vehicle access corridor desperately attempted to escape from the exploding base, John pushed through, eventually arriving in the south hangar as Phantoms took off from the base, abandoning many Covenant troops to their fates. The Spartan made his way to the elevator and entered just as flames roared into the hangar bay. As the elevator descended into an underground vehicle bay, the base detonated above him and the elevator was shaken loose, plummeting to the ground below. As it slammed into the ground and John lost consciousness, the final thing he heard was Cortana's voice telling him that "this place" would become his tomb.[1]
Aftermath[edit]
After waking up in the underground vehicle bay, John regrouped with a number of Marines led by Gunnery Sergeant Reynolds who had escaped Crow's Nests's destruction. The Spartan along with any Marines still fit for duty mounted up on several surviving Warthogs and left the base. They would go on to re-establish radio contact with Commander Keyes and Sergeant Johnson and rally a number of Marines scattered across the Kenyan savanna before launching an assault on the Covenant-held Tsavo Highway, opening up a route into the city of Voi where they would go on to assault the Prophet of Truth's anti-aircraft defenses.[6][7]
Participants[edit]
UNSC[edit][edit]Military personnel[edit]
Covenant separatists[edit][edit]Military personnel[edit]
Units[edit]Ground forces[edit] |
Covenant[edit][edit]Non-combatants[edit]
Units[edit][edit] |
List of appearances[edit]
- Halo 3 (First appearance)
Sources[edit]
- ^ a b c d e f g h i j k l m n o p q r s t u v w x y z Halo 3, campaign level Crow's Nest
- ^ Halo 2, campaign level The Great Journey
- ^ Halo 3, campaign level Arrival
- ^ Halo: Landfall, Last One Standing
- ^ Halo 3, campaign level Sierra 117
- ^ Halo 3, campaign level Tsavo Highway
- ^ Halo 3, campaign level The Storm
- ^ a b bungie.net, The Tru7h About Co-Op in Halo 3 (Retrieved on Nov 14, 2014) [archive]
| |||||||||||
