Coastal Highway: Difference between revisions
From Halopedia, the Halo wiki
No edit summary |
m (Reverted edits by The ranger 3,000 (talk) to last revision by XScruffyDaSasquatchx) Tag: Rollback |
||
| (61 intermediate revisions by 17 users not shown) | |||
| Line 1: | Line 1: | ||
{{ | {{Status|Gameplay}} | ||
{{disambig header|the campaign level|the achievement|Coastal Highway (achievement)}} | |||
{{Level infobox | {{Level infobox | ||
| | |pagegamelabel=ODST | ||
|prev=''[[Data Hive]]'' | |prev=''[[Data Hive]]'' | ||
|next=''[[Halo 3: ODST credits]]'' | |next=*''[[Halo 3: ODST credits]]'' {{C|''[[Halo 3: ODST]]''}} | ||
*''[[The | *''[[Epilogue (Halo 3: ODST)|Epilogue]]'' {{C|''[[Halo: The Master Chief Collection|MCC]]''}} | ||
|name='''''Coastal Highway''''' | |||
|image=[[File:H3ODST CoastalHighway Loadscreen.png|300px]] | |||
|game=''[[Halo 3: ODST]]'' | |game=''[[Halo 3: ODST]]'' | ||
| | |devname=<code>l300</code>{{Ref/File|Id=H3ODSTEK|H3ODSTEK|H3ODSTEK\tags\levels\atlas\l300\l300.scenario}} | ||
|player=[[ | |player=*[[ODST_(player_character)#Rookie|Rookie]] (player 1) | ||
|date | *[[ODST_(player_character)|ODST]] (co-op) | ||
*[[2552#November 15, 2552|November 15, 2552]] | |date=*[[2552#October 21, 2552|October 21, 2552]] <br> | ||
*[[2552#November 15, 2552|November 15, 2552]]{{Ref|Id=lootcrate2|'''[[Halo Legendary Crate]]''', ''[[Halo Legendary Crate/Data Drops|Data Drop #2]]''}} {{C|''Epilogue''}} | |||
*[[2552#November 17, 2552|November 17, 2552]] {{C|''Legendary Ending''}} | *[[2552#November 17, 2552|November 17, 2552]] {{C|''Legendary Ending''}} | ||
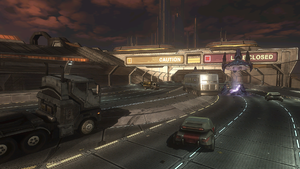
|place=[[New Mombasa Waterfront Highway|Waterfront Highway]], [[New Mombasa]], [[Earth]] | |place=[[New Mombasa Waterfront Highway|Waterfront Highway]], [[New Mombasa]], [[Earth]] | ||
|objective=Escort [[Quick to Adjust|the asset]] out of the city. | |objective=Escort [[Quick to Adjust|the asset]] out of the city. | ||
| | |partime=00:25:00 {{C|''Master Chief Collection''}} | ||
|parscore=90,000 {{C|''Master Chief Collection''}}<br/>60,000 {{C|''Halo 3: ODST''}} | |||
| | |||
}} | }} | ||
{{Article quote|Escort [[Quick to Adjust|the asset]] out of the city.}} | |||
{{Article | |||
'''Coastal Highway''' is the last ''[[Halo 3: ODST]]'' [[Campaign]] level. | '''Coastal Highway''' is the last ''[[Halo 3: ODST]]'' [[Campaign]] level. | ||
Completing this level on [[Normal]] or above unlocks | Completing this level on [[Normal]] or above unlocks the map ''[[Last Exit]]'' on [[Firefight (Halo 3: ODST)|Firefight]] mode. | ||
==Summary== | ==Summary== | ||
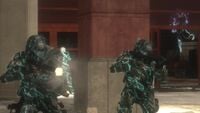
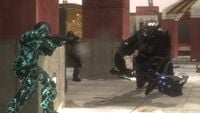
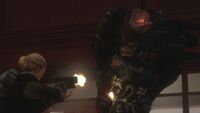
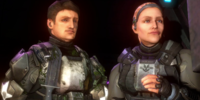
As the [[Battle of Mombasa]] enters its final stages, the [[Rookie]], [[Edward Buck|Buck]], [[Veronica Dare|Dare]], and [[Quick to Adjust|Vergil]] fight their way to the [[New Mombasa|city]]'s Coastal Highway, where Dare and Vergil board an [[Olifant]]. Buck and the Rookie escort them along the [[ | As the [[Battle of Mombasa]] enters its final stages, the [[Rookie]], [[Edward Buck|Buck]], [[Veronica Dare|Dare]], and [[Quick to Adjust|Vergil]] fight their way to the [[New Mombasa|city]]'s Coastal Highway, where Dare and Vergil board an [[Olifant]]. Buck and the Rookie escort them along the [[Covenant]]-infested highway with various [[M12 Warthog|Warthogs]] and a [[M808B Main Battle Tank|Scorpion]], hoping to reach the shipyards for extraction. However, a [[Deutoros-pattern Scarab|Scarab]] manages to cripple the Olifant, forcing the group to divert off the highway to a nearby building. There they fight off waves of Covenant until they are finally saved by the [[Ru'swum-pattern Phantom|Phantom]] that they captured earlier. Reunited at last, the [[Alpha-Nine|squad]] leaves the war-torn city just as it is glassed by [[CAS-class assault carrier|assault carriers]] and [[Ket-pattern battlecruiser|battlecruisers]]. | ||
==Transcript== | ==Transcript== | ||
[http://youtu.be/KVdZwFmi5-Q '''{''Cutscene''}'''] | [http://youtu.be/KVdZwFmi5-Q '''{''Cutscene''}'''] | ||
''Buck backs into [[elevator]], removing his helmet. Dare, The Rookie, and the [[Huragok]] are already inside.'' | ''Buck backs into [[elevator]], removing his helmet. Dare, [[The Rookie]], and the [[Huragok]] are already inside.'' | ||
*'''[[Gunnery Sergeant]] Edward Buck''': "Whew! Lord, that thing stinks. Kinda reminds me of my-" | *'''[[Gunnery Sergeant]] Edward Buck''': "Whew! Lord, that thing stinks. Kinda reminds me of my-" | ||
| Line 101: | Line 61: | ||
'''{''Gameplay''}''' | '''{''Gameplay''}''' | ||
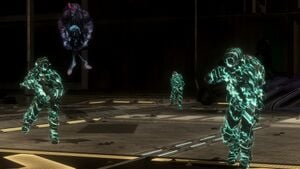
[[File:H3ODST OvershieldsForODSTs.jpg|thumb|300px|The ODSTs are protected by overshields from the Huragok.]] | |||
*'''Buck''': "Captain, how about you hang back? Let us clear a path." | *'''Buck''': "Captain, how about you hang back? Let us clear a path." | ||
| Line 106: | Line 68: | ||
*'''Dare''': "Agreed. I'll stay with the asset, give it close cover." | *'''Dare''': "Agreed. I'll stay with the asset, give it close cover." | ||
''Buck and the Rookie come across a Covenant patrol, with a [[Deployable Lookout Tower]] and | ''Buck and the Rookie come across a Covenant patrol, with a [[Deployable Lookout Tower]] and plasma cannons.'' | ||
*'''Dare''': "Buck, that turret has us pinned. We can't advance!" | *'''Dare''': "Buck, that turret has us pinned. We can't advance!" | ||
| Line 152: | Line 114: | ||
''Once the Rookie reaches the elevator:'' | ''Once the Rookie reaches the elevator:'' | ||
*'''Buck''': "Sit tight. We'll need the | *'''Buck''': "Sit tight. We'll need the alien to power on the switch." | ||
''The Engineer powers on the switch.'' | ''The Engineer powers on the switch.'' | ||
| Line 166: | Line 128: | ||
[http://youtu.be/2lTD-RlWctg '''{''Cutscene''}'''] | [http://youtu.be/2lTD-RlWctg '''{''Cutscene''}'''] | ||
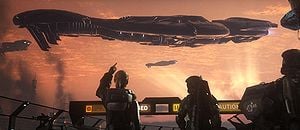
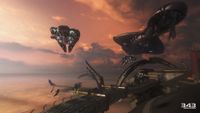
''View of the Highway at dawn opens. Cut to Dare, The Rookie, Buck, and Vergil moving forward. Covenant | [[File:Fleetwatch.jpg|thumb|300px|Dare points at a ''Ket''-pattern battlecruiser.]] | ||
''View of the Highway at dawn opens. Cut to Dare, The Rookie, Buck, and Vergil moving forward. Covenant {{Pattern|Ket|battlecruiser}}s fly above. Dare points to one.'' | |||
*'''Dare''': "When did ''this'' happen?" | *'''Dare''': "When did ''this'' happen?" | ||
| Line 176: | Line 139: | ||
''Buck takes off his helmet.'' | ''Buck takes off his helmet.'' | ||
*'''Buck''': "Oh, I'm sorry, ''I'' was a little busy. Making sure perfume ''(points to | *'''Buck''': "Oh, I'm sorry, ''I'' was a little busy. Making sure perfume ''(points to Huragok)'' over here didn't take a round and blow us all up!" | ||
''The | ''The Huragok looks sad, and floats away.'' | ||
*'''Dare''': "Eddie Buck, always thinking with his gun. You haven't changed one bit!" | *'''Dare''': "Eddie Buck, always thinking with his gun. You haven't changed one bit!" | ||
| Line 188: | Line 151: | ||
*'''Buck''': "Oh, you got that right!" | *'''Buck''': "Oh, you got that right!" | ||
''The Rookie tries to motion to the two that the | ''The Rookie tries to motion to the two that the Huragok is gone, but to no avail.'' | ||
*'''Dare''': "I never thought I'd see you again!" | *'''Dare''': "I never thought I'd see you again!" | ||
| Line 194: | Line 157: | ||
*'''Buck''': "Yeah? Well...here I am!" | *'''Buck''': "Yeah? Well...here I am!" | ||
''A cruiser | ''A cruiser drops out of slipspace attracting the attention of the squad.'' | ||
*'''Dare''': "We need to move. Now. Were you too busy to plan our exit?" | *'''Dare''': "We need to move. Now. Were you too busy to plan our exit?" | ||
*'''Buck''': "[[Kikowani Station | *'''Buck''': "[[Kikowani Station|I stole a]] [[Ru'swum-pattern Phantom|Phantom]]. Yes. Thank you. I hid it in the shipyards down the highway. ''(looks towards a nearby Warthog)'' But I only have room for two, so...that thing's gonna have to sit on your lap." | ||
''Buck points to where the Engineer was, then realizes that it is gone.'' | ''Buck points to where the Engineer was, then realizes that it is gone.'' | ||
| Line 204: | Line 167: | ||
*'''Dare''': "The Engineer, where did it go?" | *'''Dare''': "The Engineer, where did it go?" | ||
''Everyone looks around in panic, and then to the Olifant next to them. The hatch opens, and the | ''Everyone looks around in panic, and then to the [[Olifant]] next to them. The hatch opens, and the Huragok's tentacle appears. The Huragok sounds the horn twice. Dare runs up to the Olifant.'' | ||
*'''Dare''': "Keep me covered. And try to keep up." | *'''Dare''': "Keep me covered. And try to keep up." | ||
| Line 230: | Line 193: | ||
''If the player keeps walking:'' | ''If the player keeps walking:'' | ||
*'''Buck''': "What are you, crazy? Stop moving around, and drive this | *'''Buck''': "What are you, crazy? Stop moving around, and drive this Hog!" | ||
''The Rookie gets in the Warthog. He drives ahead of the Olifant, which is leaning off the main road.'' | ''The Rookie gets in the Warthog. He drives ahead of the Olifant, which is leaning off the main road.'' | ||
| Line 240: | Line 203: | ||
*'''Dare (COM)''': "Hey! Watch where you put that." | *'''Dare (COM)''': "Hey! Watch where you put that." | ||
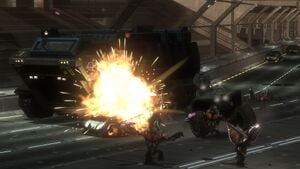
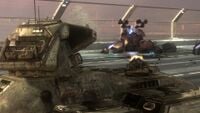
[[File:H3ODST CoastalHighwayBattle.jpg|thumb|300px|Grunts flee from Olifant and Warthog.]] | |||
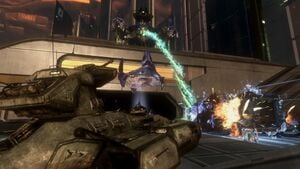
''The four run into a pack of [[Unggoy|Grunts]]. The Olifant merely smashes through the cars.'' | ''The four run into a pack of [[Unggoy|Grunts]]. The Olifant merely smashes through the cars.'' | ||
| Line 267: | Line 231: | ||
*'''Dare (COM)''': "The shields are still up, but not for long!" | *'''Dare (COM)''': "The shields are still up, but not for long!" | ||
''or'' | |||
*'''Dare (COM)''': "Shields are holding, but not for long!" | |||
''If the Olifant's shield takes heavy damage.'' | |||
*'''Dare (COM)''': "Shields falling, take out those Covenant!" | |||
''And, if the Rookie and Buck successfully eliminate whatever is damaging the Olifant:'' | ''And, if the Rookie and Buck successfully eliminate whatever is damaging the Olifant:'' | ||
*'''Dare (COM)''': "Shields are full charged. Thanks for the assist, trooper!" | *'''Dare (COM)''': "Shields are full charged. Thanks for the assist, trooper!" | ||
''or'' | |||
*'''Dare (COM)''': "We're good, trooper. Thanks for the help!" | |||
''If the Rookie failed to protect the Olifant. Dare will be thrown out and the Olifant went out of control.'' | |||
*'''Buck''': "The Olifant is dead! Veronica, talk to me! Veronica!!" | |||
''Grunts and some Brutes protect the door up ahead, but the Rookie and Buck kill them. They head through the door.'' | ''Grunts and some Brutes protect the door up ahead, but the Rookie and Buck kill them. They head through the door.'' | ||
''The second door opens, revealing a lookout tower with a Grunt wielding a [[ | ''The second door opens, revealing a lookout tower with a Grunt wielding a [[Pez'tk-pattern fuel rod gun|Fuel Rod Gun]]. A Covenant battlecruiser flies over them.'' | ||
*'''Buck''': "Another cruiser!" | *'''Buck''': "Another cruiser!" | ||
*'''Dare (COM)''': "They're all heading to the | *'''Dare (COM)''': "They're all heading to the slipspace crater, the Covenant dig site north of the city." | ||
''A huge air force of Banshees are seen ahead, but they're too far to be much of a threat.'' | ''A huge air force of Banshees are seen ahead, but they're too far to be much of a threat.'' | ||
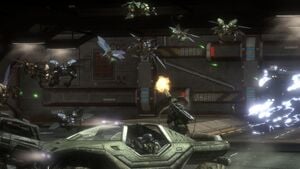
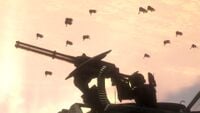
[[File:H3ODST CoastalHighwayBattleDrones.jpg|thumb|300px|The team comes across a swarm of Yanme'e.]] | |||
''The Olifant approaches the door, which opens. A whole swarm of [[Yanme'e|Drones]] appear. Buck and the Rookie kill them.'' | ''The Olifant approaches the door, which opens. A whole swarm of [[Yanme'e|Drones]] appear. Buck and the Rookie kill them.'' | ||
''Two Wraiths and some Covenant infantry fill up the highway, but the group speed past them to the door. The small group of Jackals and a [[Jiralhanae|Brute]] are defeated. Next to the door is another Warthog. Phantoms drop off reinforcements and fly away. Another Covenant cruiser flies over them. A group of [[ | ''Two Wraiths and some Covenant infantry fill up the highway, but the group speed past them to the door. The small group of Jackals and a [[Jiralhanae|Brute]] are defeated. Next to the door is another Warthog. Phantoms drop off reinforcements and fly away. Another Covenant cruiser flies over them. A group of [[Karo'etba-pattern Ghost|Ghosts]] crowd around a crashed Phantom. The group defeats the Ghosts and heads to the next door.'' | ||
*'''Buck''': "Hey, hold up! It's a Gauss 'Hog. Let's change vehicles." | *'''Buck''': "Hey, hold up! It's a Gauss 'Hog. Let's change vehicles." | ||
| Line 294: | Line 275: | ||
*'''Buck''': "Concentrate on driving. I got this." | *'''Buck''': "Concentrate on driving. I got this." | ||
''The door opens to reveal the next section of the highway. More Phantoms come. A huge group of Ghosts and Banshees come, but Buck easily takes them out. The door opens at the end. The next section has a [[ | ''The door opens to reveal the next section of the highway. More Phantoms come. A huge group of Ghosts and Banshees come, but Buck easily takes them out. The door opens at the end. The next section has a [[Deutoros-pattern Scarab|Scarab]] in the distance, along with some [[Type-26 Banshee|Banshees]]. The Engineer emits a high-pitched wail in the presence of the Scarab.'' | ||
*'''Dare (COM)''': "Buck, Scarab!" | *'''Dare (COM)''': "Buck, Scarab!" | ||
| Line 300: | Line 281: | ||
*'''Buck''': "I see it. Must've dropped out from one of the cruisers. Just keep driving, it hasn't spotted us." | *'''Buck''': "I see it. Must've dropped out from one of the cruisers. Just keep driving, it hasn't spotted us." | ||
''A Covenant [[ | ''A Covenant [[Zurdo-pattern Wraith|Wraith]] appears.'' | ||
*'''Buck''': "There's a Wraith moving in on our position!" | *'''Buck''': "There's a Wraith moving in on our position!" | ||
| Line 316: | Line 297: | ||
*'''Buck''': "Captain's right, trooper. We're gonna need that tank." | *'''Buck''': "Captain's right, trooper. We're gonna need that tank." | ||
''The two commandeer the Scorpion, and the door opens. | ''The two commandeer the Scorpion, and the door opens. They move down the Highway, crushing any Covenant in the way. They head through another set of doors. A {{Class|CAS|assault carrier}} appears from the clouds in the distance.'' | ||
*'''Buck''': "Assault | *'''Buck''': "Assault carrier! Ten o'clock high! Look at the size of that thing!" | ||
''Once the Rookie drives through the next set of gates, the | ''Once the Rookie drives through the next set of gates, the assault carrier begins charging its [[energy projector]].'' | ||
*'''Dare (COM)''': "It's charging its excavation beam!" | *'''Dare (COM)''': "It's charging its excavation beam!" | ||
| Line 326: | Line 307: | ||
*'''Buck''': "But the dig site's on the other side of the city!" | *'''Buck''': "But the dig site's on the other side of the city!" | ||
''After the next set of gates has been passed, the | ''After the next set of gates has been passed, the carrier begins [[glassing]] the city in the distance.'' | ||
*'''Buck''': "Damn it, no! They're gonna burn this city and then glass the whole planet! Covenant bastards! It's [[Siege of New Alexandria|just like]] [[Fall of Reach|Reach]] all over again!" | *'''Buck''': "Damn it, no! They're gonna burn this city and then glass the whole planet! Covenant bastards! It's [[Siege of New Alexandria|just like]] [[Fall of Reach|Reach]] all over again!" | ||
| Line 336: | Line 317: | ||
*'''Buck''': "Mickey, you read me? Change of plans. You're coming to us." | *'''Buck''': "Mickey, you read me? Change of plans. You're coming to us." | ||
*''' | *'''Private First Class [[Michael Crespo|Michael "Mickey" Crespo]] (COM)''': "Sky's kind of crowded, Gunny." | ||
*'''Buck''': "There's no other way. Covenant just wasted the highway. We're gonna keep rolling as far as we can. Get airborne, fly the Phantom to my beacon." | *'''Buck''': "There's no other way. Covenant just wasted the highway. We're gonna keep rolling as far as we can. Get airborne, fly the Phantom to my beacon." | ||
| Line 352: | Line 333: | ||
*'''Dare (COM)''': "We're going too fast, I can't stop!" | *'''Dare (COM)''': "We're going too fast, I can't stop!" | ||
''The Scarab fires its | [[File:H3ODST ScarabAttacksOlifant.jpg|thumb|300px|The Scarab fires at the Olifant.]] | ||
''The Scarab fires its [[focus cannon]] at the Olifant, severely damaging it.'' | |||
*'''Buck''': "Veronica! Talk to me!" | *'''Buck''': "Veronica! Talk to me!" | ||
| Line 387: | Line 369: | ||
*'''Buck''': "Area secure. Veronica, come to us. We'll cover you." | *'''Buck''': "Area secure. Veronica, come to us. We'll cover you." | ||
''As Dare and Vergil dismount, the Olifant explodes after sustaining heavy damage.'' | |||
*'''Buck''': "Mickey, what's your ETA?" | *'''Buck''': "Mickey, what's your ETA?" | ||
| Line 405: | Line 389: | ||
*'''Buck''': "More Phantoms! Look sharp!" | *'''Buck''': "More Phantoms! Look sharp!" | ||
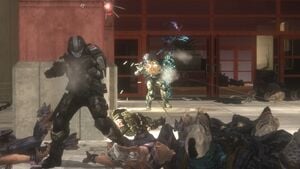
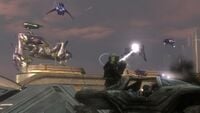
[[File:H3ODST HuragokDefense2.jpg|thumb|300px|The ODSTs defend the entrance into Uplift Nature Reserve.]] | |||
''The Phantoms deploy a squad of Kig-Yar Snipers, followed by a pair of Hunters.'' | ''The Phantoms deploy a squad of Kig-Yar Snipers, followed by a pair of [[Mgalekgolo|Hunters]].'' | ||
*'''Buck''': "Hunters!" | *'''Buck''': "Hunters!" | ||
| Line 420: | Line 404: | ||
*'''Mickey (COM)''': "Yee-Haa! Light 'em up, boys!" | *'''Mickey (COM)''': "Yee-Haa! Light 'em up, boys!" | ||
*''' | *'''Corporal [[Taylor H. Miles|Taylor "Dutch" Miles]] (COM)''': "Romeo, take the one on the left." | ||
*'''Lance Corporal [[Kojo Agu|Kojo "Romeo" Agu]] (COM)''' ''(exhausted)'': "I got it. Hold her steady." | *'''Lance Corporal [[Kojo Agu|Kojo "Romeo" Agu]] (COM)''' ''(exhausted)'': "I got it. Hold her steady." | ||
| Line 448: | Line 432: | ||
*'''Buck''': "Long as it don't get hit!" | *'''Buck''': "Long as it don't get hit!" | ||
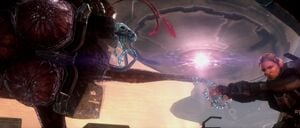
''The ground suddenly shakes as | [[File:H3ODST DarePullsQuick.jpg|thumb|300px|Dare tries dragging the Huragok towards the Phantom's gravity lift.]] | ||
''The ground suddenly shakes as another Covenant assault carrier exits slipspace dangerously close to the surface. It begins charging its energy projector. The Huragok sees the assault carrier, seems to panic, and refuses to move. Dare attempts to drag the Huragok to the Phantom.'' | |||
*'''Dare''': "Come on...damn it! Move!" | *'''Dare''': "Come on...damn it! Move!" | ||
| Line 468: | Line 451: | ||
''Buck, Dutch, and the Rookie board the Phantom.'' | ''Buck, Dutch, and the Rookie board the Phantom.'' | ||
''The | ''The assault carrier begins glassing the area as the Phantom pulls out with everyone aboard.'' | ||
[http://youtu.be/AuOWMRSGmCE '''{''Finale''}'''] | [http://youtu.be/AuOWMRSGmCE '''{''Finale''}'''] | ||
''Romeo is leaning tiredly against his | ''Romeo is leaning tiredly against his plasma cannon. Buck and the Rookie pull him away from the turret to the center of the vessel.'' | ||
*'''Buck''': "Easy does it." | *'''Buck''': "Easy does it." | ||
| Line 497: | Line 480: | ||
''Vergil floats to the controls.'' | ''Vergil floats to the controls.'' | ||
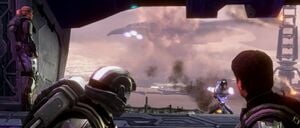
[[File:H3ODST TooBusyToCare.jpg|thumb|300px|Dare, Buck, and Rookie watch the city in flames.]] | |||
*'''Dare''': "I think they're too busy to care." | *'''Dare''': "I think they're too busy to care." | ||
| Line 512: | Line 495: | ||
*'''Dare''': "Win this war...then ask me that again." | *'''Dare''': "Win this war...then ask me that again." | ||
''Dutch presses a control panel. The Phantom's sides close as it sets off for space, leaving multiple Covenant | ''Dutch presses a control panel. The Phantom's sides close as it sets off for space, leaving multiple Covenant assault carriers and battlecruisers to glass the city. As the camera zooms out, it reveals the Covenant ships uncovering [[Portal at Voi|the Portal]].'' | ||
''[[Halo 3: ODST credits|Credits]] roll.'' | ''[[Halo 3: ODST credits|Credits]] roll.'' | ||
| Line 520: | Line 503: | ||
'''EPILOGUE''' | '''EPILOGUE''' | ||
'''[[ONI orbital facility]]''' | '''[[Quito Terminus|ONI orbital facility]]''' | ||
'''One month after drop''' | '''One month after drop''' | ||
| Line 530: | Line 513: | ||
''The Marine is revealed to be [[Avery Junior Johnson|Sergeant Johnson]].'' | ''The Marine is revealed to be [[Avery Junior Johnson|Sergeant Johnson]].'' | ||
*'''[[Sergeant Major]] [[Avery Junior Johnson]]''': "Don't worry...''(tapping a control panel)''...I know what the aliens like." | *'''[[Sergeant Major]] [[Avery Junior Johnson]]''': "Don't worry...''(tapping a control panel)''...I [[Halo: First Strike|know]] [[Metropolis|what the aliens like]]." | ||
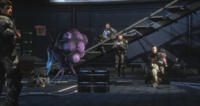
[[File:ONI orbital facility.png|thumb|300px|Johnson and Dare prepare to interrogate Quick to Adjust and Vergil.]] | |||
''The hatch opens, and the two walk into the interrogation room. Vergil is floating in the center, toying with an F99's Optics Package. Buck's squad is sitting or standing nearby. The Rookie is sleeping under some stairs.'' | ''The hatch opens, and the two walk into the interrogation room. Vergil is floating in the center, toying with an F99's Optics Package. Buck's squad is sitting or standing nearby. The Rookie is sleeping under some stairs.'' | ||
| Line 558: | Line 542: | ||
*'''Johnson''': "You're gonna tell me exactly what they're looking for. And then, you're gonna help me stop 'em." | *'''Johnson''': "You're gonna tell me exactly what they're looking for. And then, you're gonna help me stop 'em." | ||
'''''Easter Egg''': At this point, if the right thumbstick is held left, one can see Buck with a [[Cavemen|Caveman]] which is sitting on a grating. Buck nervously picks something off the monkey (possibly a bug), and proceeds to put it in his mouth.'' | '''''Easter Egg''': At this point, if the right thumbstick is held left, one can see Buck with a [[Cavemen|Caveman]] which is sitting on a grating. Buck nervously picks something off of the monkey (possibly a bug), and proceeds to put it in his mouth.''{{Ref/Site|URL=http://halocinema.bungie.org/halo3odst/hd/epilogue_easter_egg.wmv|Site=Halo.Bungie.Org|Page=Halo 3: ODST Cutscene Library - Epilogue Easter Egg}} | ||
''The Huragok lights Johnson's cigar, suggesting a deal. Johnson smiles, and the Huragok clicks the lighter off, and the screen blacks out with the lighter's click.'' | ''The Huragok lights Johnson's cigar, suggesting a deal. Johnson smiles, and the Huragok clicks the lighter off, and the screen blacks out with the lighter's click.'' | ||
'''{''Legendary-only Scene''}''' | |||
''In the [[Superintendent]]'s underground data center, many Huragok are looking around the area, as one looks behind to see the [[Prophet of Truth]] arriving from above on his [[gravity throne]], accompanied by two Huragok behind him. Inspecting the area around him, the Prophet of Truth stops to peer forward, smiles, and orders the Huragok to move forward. A large hole is shown, with part of a [[Forerunner]] relic located underneath. Several Phantoms fly around in the area, one approaching and moving towards the structure.'' | ''In the [[Superintendent]]'s underground data center, many Huragok are looking around the area, as one looks behind to see the [[Prophet of Truth]] arriving from above on his [[gravity throne]], accompanied by two Huragok behind him. Inspecting the area around him, the Prophet of Truth stops to peer forward, smiles, and orders the Huragok to move forward. A large hole is shown, with part of a [[Forerunner]] relic located underneath. Several Phantoms fly around in the area, one approaching and moving towards the structure.'' | ||
==Achievements== | |||
The following [[achievement]]s can be unlocked on Coastal Highway across the [[Xbox 360]] and ''[[Halo: The Master Chief Collection]]'' editions of ''Halo 3: ODST''. | |||
{| class="wikitable" | |||
|- | |||
! scope="col" style="width:135px;text-align:center;" |'''''Halo: 3: ODST'' (Xbox 360)''' | |||
! scope="col" style="width:135px;text-align:center;" |'''''Halo: MCC'' (Xbox One)''' | |||
! scope="col" style="width:135px;text-align:center;" |'''''Halo: MCC'' (Steam)''' | |||
! scope="col" style="width:175px;height:20px;text-align:center;" |'''Title''' | |||
! scope="col" style="width:350px;height:20px;text-align:center;" |'''Unlock requirement''' | |||
! scope="col" style="width:200px;height:20px;text-align:center;" |'''Games''' | |||
|- | |||
|[[File:H3ODST Achievement Coastal Highway.png|center|64px]] | |||
|[[File:HTMCC H3ODST Achievement CoastalHighway.png|center|114px]] | |||
|[[File:HTMCC H3ODST Achievement CoastalHighway Steam.jpg|center|64px]] | |||
|<center>'''[[Coastal Highway (achievement)|Coastal Highway]]'''</center> | |||
|Complete Coastal Highway on [[Normal]], [[Heroic]], or [[Legendary]]. {{C|''Halo 3: ODST''}}<br/> Complete Coastal Highway on any difficulty. {{C|''Halo: The Master Chief Collection''}} | |||
|<center>''[[Halo 3: ODST]]''<br/>''[[Halo: The Master Chief Collection]]''</center> | |||
|- | |||
|[[File:H3ODST Achievement Vidmaster Challenge Deja Vu.png|center|64px]] | |||
|<center>N/A</center> | |||
|<center>N/A</center> | |||
|<center>'''[[Vidmaster Challenge: Déjà Vu]]'''</center> | |||
|Complete Highway on 4-player Legendary LIVE co-op, with Iron, and no 'Hog or Scorpion. | |||
|<center>''[[Halo 3: ODST]]''</center> | |||
|- | |||
|<center>N/A</center> | |||
|[[File:MCC Double Time!.jpg|center|114px]] | |||
|[[File:HTMCC H3ODST Achievement DoubleTime Steam.jpg|center|64px]] | |||
|<center>'''[[Double Time!]]'''</center> | |||
|Beat the par time on Coastal Highway. | |||
|<center>''[[Halo: The Master Chief Collection]]''</center> | |||
|- | |||
|<center>N/A</center> | |||
|[[File:This Oliphant Has No Brakes.jpg|center|114px]] | |||
|[[File:HTMCC H3ODST Achievement ThisOliphantHasNoBrakes Steam.jpg|center|64px]] | |||
|<center>'''[[This Oliphant Has No Brakes]]'''</center> | |||
|Beat the par score on Coastal Highway. | |||
|<center>''[[Halo: The Master Chief Collection]]''</center> | |||
|- | |||
|<center>N/A</center> | |||
|[[File:Déjà Vu.jpg|center|114px]] | |||
|[[File:HTMCC Achievement Déjà Vu Steam.jpg|center|64px]] | |||
|<center>'''[[Déjà Vu]]'''</center> | |||
|Complete Coastal Highway on 4-player Legendary co-op, with Iron, and no 'Hog or Scorpion. | |||
|<center>''[[Halo: The Master Chief Collection]]''</center> | |||
|- | |||
|<center>N/A</center> | |||
|[[File:BLAM! Said The Lady!.jpg|center|114px]] | |||
|[[File:HTMCC H3ODST Achievement BLAMSaidTheLady Steam.jpg|center|64px]] | |||
|<center>'''[["BLAM" Said The Lady!]]'''</center> | |||
|Swap Dare's pistol for a Rocket Launcher on Coastal Highway. | |||
|<center>''[[Halo: The Master Chief Collection]]''</center> | |||
|} | |||
==Trivia== | ==Trivia== | ||
*The [[Vidmaster Challenge: Deja Vu]] can be unlocked by beating this level with four players on [[Legendary]] [[Xbox LIVE]] [[Campaign#Cooperative|Co-op]] with [[Halo 3 | *The [[Vidmaster Challenge: Deja Vu]] can be unlocked by beating this level with four players on [[Legendary]] [[Xbox LIVE]] [[Campaign#Cooperative|Co-op]] with [[Halo 3 skulls#Iron|Iron Skull]] activated and without using Warthogs or Scorpions. | ||
*Throughout the level, players can see several landmarks from previous missions, such as the smoking [[ONI Alpha Site]] and the bridge in [[Uplift Nature Reserve|Uplift Reserve]], on which Dutch witnesses the collapse of the space tether. The structures are best seen in Theater mode. | *Throughout the level, players can see several landmarks from previous missions, such as the smoking [[ONI Alpha Site (location)|ONI Alpha Site]] and the bridge in [[Uplift Nature Reserve|Uplift Reserve]], on which Dutch witnesses the collapse of the space tether. The structures are best seen in Theater mode. | ||
*If the Olifant is destroyed, a corpse will fall out bearing Dare's tag. Closer inspection, however, reveals that the corpse is actually the Rookie's character model. | *If the Olifant is destroyed, a corpse will fall out bearing Dare's tag. Closer inspection, however, reveals that the corpse is actually the Rookie's character model. | ||
*If the player enters the first off ramp before driving the Warthog, the song [[Rock Anthem for Saving the World]] from ''[[Halo: Combat Evolved]]'' will play. | *If the player enters the first off ramp before driving the Warthog, the song [[Rock Anthem for Saving the World]] from ''[[Halo: Combat Evolved]]'' will play. | ||
| Line 575: | Line 613: | ||
*This is the only level where the entirety of the squad fights together: Mickey, Dutch, and Romeo man the Phantom and destroy two attacking Wraiths, while the Rookie, Buck, and Dare secure Vergil and kept it safe from Covenant. | *This is the only level where the entirety of the squad fights together: Mickey, Dutch, and Romeo man the Phantom and destroy two attacking Wraiths, while the Rookie, Buck, and Dare secure Vergil and kept it safe from Covenant. | ||
*Any weapons from the previous level will carry over to this level; in the case of a fresh start from the campaign menu, however, the starting loadout is the [[M7S SMG]] and [[M6C/SOCOM]]. | *Any weapons from the previous level will carry over to this level; in the case of a fresh start from the campaign menu, however, the starting loadout is the [[M7S SMG]] and [[M6C/SOCOM]]. | ||
*Buck will not fire whatever vehicle turret he mans when he speaks scripted dialogue, a point of gameplay contention as the player will likely take damage when dealing with Ghosts, Wraiths, and/or Banshees. | **If the player brings a weapon such as [[M7057 flamethrower]] when completing the level, the loadout will reset to M7S SMG and M6C/SOCOM by default. | ||
*Buck will not fire whatever vehicle turret he mans when he speaks scripted dialogue, a point of gameplay contention as the player will likely take damage when dealing with Ghosts, Wraiths, and/or Banshees. This will have been remedied by the time the Rookie drives a tank. | |||
*In the ''[[Halo: The Master Chief Collection]]'' version of the game, the Epilogue is a separate level and by playing it on Legendary even if you don't beat the rest of the game on Legendary, you can get the Legendary ending. | |||
*The Tilt skull can make the highway section nearly impossible on higher difficulties. As the player only has access to [[Warthog]]s and the Tilt skull greatly reduces damage from bullets against shields, it is significantly harder to protect the Olifant before it is overwhelmed. | |||
*It is inadvisable to equip [[Edward Buck|Buck]] with a rocket launcher until after the highway section. Should he be ejected from the Warthog, Buck will not enter the gunner position and instead sit in the passenger seat. However, he will only fire rockets seldomly, often causing the Olifant to take excessive damage. | |||
===Glitches=== | ===Glitches=== | ||
*The player can also hijack the [[ | *The player can also hijack the [[Ogab'd-pattern anti-aircraft Wraith|AA Wraith]] in this level using the same [[Drive an AA Wraith|glitch]] that allowed the player to hijack them in ''[[Halo 3]]''. Buck will say that he will man the AA Wraith's turret but actually will continue on foot. It is unknown if getting the AA Wraith will invalidate the Deja Vu achievement, which explicitly bans only the use of Warthogs and Scorpions. | ||
*The Olifant can be flipped over using debris on the highway, which causes the Olifant to eventually instantly teleport back to its original position. | *The Olifant can be flipped over using debris on the highway, which causes the Olifant to eventually instantly teleport back to its original position. | ||
*Players can actually get a Ghost past the barricade when securing the building. Use another vehicle as a ramp for the Ghost and allow it to flip when one hits the invisible barrier. The Ghost should roll through, allowing one to ride it to the building. | *Players can actually get a Ghost past the barricade when securing the building. Use another vehicle as a ramp for the Ghost and allow it to flip when one hits the invisible barrier. The Ghost should roll through, allowing one to ride it to the building. | ||
*In Theater mode, when the player gets out of his/her vehicle and enters the entrance to the Reserve, press Y to get into flying cam. Now the viewer will be able to roam the city and beyond free like in Pam Cam, just like the glitch on Mombasa Streets. | *In Theater mode, when the player gets out of his/her vehicle and enters the entrance to the Reserve, press Y to get into flying cam. Now the viewer will be able to roam the city and beyond free like in Pam Cam, just like the glitch on Mombasa Streets. | ||
*Using Boom Skull will cause Vergil to die instantly upon dismounting from Olifant. Vergil will always be caught inside explosion distance when Boom Skull applies, as the Olifant explodes upon dismounting. The only way to avoid this glitch is to play this level without Boom Skull. | |||
===Mistakes=== | ===Mistakes=== | ||
*Buck's assault rifle lacks a muzzle in the beginning cutscene, when everyone is in the elevator. This is best seen when Buck turns to leave the elevator, revealing the rifle on his back holster. | *Buck's assault rifle lacks a muzzle in the beginning cutscene, when everyone is in the elevator. This is best seen when Buck turns to leave the elevator, revealing the rifle on his back holster. | ||
*When the ODSTs' Phantom arrives after the final wave of enemies, the ODSTs manning the turrets are not Dutch and Romeo but rather two Rookie NPCs, both armed with carbines on their backs. | *When the ODSTs' Phantom arrives after the final wave of enemies, the ODSTs manning the turrets are not Dutch and Romeo but rather two Rookie NPCs, both armed with carbines on their backs. | ||
==Gallery== | |||
===Concept art=== | |||
<gallery> | |||
File:H3ODST HighwayDebris Concept.jpg|Concept art of the highway. | |||
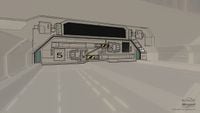
File:H3ODST_CoastalHighway_Gate_Concept_1.jpg|Concept art for gates on the highway. | |||
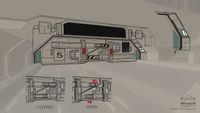
File:H3ODST_CoastalHighway_Gate_Concept_2.jpg|Concept art for gates on the highway. | |||
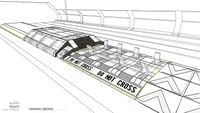
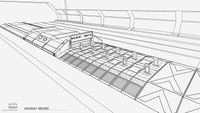
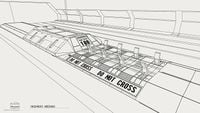
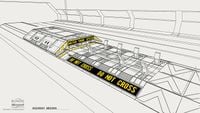
File:H3ODST_CoastalHighway_Median_Concept_1.jpg|Concept art for the median structures on the highway. | |||
File:H3ODST_CoastalHighway_Median_Concept_2.jpg|Concept art for the median structures on the highway. | |||
File:H3ODST_CoastalHighway_Median_Concept_3.jpg|Concept art for the median structures on the highway. | |||
File:H3ODST_CoastalHighway_Median_Concept_4.jpg|Concept art for the median structures on the highway. | |||
File:H3ODST_CoastalHighway_Barrier_Concept.jpg|Concept art for the barrier structures on the highway. | |||
</gallery> | |||
===Screenshots=== | |||
<gallery> | |||
File:H3ODST Menu 10 Coastal Highway.png|Preview of the level in ''Halo 3: ODST'' menu. | |||
File:H3ODST BuckAndBanshees.jpg|A large group of Banshees flying overhead. | |||
File:H3ODST-Highway.jpg|A Phantom and a {{Pattern|Ket|battlecruiser}} fly above the highway. | |||
File:H3ODST GaussBanshees.jpg|A Scarab looms in the distance as Buck fires the Gauss cannon at a Banshee. | |||
File:H3ODST ScorpionAAWraith.jpg|Rookie's Scorpion faces an AA Wraith. | |||
File:H3ODST HuragokDefense.jpg|Rookie, Buck, and Dare defend the entrance to Uplift Nature Reserve. | |||
File:H3ODST BuckRookieChieftain.jpg|Buck and Rookie fighting a Chieftain. | |||
File:H3ODST DareFightsChieftain.jpg|Dare fighting a Chieftain. | |||
File:H3ODST-Buck&Dare.png|Buck and Dare escape New Mombasa onboard the Phantom. | |||
File:Portal odst.png|[[Truth's fleet]] uncovering the Portal. | |||
File:RookieAsleep.png|Alpha Nine guarding the Huragok in the orbital facility. | |||
File:Johnson & Vergil.png|Quick to Adjust lights Johnson's cigar for him. | |||
File:H3ODST Truth&Huragok.png|The Prophet of Truth appears in the Legendary ending. | |||
</gallery> | |||
==Sources== | ==Sources== | ||
{{Ref/Sources}} | |||
{{Levels| | {{Levels|ODST}} | ||
Latest revision as of 18:56, August 26, 2024
|
Prev: |
|
|
Next: |
|
| Coastal Highway | |
|---|---|
| |
|
Game: |
|
|
File name (?): |
|
|
Player: |
|
|
Date: |
|
|
Location: |
|
|
Objective(s): |
Escort the asset out of the city. |
|
Par Time: |
00:25:00 (Master Chief Collection) |
|
Par Score: |
90,000 (Master Chief Collection) |
 |
Halopedia has a walkthrough guide for this level; see Coastal Highway/Walkthrough. |
| “ | Escort the asset out of the city. | ” |
Coastal Highway is the last Halo 3: ODST Campaign level.
Completing this level on Normal or above unlocks the map Last Exit on Firefight mode.
Summary[edit]
As the Battle of Mombasa enters its final stages, the Rookie, Buck, Dare, and Vergil fight their way to the city's Coastal Highway, where Dare and Vergil board an Olifant. Buck and the Rookie escort them along the Covenant-infested highway with various Warthogs and a Scorpion, hoping to reach the shipyards for extraction. However, a Scarab manages to cripple the Olifant, forcing the group to divert off the highway to a nearby building. There they fight off waves of Covenant until they are finally saved by the Phantom that they captured earlier. Reunited at last, the squad leaves the war-torn city just as it is glassed by assault carriers and battlecruisers.
Transcript[edit]
Buck backs into elevator, removing his helmet. Dare, The Rookie, and the Huragok are already inside.
- Gunnery Sergeant Edward Buck: "Whew! Lord, that thing stinks. Kinda reminds me of my-"
Dare punches Buck in the face.
- Buck: (coughs) "What was that for!?"
- Captain Veronica Dare: "Abandoning the mission."
- Buck: "What mission? You dropped off the grid! My squad was scattered-"
Dare walks up to Buck and kisses him. Buck relaxes and puts his arms around Dare.
- Buck: (murmuring) "And that?"
- Dare: "For coming back."
The Rookie and Vergil look awkwardly at Dare and Buck, then at each other.
Switch to the Rookie's perspective.
- Dare: "Thank you."
- Buck: "You did good Rookie, no doubt. But we're not out of this yet."
As Buck walks off the elevator, Dare teasingly looks back at the Rookie, before following Buck.
{Gameplay}
- Buck: "Captain, how about you hang back? Let us clear a path."
- Dare: "Agreed. I'll stay with the asset, give it close cover."
Buck and the Rookie come across a Covenant patrol, with a Deployable Lookout Tower and plasma cannons.
- Dare: "Buck, that turret has us pinned. We can't advance!"
- Buck: "Flank the watchtower, Trooper! Take it out!"
If Vergil comes under fire:
- Buck: "Careful, Rookie! The asset's taking fire!"
Buck and the Rookie eliminate the Covenant outpost.
- Buck: "All clear, Captain. Let's move!"
or
- Buck: "That's the last of them! Captain, let's move!"
- Dare: "Where are we going exactly?"
- Buck: "Waterfront Highway! Fastest way out of the city."
Dare and Vergil come to them as they move down a small street.
- Buck: "Can't that thing move any faster?"
- Dare: "All the shooting, it's...frightened."
- Buck: "Want me to give it a little push?"
- Dare: (whispering) "What do you think?"
- Buck: "Just trying to help."
If the player stalls:
- Buck: "Follow me, trooper. Double time!"
They enter a building.
- Buck: "This way, should be an elevator right through here."
Once the Rookie reaches the elevator:
- Buck: "Sit tight. We'll need the alien to power on the switch."
The Engineer powers on the switch.
- Buck: "Okay, we're all set. Hit it, Rookie."
If the player stalls:
- Dare: "Go on, trooper. Activate the switch."
The Rookie activates the switch, and they enter the elevator.
View of the Highway at dawn opens. Cut to Dare, The Rookie, Buck, and Vergil moving forward. Covenant Ket-pattern battlecruisers fly above. Dare points to one.
- Dare: "When did this happen?"
- Buck: "They started showing up right before I went underground."
- Dare: "And you waited until now to tell me that?"
Buck takes off his helmet.
- Buck: "Oh, I'm sorry, I was a little busy. Making sure perfume (points to Huragok) over here didn't take a round and blow us all up!"
The Huragok looks sad, and floats away.
- Dare: "Eddie Buck, always thinking with his gun. You haven't changed one bit!"
- Buck: "Me? What about you? Oh, so full of big ONI secrets, couldn't even give a guy a yes or no answer!"
- Dare: "That's not fair."
- Buck: "Oh, you got that right!"
The Rookie tries to motion to the two that the Huragok is gone, but to no avail.
- Dare: "I never thought I'd see you again!"
- Buck: "Yeah? Well...here I am!"
A cruiser drops out of slipspace attracting the attention of the squad.
- Dare: "We need to move. Now. Were you too busy to plan our exit?"
- Buck: "I stole a Phantom. Yes. Thank you. I hid it in the shipyards down the highway. (looks towards a nearby Warthog) But I only have room for two, so...that thing's gonna have to sit on your lap."
Buck points to where the Engineer was, then realizes that it is gone.
- Dare: "The Engineer, where did it go?"
Everyone looks around in panic, and then to the Olifant next to them. The hatch opens, and the Huragok's tentacle appears. The Huragok sounds the horn twice. Dare runs up to the Olifant.
- Dare: "Keep me covered. And try to keep up."
- Buck: "Take my advice, Rookie. If you ever fall for a woman, (puts on his helmet) make sure she's got balls."
Buck nods and moves out, as the Rookie looks on.
{Gameplay}
- Buck: "Take the wheel, Rookie. I'll ride shotgun."
If the player stalls:
- Buck: "Get in the driver seat, trooper. We gotta roll!"
If the player further stalls:
- Buck: "Listen, Marine, we ain't going anywhere until you drive us there!"
If the player tries to walk away:
- Buck: "It's too far to walk, Rookie. Get in the Warthog!"
If the player keeps walking:
- Buck: "What are you, crazy? Stop moving around, and drive this Hog!"
The Rookie gets in the Warthog. He drives ahead of the Olifant, which is leaning off the main road.
- Buck: "Hey, uh, Captain? Pick a lane."
- Dare (COM) (a little irritated): "It's a little crowded in here. The Engineer is doing something with the control circuits."
- Dare (COM): "Hey! Watch where you put that."
The four run into a pack of Grunts. The Olifant merely smashes through the cars.
- Buck: "You got to be kidding me!"
- Dare (COM): "I'm doing the best I can! Just stay out of our way!"
They fight their way down the highway. Next to a locked door is a flipped Warthog.
- Dare (COM): "Covenant must have shut these doors. Give the Engineer a second to override the lock!"
The Engineer opens the door after a few seconds.
- Dare (COM): "That's it! We're moving on."
The door leads to a small checkpoint. A second door opens up back to the highway, where a group of Jackals fire on the group. As the Olifant moves on, shields erupt around it.
- Buck: "Whoa! What just happened?"
- Dare (COM): "I think the Engineer found a way to extend its shields, sent a current through the outer plating. I don't know how strong its shields are, so stay close."
- Buck: "Don't worry! We've got you covered!"
From this point on, Buck and Dare will warn the player whenever the Olifant's shields are lowered or down:
- Buck: "Heads up, Rookie, the captain's in trouble!"
- Dare (COM): "The shields are still up, but not for long!"
or
- Dare (COM): "Shields are holding, but not for long!"
If the Olifant's shield takes heavy damage.
- Dare (COM): "Shields falling, take out those Covenant!"
And, if the Rookie and Buck successfully eliminate whatever is damaging the Olifant:
- Dare (COM): "Shields are full charged. Thanks for the assist, trooper!"
or
- Dare (COM): "We're good, trooper. Thanks for the help!"
If the Rookie failed to protect the Olifant. Dare will be thrown out and the Olifant went out of control.
- Buck: "The Olifant is dead! Veronica, talk to me! Veronica!!"
Grunts and some Brutes protect the door up ahead, but the Rookie and Buck kill them. They head through the door.
The second door opens, revealing a lookout tower with a Grunt wielding a Fuel Rod Gun. A Covenant battlecruiser flies over them.
- Buck: "Another cruiser!"
- Dare (COM): "They're all heading to the slipspace crater, the Covenant dig site north of the city."
A huge air force of Banshees are seen ahead, but they're too far to be much of a threat.
The Olifant approaches the door, which opens. A whole swarm of Drones appear. Buck and the Rookie kill them.
Two Wraiths and some Covenant infantry fill up the highway, but the group speed past them to the door. The small group of Jackals and a Brute are defeated. Next to the door is another Warthog. Phantoms drop off reinforcements and fly away. Another Covenant cruiser flies over them. A group of Ghosts crowd around a crashed Phantom. The group defeats the Ghosts and heads to the next door.
- Buck: "Hey, hold up! It's a Gauss 'Hog. Let's change vehicles."
- Buck: "Same deal, trooper: You drive, I shoot."
The Rookie drives, while Buck takes the Gauss Turret.
- Buck: "Concentrate on driving. I got this."
The door opens to reveal the next section of the highway. More Phantoms come. A huge group of Ghosts and Banshees come, but Buck easily takes them out. The door opens at the end. The next section has a Scarab in the distance, along with some Banshees. The Engineer emits a high-pitched wail in the presence of the Scarab.
- Dare (COM): "Buck, Scarab!"
- Buck: "I see it. Must've dropped out from one of the cruisers. Just keep driving, it hasn't spotted us."
A Covenant Wraith appears.
- Buck: "There's a Wraith moving in on our position!"
- Dare (COM): "How the hell did you make it down this highway in one piece?"
- Buck: "There weren't that many Covenant last night!"
They reach the next set of doors.
- Dare (COM): "I see a Scorpion tank up ahead. We'll need the extra firepower."
If the player stalls:
- Buck: "Captain's right, trooper. We're gonna need that tank."
The two commandeer the Scorpion, and the door opens. They move down the Highway, crushing any Covenant in the way. They head through another set of doors. A CAS-class assault carrier appears from the clouds in the distance.
- Buck: "Assault carrier! Ten o'clock high! Look at the size of that thing!"
Once the Rookie drives through the next set of gates, the assault carrier begins charging its energy projector.
- Dare (COM): "It's charging its excavation beam!"
- Buck: "But the dig site's on the other side of the city!"
After the next set of gates has been passed, the carrier begins glassing the city in the distance.
- Buck: "Damn it, no! They're gonna burn this city and then glass the whole planet! Covenant bastards! It's just like Reach all over again!"
- Dare (COM): "You made it out of there. We'll make it out of here. You can do this, Buck."
- Buck: "Right. Yeah. Okay."
- Buck: "Mickey, you read me? Change of plans. You're coming to us."
- Private First Class Michael "Mickey" Crespo (COM): "Sky's kind of crowded, Gunny."
- Buck: "There's no other way. Covenant just wasted the highway. We're gonna keep rolling as far as we can. Get airborne, fly the Phantom to my beacon."
- Mickey (COM): "Understood."
- Buck: "And whatever you do...stay clear of that carrier."
As the trio proceeds, a Scarab jumps out of the water and begins to target the Olifant.
- Buck: "Scarab, look out! This one's on to us!"
Vergil gives out a high-pitched wail.
- Dare (COM): "We're going too fast, I can't stop!"
The Scarab fires its focus cannon at the Olifant, severely damaging it.
- Buck: "Veronica! Talk to me!"
- Dare (COM): (coughs) "The asset...it's all right."
- Buck: "Screw the alien, what about you?"
- Dare (COM): "I'm okay... but this garbage truck's had it."
They move through a final set of gates.
- Buck: "Take the next off-ramp. I see a building, north side of the highway. We'll hole up there, wait for evac."
They reach the end of the tunnel. A barricade prevents the player's vehicle from going any further.
- Buck: "Out of the vehicle, trooper! Let's move!"
If the player doesn't get out of the tank:
- Buck: "Our vehicle won't fit through that. We're on foot from here!"
If the player stalls:
- Dare (COM): "Go with Buck, trooper. We'll be OK."
The Rookie gets out of the vehicle and sets off on foot with Buck.
- Buck: "Veronica, wait here. Rookie, let's secure that building!"
Buck and the Rookie take out the two Grunts guarding the building.
- Buck: "Area secure. Veronica, come to us. We'll cover you."
As Dare and Vergil dismount, the Olifant explodes after sustaining heavy damage.
- Buck: "Mickey, what's your ETA?"
- Mickey (COM): "Had to reroute, Gunny, the whole damn city's on fire!"
- Dare: "Trooper, I have a Tier One asset and a whole bunch of Covenant that want it dead. Whatever you're going to do...step on it!"
- Mickey (COM): "Yes, ma'am!"
Enemy Phantoms begin to assault the building.
- Buck: "Hostile Phantoms, coming in!"
The Rookie, Dare and Buck fight off the first wave of Covenant troops.
Another wave of enemy Phantoms appear.
- Buck: "More Phantoms! Look sharp!"
The Phantoms deploy a squad of Kig-Yar Snipers, followed by a pair of Hunters.
- Buck: "Hunters!"
After the Hunters are killed, two Wraiths on the highway open fire on trio's position.
- Dare: "Wraiths, on the highway!"
- Buck: "That's not good!"
The last Phantom drops off numerous Jump Pack Brutes and a Brute Chieftain. The trio defeats them. Mickey's captured Phantom flies into view, directly above the two Wraiths.
- Mickey (COM): "Yee-Haa! Light 'em up, boys!"
- Corporal Taylor "Dutch" Miles (COM): "Romeo, take the one on the left."
- Lance Corporal Kojo "Romeo" Agu (COM) (exhausted): "I got it. Hold her steady."
The Brutes crewing the two Wraiths are killed. The Phantom hovers above the right parking lot.
- Dare: "For replacements...you men make one hell of a team."
- Buck: "Just nice to know they really do listen. C'mon, let's get out of this city."
- Buck: "Go, Rookie. Head for the Phantom."
If the player stalls:
- Buck: "Come on Rookie, get in the Phantom."
If the player further stalls:
- Buck: "What are you waiting for, trooper? Phantom! Now!"
The Rookie secures the Phantom's landing zone. Dutch drops down from the Phantom's grav lift, and points his SMG at the Huragok.
- Dutch: "That thing safe?"
- Buck: "Long as it don't get hit!"
The ground suddenly shakes as another Covenant assault carrier exits slipspace dangerously close to the surface. It begins charging its energy projector. The Huragok sees the assault carrier, seems to panic, and refuses to move. Dare attempts to drag the Huragok to the Phantom.
- Dare: "Come on...damn it! Move!"
Dare looks at Buck and shrugs.
- Buck: "Aw, nuts."
Buck pushes the Huragok, until it and Dare are in the Phantom's gravity beam and pulled inside. Buck turns to Dutch and the Rookie.
- Buck: "What can I say...?"
Buck pulls a piece of a Drone's wing out of his body suit, then crushes it with his hand.
- Buck: "It was a hell of a night."
Buck, Dutch, and the Rookie board the Phantom.
The assault carrier begins glassing the area as the Phantom pulls out with everyone aboard.
Romeo is leaning tiredly against his plasma cannon. Buck and the Rookie pull him away from the turret to the center of the vessel.
- Buck: "Easy does it."
- Romeo: "Argh!"
They lay Romeo down and Buck pulls off his helmet. Romeo looks up, pointing at the corner where Dare and the Huragok are sitting.
- Romeo: "We went through hell for that?"
- Buck (to the Rookie): "Give him some meds, would ya?"
- Buck (to Romeo): "It's important. It knows things."
The Rookie gives Romeo an injection.
- Romeo: "Heck, Gunny... I wasn't talking about the alien."
- Buck: "Mickey? I'm sending you a very special co-pilot."
- Mickey (COM): "Aw, come on! I don't want one of those things in here!"
- Buck: "It won't bite. And unlike you, it knows what to tell those cruisers to keep 'em off our tail."
Vergil floats to the controls.
- Dare: "I think they're too busy to care."
Dare walks to the side of the ship to watch the carriers burn the city.
- Dare: "Looks like they've found what they're looking for."
Buck joins her.
- Buck: "What about you? What about us?"
Dare holds Buck's hand.
- Dare: "Win this war...then ask me that again."
Dutch presses a control panel. The Phantom's sides close as it sets off for space, leaving multiple Covenant assault carriers and battlecruisers to glass the city. As the camera zooms out, it reveals the Covenant ships uncovering the Portal.
Credits roll.
EPILOGUE
One month after drop
Dare and a Marine walk down a passageway, the screen cuts the Marine's face from view.
- Dare: "Lord Hood may have given you clearance, but it was my op, and it's my interrogation. We only captured one. It's very delicate."
The Marine is revealed to be Sergeant Johnson.
- Sergeant Major Avery Junior Johnson: "Don't worry...(tapping a control panel)...I know what the aliens like."
The hatch opens, and the two walk into the interrogation room. Vergil is floating in the center, toying with an F99's Optics Package. Buck's squad is sitting or standing nearby. The Rookie is sleeping under some stairs.
- Johnson: "It has access to the Covenant battle-net?"
- Dare: "Limited, but yes. We're not entirely sure how it manages a remote connection to the w-"
Johnson throws a lighter to the Huragok, the ODSTs turn in alarm and attempt to interfere.
- Buck: "Whoa, stand down! Stand down!"
The Huragok, still looking at the optic package, swiftly catches the lighter.
- Dare: "Sergeant Major, please! It's extremely flammable!"
Johnson walks right up to the Huragok.
- Johnson: "The Brutes. The bastards who put bombs on your buddies and killed millions of my people..."
Johnson sits down on a nearby crate.
- Johnson: (grunts) "...they're digging a mighty big hole."
Johnson puts a cigar in his mouth.
- Johnson: "You're gonna tell me exactly what they're looking for. And then, you're gonna help me stop 'em."
Easter Egg: At this point, if the right thumbstick is held left, one can see Buck with a Caveman which is sitting on a grating. Buck nervously picks something off of the monkey (possibly a bug), and proceeds to put it in his mouth.[3]
The Huragok lights Johnson's cigar, suggesting a deal. Johnson smiles, and the Huragok clicks the lighter off, and the screen blacks out with the lighter's click.
{Legendary-only Scene}
In the Superintendent's underground data center, many Huragok are looking around the area, as one looks behind to see the Prophet of Truth arriving from above on his gravity throne, accompanied by two Huragok behind him. Inspecting the area around him, the Prophet of Truth stops to peer forward, smiles, and orders the Huragok to move forward. A large hole is shown, with part of a Forerunner relic located underneath. Several Phantoms fly around in the area, one approaching and moving towards the structure.
Achievements[edit]
The following achievements can be unlocked on Coastal Highway across the Xbox 360 and Halo: The Master Chief Collection editions of Halo 3: ODST.
| Halo: 3: ODST (Xbox 360) | Halo: MCC (Xbox One) | Halo: MCC (Steam) | Title | Unlock requirement | Games |
|---|---|---|---|---|---|
| Complete Coastal Highway on Normal, Heroic, or Legendary. (Halo 3: ODST) Complete Coastal Highway on any difficulty. (Halo: The Master Chief Collection) |
Halo: The Master Chief Collection | ||||
| Complete Highway on 4-player Legendary LIVE co-op, with Iron, and no 'Hog or Scorpion. | |||||
| Beat the par time on Coastal Highway. | |||||
| Beat the par score on Coastal Highway. | |||||
| Complete Coastal Highway on 4-player Legendary co-op, with Iron, and no 'Hog or Scorpion. | |||||
| Swap Dare's pistol for a Rocket Launcher on Coastal Highway. |
Trivia[edit]
- The Vidmaster Challenge: Deja Vu can be unlocked by beating this level with four players on Legendary Xbox LIVE Co-op with Iron Skull activated and without using Warthogs or Scorpions.
- Throughout the level, players can see several landmarks from previous missions, such as the smoking ONI Alpha Site and the bridge in Uplift Reserve, on which Dutch witnesses the collapse of the space tether. The structures are best seen in Theater mode.
- If the Olifant is destroyed, a corpse will fall out bearing Dare's tag. Closer inspection, however, reveals that the corpse is actually the Rookie's character model.
- If the player enters the first off ramp before driving the Warthog, the song Rock Anthem for Saving the World from Halo: Combat Evolved will play.
- The ONI orbital facility in the epilogue is represented by the multiplayer level Orbital.
- Johnson's quote, "Don't worry...I know what the aliens like," is a tribute to an earlier quote in the Halo 2 level Metropolis, where he says, "Oh, I know what the ladies like," in reply to Cortana's remark about how John-117 never giving her gifts. It also alludes to his encounters and capture of Huragok in Halo: First Strike.
- This is the only level where the entirety of the squad fights together: Mickey, Dutch, and Romeo man the Phantom and destroy two attacking Wraiths, while the Rookie, Buck, and Dare secure Vergil and kept it safe from Covenant.
- Any weapons from the previous level will carry over to this level; in the case of a fresh start from the campaign menu, however, the starting loadout is the M7S SMG and M6C/SOCOM.
- If the player brings a weapon such as M7057 flamethrower when completing the level, the loadout will reset to M7S SMG and M6C/SOCOM by default.
- Buck will not fire whatever vehicle turret he mans when he speaks scripted dialogue, a point of gameplay contention as the player will likely take damage when dealing with Ghosts, Wraiths, and/or Banshees. This will have been remedied by the time the Rookie drives a tank.
- In the Halo: The Master Chief Collection version of the game, the Epilogue is a separate level and by playing it on Legendary even if you don't beat the rest of the game on Legendary, you can get the Legendary ending.
- The Tilt skull can make the highway section nearly impossible on higher difficulties. As the player only has access to Warthogs and the Tilt skull greatly reduces damage from bullets against shields, it is significantly harder to protect the Olifant before it is overwhelmed.
- It is inadvisable to equip Buck with a rocket launcher until after the highway section. Should he be ejected from the Warthog, Buck will not enter the gunner position and instead sit in the passenger seat. However, he will only fire rockets seldomly, often causing the Olifant to take excessive damage.
Glitches[edit]
- The player can also hijack the AA Wraith in this level using the same glitch that allowed the player to hijack them in Halo 3. Buck will say that he will man the AA Wraith's turret but actually will continue on foot. It is unknown if getting the AA Wraith will invalidate the Deja Vu achievement, which explicitly bans only the use of Warthogs and Scorpions.
- The Olifant can be flipped over using debris on the highway, which causes the Olifant to eventually instantly teleport back to its original position.
- Players can actually get a Ghost past the barricade when securing the building. Use another vehicle as a ramp for the Ghost and allow it to flip when one hits the invisible barrier. The Ghost should roll through, allowing one to ride it to the building.
- In Theater mode, when the player gets out of his/her vehicle and enters the entrance to the Reserve, press Y to get into flying cam. Now the viewer will be able to roam the city and beyond free like in Pam Cam, just like the glitch on Mombasa Streets.
- Using Boom Skull will cause Vergil to die instantly upon dismounting from Olifant. Vergil will always be caught inside explosion distance when Boom Skull applies, as the Olifant explodes upon dismounting. The only way to avoid this glitch is to play this level without Boom Skull.
Mistakes[edit]
- Buck's assault rifle lacks a muzzle in the beginning cutscene, when everyone is in the elevator. This is best seen when Buck turns to leave the elevator, revealing the rifle on his back holster.
- When the ODSTs' Phantom arrives after the final wave of enemies, the ODSTs manning the turrets are not Dutch and Romeo but rather two Rookie NPCs, both armed with carbines on their backs.
Gallery[edit]
Concept art[edit]
Screenshots[edit]
A Phantom and a Ket-pattern battlecruiser fly above the highway.
Truth's fleet uncovering the Portal.
Sources[edit]
- ^ Halo 3: ODST Editing Kit, game file
H3ODSTEK\tags\levels\atlas\l300\l300.scenario - ^ Halo Legendary Crate, Data Drop #2
- ^ Halo.Bungie.Org, Halo 3: ODST Cutscene Library - Epilogue Easter Egg
| |||||||||||||||||
