The Cauldron: Difference between revisions
From Halopedia, the Halo wiki
No edit summary |
|||
| (16 intermediate revisions by 7 users not shown) | |||
| Line 1: | Line 1: | ||
{{ | {{Status|Gameplay}} | ||
{{ | {{Multiplayer map infobox | ||
[[File:SO-EP1-CH5.png| | |pagelabel=Spartan Ops map | ||
'''The Cauldron''', designated '''Site Req//8934-8829''', | |pagegamelabel=H4 | ||
|name=The Cauldron | |||
|image=[[File:SO-EP1-CH5.png|300px]] | |||
|game=''[[Halo 4]]'' | |||
|devname=<code>ff81_scurve</code>{{Ref/File|Id=H4EK|H4EK|H4EK\tags\levels\firefight\ff81_scurve\ff81_scurve.scenario}} | |||
|location=[[Requiem]] | |||
|terrain= | |||
|playernumber=1-4 | |||
|gametypes=[[Spartan Ops]] | |||
}} | |||
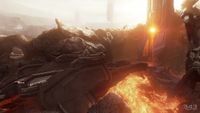
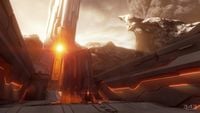
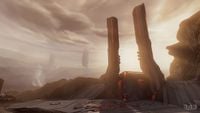
'''The Cauldron''', designated '''Site Req//8934-8829''',{{Ref/Book|Id=VIS|H4EVG|Page=202}} was the [[United Nations Space Command|UNSC]] codename for a location on the [[Forerunner]] [[shield world]] [[Requiem]]. | |||
==Background== | ==Background== | ||
Buried within a large volcanic mountain range, the site dubbed "The Cauldron" appeared to be a thermal processing system created by the Forerunners to power large-scale tension modifiers, which were used to stabilize atmosphere pockets deep within the planet. The Cauldron was the site of numerous conflicts, and eventually led to the discovery of a valuable artifact the [[Covenant remnants | Buried within a large volcanic mountain range, the site dubbed "The Cauldron" appeared to be a thermal processing system created by the Forerunners to power large-scale tension modifiers, which were used to stabilize atmosphere pockets deep within the planet. The Cauldron was the site of numerous conflicts, and eventually led to the discovery of [[Requiem slipspace artifacts|a valuable artifact]] the [[Covenant remnants]] desperately sought. This object and the secrets it held made The Cauldron one of the most significant battleground sites on Requiem, later leading the UNSC to the mysterious [[Janus Key]].<ref>[https://www.halowaypoint.com/en-us/universe/locations/requiem ''Halo Waypoint'': ''Requiem'']</ref> | ||
==History== | ==History== | ||
During the [[Requiem Campaign]] in [[2558]], Covenant archaeological teams were operating in this location, and the {{UNSCShip|Infinity}} sent [[SPARTAN-IV | During the [[Requiem Campaign]] in [[2558]], Covenant archaeological teams were operating in this location, and the {{UNSCShip|Infinity}} sent [[SPARTAN-IV program|Spartan-IV]] [[Fireteam Crimson]] to investigate the area. After dispatching the Covenant forces in the area, Fireteam Crimson was attacked by [[Promethean]] forces. The Spartans then found [[Requiem slipspace artifacts|a Forerunner artifact]] hidden in the facility. The team extracted the artifact and evacuated the area.{{Ref/SpOps|Departure|Core}} | ||
A science team was deployed to the base | A science team was deployed to the base led by Dr. [[Morgan Rivera]]. They came under attack by Covenant forces and were forced to flee behind an energy shield. Fireteam Crimson responded to their distress beacon and cleared out the Covenant forces. The science team was rescued.{{Ref/SpOps|Artifact (Spartan Ops)|EpisodeLinkText=Artifact|For Science}} However, "the Cauldron" later fell again to the Covenant. | ||
Fireteam Crimson later tracked [[Jul 'Mdama]] to this location in their continued pursuit of him and gave chase before he narrowly escaped an airstrike coordinated by [[Sarah Palmer|Commander Sarah Palmer]] and [[Robert Dalton]] and teleported to safety. In his hasty getaway, he dropped a mysterious artifact known as the | Fireteam Crimson later tracked [[Jul 'Mdama]] to this location in their continued pursuit of him and gave chase before he narrowly escaped an airstrike coordinated by [[Sarah Palmer|Commander Sarah Palmer]] and [[Robert Dalton]] and teleported to safety. In his hasty getaway, he dropped a mysterious artifact known as the "[[Didact's Gift]]," which was later retrieved by Crimson and transported to [[Galileo Base]] for further study.{{Ref/SpOps|Didact's Hand|The Chase}} | ||
After touching the artifact, Spartan [[Gabriel Thorne]] was translocated to "the Cauldron" where he was confronted by [[seven]] [[Sangheili Storm]].{{Ref/SpOps|Memento Mori}} After a fight, Thorne was overpowered and captured by the Covenant who took him prisoner per Jul's orders who wanted anyone who came through the shrine alive.{{Ref/SpOps|Scattered}} | |||
The Covenant later launched another counterattack on the base, in which they successfully shot down and captured a [[UNSC Army]] [[D79-TC Pelican]], which was then brought back to [[Lockup]]. | Sometime later, UNSC forces set up a forward operations base known as "[[Magma Base|Magma]]" in the area. Magma Base came [[Assault on Magma Base|under attack]] by Covenant forces, forcing them to send a distress signal. Fireteam Crimson was sent in response. The Covenant focused their attack on the base's generators. The Spartans, along with [[UNSC Marine Corps|Marines]], [[HRUNTING/YGGDRASIL Mark IX Mantis|Mantises]] and [[M3063 deployable turret|autoturret]] support, were able to hold off multiple Covenant waves. After successfully holding off the attack, [[Roland]] noticed [[Gabriel Thorne]]'s IFF tag in the area, but when Crimson went to investigate, they only found the tag, leaving Roland and [[Jared Miller|Miller]] to wonder what happened.{{Ref/SpOps|Memento Mori|The Cauldron Base}} | ||
The Covenant later launched another counterattack on the base, in which they successfully shot down and captured a [[UNSC Army]] [[D79-TC Pelican]], which was then brought back to "[[Lockup]]." This Pelican acted as a listening post until Crimson [[Raid on Lockup|raided]] "Lockup" and aided the ''Infinity'' in destroying it.{{Ref/SpOps|Expendable|Crystal Ball}} | |||
Later, Jul 'Mdama returned to the Cauldron to activate Requiem's [[self-destruct]], prompting the shield world to eventually collide with its sun.{{Ref/SpOps|Exodus (Spartan Ops)|EpisodeLinkText=Exodus}} | |||
==Gallery== | ==Gallery== | ||
{{Linkbox|gallery=yes}} | |||
<gallery> | <gallery> | ||
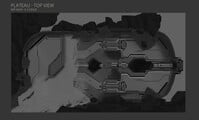
File:H4 Cauldron Layout Concept 1.jpg|Concept art for the region's top-down layout. | |||
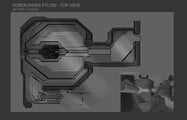
File:H4 Cauldron Layout Concept 2.jpg|Concept art for the region's top-down layout. | |||
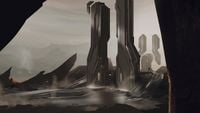
File:H4-Concept-Cauldron.jpg|Concept art. | File:H4-Concept-Cauldron.jpg|Concept art. | ||
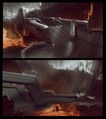
File:H4-Concept-Cauldron-2.jpg|Concept art. | File:H4-Concept-Cauldron-2.jpg|Concept art. | ||
| Line 28: | Line 45: | ||
File:H4 SO S01E10 Jul 'Mdama with Storm.jpg|Jul 'Mdama in The Cauldron. | File:H4 SO S01E10 Jul 'Mdama with Storm.jpg|Jul 'Mdama in The Cauldron. | ||
</gallery> | </gallery> | ||
==List of appearances== | ==List of appearances== | ||
| Line 36: | Line 51: | ||
==Sources== | ==Sources== | ||
{{Ref/Sources}} | |||
[[Category:Requiem locations]] | [[Category:Requiem locations]] | ||
Latest revision as of 20:38, January 15, 2025
| The Cauldron | |
|---|---|
| |
| Map overview | |
|
Game: |
|
|
Map file name (?): |
|
| Lore information | |
|
Location: |
|
| Gameplay overview | |
|
Recommended number of players: |
1-4 |
|
Recommended gametype(s): |
|
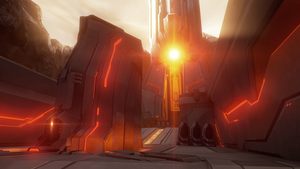
The Cauldron, designated Site Req//8934-8829,[2] was the UNSC codename for a location on the Forerunner shield world Requiem.
Background[edit]
Buried within a large volcanic mountain range, the site dubbed "The Cauldron" appeared to be a thermal processing system created by the Forerunners to power large-scale tension modifiers, which were used to stabilize atmosphere pockets deep within the planet. The Cauldron was the site of numerous conflicts, and eventually led to the discovery of a valuable artifact the Covenant remnants desperately sought. This object and the secrets it held made The Cauldron one of the most significant battleground sites on Requiem, later leading the UNSC to the mysterious Janus Key.[3]
History[edit]
During the Requiem Campaign in 2558, Covenant archaeological teams were operating in this location, and the UNSC Infinity sent Spartan-IV Fireteam Crimson to investigate the area. After dispatching the Covenant forces in the area, Fireteam Crimson was attacked by Promethean forces. The Spartans then found a Forerunner artifact hidden in the facility. The team extracted the artifact and evacuated the area.[4]
A science team was deployed to the base led by Dr. Morgan Rivera. They came under attack by Covenant forces and were forced to flee behind an energy shield. Fireteam Crimson responded to their distress beacon and cleared out the Covenant forces. The science team was rescued.[5] However, "the Cauldron" later fell again to the Covenant.
Fireteam Crimson later tracked Jul 'Mdama to this location in their continued pursuit of him and gave chase before he narrowly escaped an airstrike coordinated by Commander Sarah Palmer and Robert Dalton and teleported to safety. In his hasty getaway, he dropped a mysterious artifact known as the "Didact's Gift," which was later retrieved by Crimson and transported to Galileo Base for further study.[6]
After touching the artifact, Spartan Gabriel Thorne was translocated to "the Cauldron" where he was confronted by seven Sangheili Storm.[7] After a fight, Thorne was overpowered and captured by the Covenant who took him prisoner per Jul's orders who wanted anyone who came through the shrine alive.[8]
Sometime later, UNSC forces set up a forward operations base known as "Magma" in the area. Magma Base came under attack by Covenant forces, forcing them to send a distress signal. Fireteam Crimson was sent in response. The Covenant focused their attack on the base's generators. The Spartans, along with Marines, Mantises and autoturret support, were able to hold off multiple Covenant waves. After successfully holding off the attack, Roland noticed Gabriel Thorne's IFF tag in the area, but when Crimson went to investigate, they only found the tag, leaving Roland and Miller to wonder what happened.[9]
The Covenant later launched another counterattack on the base, in which they successfully shot down and captured a UNSC Army D79-TC Pelican, which was then brought back to "Lockup." This Pelican acted as a listening post until Crimson raided "Lockup" and aided the Infinity in destroying it.[10]
Later, Jul 'Mdama returned to the Cauldron to activate Requiem's self-destruct, prompting the shield world to eventually collide with its sun.[11]
Gallery[edit]

|
Browse more images in this article's gallery page. |
List of appearances[edit]
- Halo 4
- Spartan Ops (First appearance)
Sources[edit]
- ^ Halo 4 Editing Kit, game file
H4EK\tags\levels\firefight\ff81_scurve\ff81_scurve.scenario - ^ Halo 4: The Essential Visual Guide, page 202
- ^ Halo Waypoint: Requiem
- ^ Halo 4 - Spartan Ops, episode Departure, level Core
- ^ Halo 4 - Spartan Ops, episode Artifact, level For Science
- ^ Halo 4 - Spartan Ops, episode Didact's Hand, level The Chase
- ^ Halo 4 - Spartan Ops, episode Memento Mori
- ^ Halo 4 - Spartan Ops, episode Scattered
- ^ Halo 4 - Spartan Ops, episode Memento Mori, level The Cauldron Base
- ^ Halo 4 - Spartan Ops, episode Expendable, level Crystal Ball
- ^ Halo 4 - Spartan Ops, episode Exodus
