Stealth Sangheili: Difference between revisions
From Halopedia, the Halo wiki
Nighterlev (talk | contribs) m (replaced one of the Stealth Elite images) |
|||
| (46 intermediate revisions by 17 users not shown) | |||
| Line 1: | Line 1: | ||
{{ | {{Status|Canon}} | ||
{{Unit infobox|variant=Cov | {{Unit infobox | ||
|variant=Cov | |||
|name=Stealth | |name=Stealth | ||
|image= [[File: | |image= [[File:StealthSangheiliTransparent2.png|250px]] | ||
|species=[[Sangheili]] | |species=[[Sangheili]] | ||
|branch=[[Fleet Security]]<ref name="library">'''[[Halo: Combat Evolved Anniversary]]''', [[Library (feature)|The Library]]: ''Stealth Elite''</ref> | |branch=[[Fleet Security]]<ref name="library">'''[[Halo: Combat Evolved Anniversary]]''', [[Library (feature)|The Library]]: ''Stealth Elite''</ref> | ||
|armament=[[Energy stave]] | |armament=[[Energy stave]] | ||
<br>[[Type-1 energy sword]] | <br>[[Type-1 energy sword]] | ||
<br> | <br>{{Pattern|Okarda'phaa|plasma rifle}} | ||
<br>[[Type-33 Needler]] | <br>[[Type-33 Needler]] | ||
|equipment=[[Active camouflage]] | |equipment=[[Active camouflage]] | ||
| Line 19: | Line 20: | ||
{{Quote|I still have nightmares about the Stealth Elites... they would come out of nowhere. You have to look very, very closely: you could see the air move just before they jump you. But then it was usually already too late...|Private Roger Alfarsi<ref>'''[[Halo: Spartan Assault]]''', ''[[Halo: Spartan Assault/Quotes|Quotes]]''</ref>}} | {{Quote|I still have nightmares about the Stealth Elites... they would come out of nowhere. You have to look very, very closely: you could see the air move just before they jump you. But then it was usually already too late...|Private Roger Alfarsi<ref>'''[[Halo: Spartan Assault]]''', ''[[Halo: Spartan Assault/Quotes|Quotes]]''</ref>}} | ||
The '''Stealth Sangheili''' are a specialized Sangheili | The '''Stealth Sangheili''' are a class of specialized [[Sangheili]] units in the [[Covenant]] and some of its [[Covenant remnants|splinter factions]], tasked with infiltration and stealth operations. Within the Covenant, they reported to [[Fleet Security]] of the [[Special Warfare Group]].{{Ref/Reuse|library}} They are typically equipped with [[energy sword]]s and {{Pattern|Okarda'phaa|plasma rifle}}s, and are often seen commanding a [[File (unit)|file]] of [[Unggoy]] soldiers. | ||
==Description== | ==Description== | ||
Not to be confused with [[Covenant Special Operations|Special Operations]] [[Special Operations Sangheili|Sangheili]], Sangheili Stealth soldiers are the assassins and spies of the Covenant [[Fleet Security]]. | Not to be confused with [[Covenant Special Operations|Special Operations]] [[Special Operations Sangheili|Sangheili]], Sangheili Stealth soldiers are the assassins and spies of the Covenant [[Fleet Security]].{{Ref/Reuse|library}} Unlike the Special Operations Sangheili, Sangheili serving under the Stealth class are distributed throughout the Covenant's ground forces in standard battlefield units. Stealth Sangheili participate in most widespread ground engagements.<ref>'''[[Halo Encyclopedia (2009 edition)]]''', ''page 133'' (2011 edition)</ref> Though part of the [[Special Warfare Group]], Stealth Sangheili report through Fleet Security as their role concentrates more on the acquisition of intelligence and strategic countermeasures than direct combat. Their commanders are usually high-ranking fleet leaders and can even be [[San'Shyuum]] Prophets, depending on the nature of their service.{{Ref/Reuse|library}} The Stealth Sangheili corps is divided into several subgroups, such as the [[Ossoona]]. Ossoona was a title assigned to Sangheili ordered with recovering hostile intelligence from the battlefield, or sent on high-risk missions of critical importance, such as assassinations.<ref>'''[[Halo: The Flood]]''', ''page 28''</ref> | ||
During the events of the [[Great Schism]], the Covenant replaced the Stealth Sangheili with the [[Jiralhanae Stalker]], who have a similar set of [[cloaking|equipment]] and role. During the [[Battle of Draetheus V]] in [[2554]], some Stealth Sangheili participated in the battle serving under [[Merg Vol]]'s [[Merg Vol's Covenant|Covenant]].<ref name="hsa">'''Halo: Spartan Assault'''</ref> In [[2557]], many Stealth Sangheili would serve in [[Jul 'Mdama]]'s [[Jul 'Mdama's Covenant|Covenant]] during the [[Battle of Installation 03]].<ref>'''[[Halo: Spartan Strike]]'''</ref> | During the events of the [[Great Schism]], the Covenant replaced the Stealth Sangheili with the [[Jiralhanae Stalker]], who have a similar set of [[cloaking|equipment]] and role. During the [[Battle of Draetheus V]] in [[2554]], some Stealth Sangheili participated in the battle serving under [[Merg Vol]]'s [[Merg Vol's Covenant|Covenant]].<ref name="hsa">'''Halo: Spartan Assault'''</ref> In [[2557]], many Stealth Sangheili would serve in [[Jul 'Mdama]]'s [[Jul 'Mdama's Covenant|Covenant]] during the [[Battle of Installation 03]].<ref>'''[[Halo: Spartan Strike]]'''</ref> | ||
==Operational history== | |||
Stealth Sangheili saw usage by the Covenant throughout its [[Human-Covenant War|genocidal campaign]] against the [[human]] race. During the [[Harvest campaign|five-year battle]] on the human colony world of [[Harvest]], Stealth Sangheili were among the many troops deployed against the [[United Nations Space Command]]. After UNSC forces under [[Sergeant Forge]] prevented the Covenant from destroying an underground [[Forerunner]] [[Relic (location)|structure]] in the northern polar region of Harvest, they went on to access the facility's star map. While the humans were distracted, a number of Stealth Sangheili disengaged their [[active camouflage]] and attacked Forge and his group. The Stealth Sangheili were soon joined by [[Mgalekgolo]] and other Covenant troops and were poised to overrun Sergeant Forge and his men when a pair of [[M850 Grizzly|Grizzly]] tanks sent by the {{UNSCShip|Spirit of Fire}} arrived, killing all Covenant, including the Stealth Sangheili, allowing Forge and his group to escape.<ref>'''[[Halo Wars]]''', campaign level, ''[[Relic Interior]]''</ref> | |||
During the [[Battle of Trove]], a group of Stealth Sangheili armed with [[Energy stave#Non-ceremonial stave|energy staves]] ambushed the [[Spartan-II program|Spartans]] of [[Red Team]] at the [[Apex Site]], while [[Arbiter]] [[Ripa 'Moramee]] attacked Sergeant Forge. Although they outnumbered Red Team, the Spartans proved superior in terms of skill and quickly killed all of the attacking Stealth Sangheili while Forge personally slew 'Moramee.<ref>'''Halo Wars''', campaign level, ''[[Escape (Halo Wars level)|Escape]]''</ref> | |||
A large number of Stealth Sangheili served in the [[Fleet of Particular Justice]], and were present when the fleet arrived at [[Installation 04]] after pursuing the {{UNSCShip|Pillar of Autumn}} from [[Reach]]. Several were onboard the ''[[Truth and Reconciliation]]'' when the ship was boarded by [[John-117|SPARTAN-117]] and a team of [[Orbital Drop Shock Trooper|ODSTs]] under Sergeant [[Parker]] in order to rescue [[Jacob Keyes|Captain Keyes]] who had been captured by the Covenant. At least one Stealth Sangheili was present in the brig where Keyes was located. He managed to land at least one hit on the Master Chief with a beam weapon, but the Spartan was able to ascertain his location and quickly killed the Sangheili. Around the same time, another pair of Stealth Sangheili ambushed Parker and his squad while they were guarding the control room, and managed to kill all of the ODSTs. These two Sangheili were slain in revenge by the Master Chief, Keyes and several rescued [[UNSC Marine Corps|Marine]] [[Prisoner of war|POWs]] upon their return to the control room.<ref>'''[[Halo: Combat Evolved]]''', campaign level ''[[The Truth and Reconciliation]]''</ref> | |||
Another Stealth Sangheili ambushed the Master Chief shortly after the Spartan had deactivated the security system for the installation's [[Cartographer#Installation 04|Cartographer]] facility. Fortunately for the Chief, the Sangheili roared before firing his weapon, allowing the Spartan to quickly locate and kill him. A group of Stealth Sangheili were deployed onto the exterior platform of the Cartographer building by a [[Dextro Xur-pattern Spirit|Spirit]] dropship as a last ditch attempt by the Covenant to kill John-117 after he had accessed the Cartographer. They failed in their mission, and the Chief was able to escape onboard ''[[Echo 419]]''.<ref>'''Halo: Combat Evolved''', campaign level ''[[The Silent Cartographer]]''</ref> Stealth Sangheili, along with other Covenant troops were deployed into the area around Installation 04's [[Control Room (Installation 04)|control room]] but all of them were killed by John-117 as he made his way towards the control room.<ref>'''Halo: Combat Evolved''', campaign level ''[[Assault on the Control Room]]''</ref> | |||
Later in the [[Battle of Installation 04|battle]], following the release of the [[Flood]] onto the installation, Stealth Sangheili were among the forces that attempted to stem the parasitic outbreak, with many deployed into the vast icy canyons where the Covenant engaged the Flood with the aid of vehicles, aircraft and Mgalekgolo support. During one such battle, where the Master Chief engaged both parties while searching for a [[Type-26 Banshee|Banshee]] to access the final [[phase pulse generator]] needed to delay the installation's firing sequence, a group of Stealth Sangheili broke through a line of Flood, specifically seeking out the Spartan to kill him but once again, the Chief was able to survive their attacks and eliminate all of his assailants.<ref>'''Halo: Combat Evolved''', campaign level ''[[Two Betrayals]]''</ref> A number of Stealth Sangheili were infected by the Flood onboard the downed ''Pillar of Autumn'' during the final phase of the battle. The resultant [[Flood combat form|combat forms]] retained their host's active camouflage modules. They were discovered in the ship's armory by John-117 while searching for weapons to aid his assault on the engine room and despite the advantage of their camouflage, the infected Stealth Sangheili fell to the Spartan.<ref>'''Halo: Combat Evolved''', campaign level ''[[The Maw]]''</ref> | |||
During the initial stages of the [[Battle for Earth]], Stealth Sangheili were among the Covenant boarders that invaded a cluster of [[orbital defense platform]]s to destroy them from within, to allow the [[Fleet of Sacred Consecration]] to descend to Earth's surface. A pair of them were engaged and killed by John-117 under [[Armory A-01#Cairo Station Armory A-01|Armory A-01]], but their interference allowed more Sangheili to kill the [[Unidentified master gunnery sergeant|gunnery sergeant]] in the armory.<ref>'''[[Halo 2]]''', campaign level ''[[Cairo Station]]''</ref> Many more were deployed by the ''[[Solemn Penance]]'' directly into the city of [[Mombasa]], particularly into the narrow streets and subterranean tunnels of the city, where they used their camouflage to ambush UNSC forces.<ref>'''Halo 2''', campaign level ''[[Outskirts]]''</ref><ref>'''Halo 2''', campaign level ''[[Metropolis]]''</ref> | |||
Following the [[Prophet of Regret]]'s arrival at [[Installation 05]] on [[2552#November|November 2, 2552]], he deployed troops into the ruined structures and underwater facilities in the vicinity of the [[Temple (Installation 05)|temple]] from which the Prophet conducted his religious sermons. A number of Stealth Sangheili along with similarly-camouflaged [[Unggoy]] were stationed in one of several underwater passageways that connected the various structures in the large artificial lake that ultimately connected to the Prophet's temple. This group was slain by John-117 as he passed through the area in his mission to assassinate the Prophet of Regret.<ref>'''Halo 2''', campaign level ''[[Regret (Halo 2 level)|Regret]]''</ref> The next day, as the [[Great Schism]] broke out on [[High Charity]], the Stealth Sangheili aided the rest of the species as they defended themselves from the now [[Jiralhanae]]-commanded [[Covenant military]]. A pair of [[Type-1 energy sword|energy sword]] wielding Stealth Sangheili along with a group of [[Special Operations Unggoy]] defended the door connecting the second [[Valleys of Tears#Valley of Tears B|Valley of Tears]] to the tower that would lead to the [[Mausoleum of the Arbiter]], where the Sangheili prepared to fight a last stand against the Covenant. All members of both warring factions were slain by the Master Chief during his pursuit of the [[Prophet of Truth]].<ref>'''Halo 2''', campaign level ''[[Gravemind (level)|Gravemind]]''</ref> | |||
After the conclusion of the [[Human-Covenant War]], a number of Stealth Sangheili joined a [[Merg Vol's Covenant|faction]] of the defunct Covenant Empire led by [[Sangheili Zealot]] [[Merg Vol]]. In [[2554]], this "new" Covenant [[Battle of Draetheus V|attacked]] the human research colony world of [[Draetheus V]] and its moon [[X50]]. As the battle raged on, Merg Vol discovered the true purpose of X50: the moon was actually a Forerunner installation capable of building and destroying planets. The cult leader was successful in activating X50's main weapon, beginning the process of dismantling Draetheus V. Covenant forces established a mile wide defense perimeter around the Forerunner structure from where Vol had activated the weapon. The UNSC realized that they would need to get combat technicians into the structure to disable the weapon. To protect the technicians, UNSC command had deployed snipers among the Marine reinforcements. These snipers would provide suppressing fire from the higher ground around the structure. However, the area they were deploying to was swarming with Stealth Sangheili. [[SPARTAN-IV program|Spartan]] [[Edward Davis|Davis]] escorted several sniper teams to their locations, killing many Stealth Sangheili in the process.<ref>'''[[Halo: Spartan Assault]]''', ''[[Mission 14: Infiltration of the Covenant Perimeter|Infiltration of the Covenant Perimeter]]''</ref> | |||
Later in the battle, Spartan [[Sarah Palmer]] and a group of Marines made their way through one of Draetheus V's forests, seeking out Covenant commander [[Parg Vol]]'s [[R'shwupa-pattern Phantom|personal transport]], of which Palmer would use to infiltrate Merg Vol's camp and slay the leader of the Covenant cultists. As the UNSC team advanced towards the Phantom, they were beset by a number of Stealth Sangheili, along with other Covenant forces that attempted to halt the humans process, to no avail. After Palmer located the Phantom gunboat, the Covenant launched an all out assault on her position, sending forth Stealth Sangheili, along with regular Sangheili infantry and even a [[Jiralhanae Chieftain]] but all of them fell to the Spartan, and Parg Vol's Phantom was secured.<ref>'''Halo: Spartan Assault''', ''[[Mission 21: Hunt for the Phantom|Hunt for the Phantom]]''</ref> Before Palmer could take off, however, she had to bypass the security systems onboard the Phantom. To this end, a combat technician was brought in. While the technician worked, Palmer was forced to defend against a massive enemy assault force; Parg Vol had heard about the attempted theft of his personal transport, and sent all available Covenant forces to stop the humans. Under support fire from a platoon of [[Zurdo-pattern Wraith|Wraiths]], the Covenant launched a ferocious attack, sending waves of [[Unggoy]] at first, including [[Suicide Unggoy|suicide]] units. [[Kig-Yar]] soldiers were then sent in, followed by Sangheili, including many Stealth operatives and another Jiralhanae Chieftain. Despite the overwhelming odds, Palmer was able to hold the Covenant off long enough for the technician to bypass the security protocols, and they soon left for Merg Vol's camp.<ref>'''Halo: Spartan Assault''', ''[[Mission 22: The Scorching of the Thicket|The Scorching of the Thicket]]''</ref> Ultimately Sarah Palmer would be successful in assaulting Merg Vol's camp, resulting in the death of the cult leader, and the fragmentation of his Covenant soon after.<ref>'''Halo: Spartan Assault''', ''[[Mission 25: Battle for the Moon|Battle for the Moon]]''</ref> | |||
==Equipment== | ==Equipment== | ||
While they possess [[active camouflage]] units, their defensive capabilities are lower than those of other Sangheili due to the weakness of their personal energy shields.{{ | While they possess [[active camouflage]] units, their defensive capabilities are lower than those of other Sangheili due to the weakness of their personal energy shields.{{citation needed}} Early in the [[Human-Covenant War]], Stealth Sangheili had no energy shields, relying only on their stealth and weapons to accomplish their complicated missions.{{citation needed}} This was later rectified, but their newly gained energy shields were weak, causing any Sangheili who held the rank to still rely heavily on stealth and quickness.{{citation needed}} | ||
While Stealth Sangheili are not required to be armed, and several subgroups like the [[Ossoona]] very specifically are not, most still brandish at least a few standard-issue weapons in preparation of any new assignment. | While Stealth Sangheili are not required to be armed, and several subgroups like the [[Ossoona]] very specifically are not, most still brandish at least a few standard-issue weapons in preparation of any new assignment.{{Ref/Reuse|library}} Stealth Sangheili often arm themselves with {{Pattern|Okarda'phaa|plasma rifle}}s or [[Type-33 needler]]s, and utilize [[Type-1 energy sword]]s for close-quarters combat.{{Ref/Reuse|hsa}}<ref name="Halo: Combat Evolved">'''[[Halo: Combat Evolved]]'''</ref><ref>'''Halo 2'''</ref> However, during the [[Battle of Trove]] in [[2531|February 2531]], some Stealth Sangheili were seen armed with a non-ceremonial variant of the [[energy stave]].<ref>'''[[Halo Wars]]''', campaign level ''[[Escape (Halo Wars level)|Escape]]''</ref> | ||
In terms of [[Sangheili harness|armor sets]], Stealth Sangheili wear either the standard [[ | In terms of [[Sangheili harness|armor sets]], Stealth Sangheili wear either the standard [[Combat harness]] in light blue,{{Ref/Reuse|Halo: Combat Evolved}}<ref>'''[[Halo Wars]]'''</ref> brown or silver coloration,<ref>'''[[Halo 2]]'''</ref><ref>'''[[Halo 2: Anniversary]]'''</ref> or the more specialized [[Infiltration harness]] in dark brown/ black<ref>'''[[Halo: Reach]]'''</ref> or teal coloration.<ref>'''[[Halo: Combat Evolved Anniversary]]'''</ref> Simulated [[Warzone]] Stealth Sangheili are seen with the [[Commander (Covenant)|Commander]]-class harness.<ref name="H5guide">'''[[Halo 5: Guardians Official Game Guide]] (Collector's Edition)''', ''page 320''</ref> | ||
==Gameplay== | ==Gameplay== | ||
| Line 42: | Line 62: | ||
===''Halo 2''=== | ===''Halo 2''=== | ||
Compared to the iterations in ''Halo: Combat Evolved'', the Stealth Sangheili are now equipped with energy shields | Compared to the iterations in ''Halo: Combat Evolved'', the Stealth Sangheili are now equipped with energy shields of a shield strength slightly less than half of the [[Sangheili Minor]]. Likewise, a headshot-capable weapons such as the SRS99C-S2 AM sniper rifle, [[M6C magnum]], [[BR55 battle rifle]], or the {{Pattern|Vostu|carbine}} would be the best tool to eliminate these Sangheili. In close-quarters, consider using the [[M90 shotgun]] or dual-wielding the SMGs or plasma rifles. Two variations exist, one with tan/brown armor and another with white/silver armor. The tan/brown is uncommon (rare to very rare on lower difficulties), and their energy shield strength and armor are substantially better than their white/silver counterparts with the fastest shield regen of any Sangheili in ''Halo 2''. According to the tags in the Halo 2 game files, the stronger elites are Stealth Majors and the weaker elites are Stealth Minors; this probably reflects their actual ranks, but Bungie did not explicitly confirm that Stealth Major and Stealth Minor are the canon names of specific ranks. | ||
Stealth Sangheili appear frequently in the ''Halo 2'' campaign | Stealth Sangheili appear frequently in the ''Halo 2'' campaign, mainly the levels [[Cairo Station]], [[Outskirts]] on Legendary, [[Metropolis]] on Heroic/Legendary, and [[Delta Halo]] on Legendary, though they also appear in the underwater structure in the level [[Regret (Halo 2 level)|Regret]], and on [[Gravemind (level)|Gravemind]]. | ||
===''Halo: Spartan Assault'' and ''Halo: Spartan Strike''=== | ===''Halo: Spartan Assault'' and ''Halo: Spartan Strike''=== | ||
| Line 52: | Line 72: | ||
===''Halo 5: Guardians''=== | ===''Halo 5: Guardians''=== | ||
Stealth Sangheili only appear in | Stealth Sangheili only appear in [[Warzone]] mode. They appear on the map [[Raid on Apex 7]] as the [[Sangheili Zealot|Zealot Assassins]]' minions on each side of the map, two minutes after the game's beginning. Stealth Elites are equipped with active camouflage and energy swords, and their energy shields are very weak as usual. The harness they use is the Commander type. They typically charge at the player, but can be killed quite easily. It is recommended to take them down after the Zealot Assassin, so as to avoid missing the boss kill, but players must be careful not to be ambushed by the Stealth Elites.{{Ref/Reuse|H5guide}} | ||
==Gallery== | ==Gallery== | ||
<gallery> | <gallery> | ||
File:HCE Stealth Elite.png|A Stealth Sangheili in ''[[Halo: Combat Evolved]]''. | File:HCE Stealth Elite.png|A Stealth Sangheili in ''[[Halo: Combat Evolved]]''. | ||
File:StealthElite.jpg|A Stealth Sangheili in Halo: Combat Evolved | File:StealthElite.jpg|A [[Active camouflage|camouflaged]] Stealth Sangheili in ''Halo: Combat Evolved''. | ||
File:H2 Stealth Elite.png|A Stealth Sangheili armed with dual [[ | File:HTMCC-HCEA StealthEliteSword.png|A camouflaged Stealth Sangheili in ''[[Halo: Combat Evolved Anniversary]]'' | ||
File:HCE Stealth Elite in AC.png|A | File:H2 Stealth Elite.png|A Stealth Sangheili armed with dual [[Okarda'phaa-pattern plasma rifle|plasma rifles]] in ''[[Halo 2]]''. | ||
File:HCE Stealth Elite in AC.png|A camouflaged Stealth Sangheili in ''Halo 2'' armed with a plasma rifle on ''[[Cairo Station (station)|Cairo Station]]'' during the [[Battle of Earth]]. | |||
File:H2_DeltaHalo_BrownStealthSangheili.png|Brown-armoured Stealth Sangheili. | |||
File:HW6.png|Stealth Sangheili in ''[[Halo Wars]]'' charging [[Red Team]] with [[energy stave]]s. | File:HW6.png|Stealth Sangheili in ''[[Halo Wars]]'' charging [[Red Team]] with [[energy stave]]s. | ||
File:Stealth | File:HTMCC-H3ODST DeadStealthElite.png|A dead Stealth Sangheili in ''Halo 3: ODST''. | ||
File:HCEA_Stealth_Elite.png|A Stealth Sangheili, as displayed in the [[Library (feature)|Library]] feature of ''[[Halo: Combat Evolved Anniversary]]''. | |||
Image:Stealth Elite.png|A Stealth Sangheili in ''Halo: Combat Evolved Anniversary''. | Image:Stealth Elite.png|A Stealth Sangheili in ''Halo: Combat Evolved Anniversary''. | ||
File:H2A-StealthSangheili.png|A camouflaged Stealth Sangheili in ''[[Halo 2: Anniversary]]'' with a plasma rifle in [[New Mombasa]]. | File:H2A-StealthSangheili.png|A camouflaged Stealth Sangheili in ''[[Halo 2: Anniversary]]'' with a plasma rifle in [[New Mombasa]]. | ||
File:H2A-StealthSangheili1.png|A Stealth Sangheili in ''[[Halo 2: Anniversary]]'' on ''Cairo Station''. | File:H2A-StealthSangheili1.png|A Stealth Sangheili in ''[[Halo 2: Anniversary]]'' on ''Cairo Station''. | ||
File:H5G - Stealth Elite.png|A Stealth Sangheili on [[Raid on Apex 7]] in ''[[Halo 5: Guardians]]''. | File:H2A Stealth Sangheili.png|A Stealth Sangheili in ''Halo 2: Anniversary''. | ||
File:H2A_DeltaHalo_BrownStealthSangheili.png|A brown stealth Sangheili on the mission [[Delta Halo]]. | |||
File:H5G - Stealth Elite.png|A camouflaged Stealth Sangheili on [[Raid on Apex 7]] in ''[[Halo 5: Guardians]]''. | |||
</gallery> | </gallery> | ||
{{Linkbox|gallery=yes|gallerypage=Images of Stealth Sangheili}} | {{Linkbox|gallery=yes|gallerypage=Images of Stealth Sangheili}} | ||
| Line 75: | Line 100: | ||
*''[[Halo 2]]'' | *''[[Halo 2]]'' | ||
*''[[Halo Wars]]'' | *''[[Halo Wars]]'' | ||
*''[[Halo 3: ODST]]'' | |||
*''[[Halo: Combat Evolved Anniversary]]'' | *''[[Halo: Combat Evolved Anniversary]]'' | ||
*''[[Halo: Spartan Assault]]'' | *''[[Halo: Spartan Assault]]'' | ||
| Line 82: | Line 108: | ||
==Sources== | ==Sources== | ||
{{Ref/Sources}} | |||
{{Sangheili Ranks}} | {{Sangheili Ranks}} | ||
Latest revision as of 10:51, August 27, 2024
| Stealth | |
|---|---|
| |
|
Function: |
Stealth, infiltration |
|
Species: |
|
|
Affiliation: |
|
|
Group: |
|
|
Other role(s): |
Flanking, spying and stalking |
- "I still have nightmares about the Stealth Elites... they would come out of nowhere. You have to look very, very closely: you could see the air move just before they jump you. But then it was usually already too late..."
- — Private Roger Alfarsi[2]
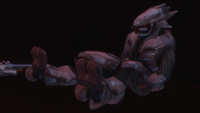
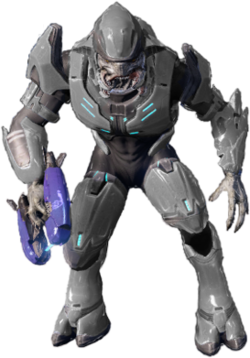
The Stealth Sangheili are a class of specialized Sangheili units in the Covenant and some of its splinter factions, tasked with infiltration and stealth operations. Within the Covenant, they reported to Fleet Security of the Special Warfare Group.[1] They are typically equipped with energy swords and Okarda'phaa-pattern plasma rifles, and are often seen commanding a file of Unggoy soldiers.
Description[edit]
Not to be confused with Special Operations Sangheili, Sangheili Stealth soldiers are the assassins and spies of the Covenant Fleet Security.[1] Unlike the Special Operations Sangheili, Sangheili serving under the Stealth class are distributed throughout the Covenant's ground forces in standard battlefield units. Stealth Sangheili participate in most widespread ground engagements.[3] Though part of the Special Warfare Group, Stealth Sangheili report through Fleet Security as their role concentrates more on the acquisition of intelligence and strategic countermeasures than direct combat. Their commanders are usually high-ranking fleet leaders and can even be San'Shyuum Prophets, depending on the nature of their service.[1] The Stealth Sangheili corps is divided into several subgroups, such as the Ossoona. Ossoona was a title assigned to Sangheili ordered with recovering hostile intelligence from the battlefield, or sent on high-risk missions of critical importance, such as assassinations.[4]
During the events of the Great Schism, the Covenant replaced the Stealth Sangheili with the Jiralhanae Stalker, who have a similar set of equipment and role. During the Battle of Draetheus V in 2554, some Stealth Sangheili participated in the battle serving under Merg Vol's Covenant.[5] In 2557, many Stealth Sangheili would serve in Jul 'Mdama's Covenant during the Battle of Installation 03.[6]
Operational history[edit]
Stealth Sangheili saw usage by the Covenant throughout its genocidal campaign against the human race. During the five-year battle on the human colony world of Harvest, Stealth Sangheili were among the many troops deployed against the United Nations Space Command. After UNSC forces under Sergeant Forge prevented the Covenant from destroying an underground Forerunner structure in the northern polar region of Harvest, they went on to access the facility's star map. While the humans were distracted, a number of Stealth Sangheili disengaged their active camouflage and attacked Forge and his group. The Stealth Sangheili were soon joined by Mgalekgolo and other Covenant troops and were poised to overrun Sergeant Forge and his men when a pair of Grizzly tanks sent by the UNSC Spirit of Fire arrived, killing all Covenant, including the Stealth Sangheili, allowing Forge and his group to escape.[7]
During the Battle of Trove, a group of Stealth Sangheili armed with energy staves ambushed the Spartans of Red Team at the Apex Site, while Arbiter Ripa 'Moramee attacked Sergeant Forge. Although they outnumbered Red Team, the Spartans proved superior in terms of skill and quickly killed all of the attacking Stealth Sangheili while Forge personally slew 'Moramee.[8]
A large number of Stealth Sangheili served in the Fleet of Particular Justice, and were present when the fleet arrived at Installation 04 after pursuing the UNSC Pillar of Autumn from Reach. Several were onboard the Truth and Reconciliation when the ship was boarded by SPARTAN-117 and a team of ODSTs under Sergeant Parker in order to rescue Captain Keyes who had been captured by the Covenant. At least one Stealth Sangheili was present in the brig where Keyes was located. He managed to land at least one hit on the Master Chief with a beam weapon, but the Spartan was able to ascertain his location and quickly killed the Sangheili. Around the same time, another pair of Stealth Sangheili ambushed Parker and his squad while they were guarding the control room, and managed to kill all of the ODSTs. These two Sangheili were slain in revenge by the Master Chief, Keyes and several rescued Marine POWs upon their return to the control room.[9]
Another Stealth Sangheili ambushed the Master Chief shortly after the Spartan had deactivated the security system for the installation's Cartographer facility. Fortunately for the Chief, the Sangheili roared before firing his weapon, allowing the Spartan to quickly locate and kill him. A group of Stealth Sangheili were deployed onto the exterior platform of the Cartographer building by a Spirit dropship as a last ditch attempt by the Covenant to kill John-117 after he had accessed the Cartographer. They failed in their mission, and the Chief was able to escape onboard Echo 419.[10] Stealth Sangheili, along with other Covenant troops were deployed into the area around Installation 04's control room but all of them were killed by John-117 as he made his way towards the control room.[11]
Later in the battle, following the release of the Flood onto the installation, Stealth Sangheili were among the forces that attempted to stem the parasitic outbreak, with many deployed into the vast icy canyons where the Covenant engaged the Flood with the aid of vehicles, aircraft and Mgalekgolo support. During one such battle, where the Master Chief engaged both parties while searching for a Banshee to access the final phase pulse generator needed to delay the installation's firing sequence, a group of Stealth Sangheili broke through a line of Flood, specifically seeking out the Spartan to kill him but once again, the Chief was able to survive their attacks and eliminate all of his assailants.[12] A number of Stealth Sangheili were infected by the Flood onboard the downed Pillar of Autumn during the final phase of the battle. The resultant combat forms retained their host's active camouflage modules. They were discovered in the ship's armory by John-117 while searching for weapons to aid his assault on the engine room and despite the advantage of their camouflage, the infected Stealth Sangheili fell to the Spartan.[13]
During the initial stages of the Battle for Earth, Stealth Sangheili were among the Covenant boarders that invaded a cluster of orbital defense platforms to destroy them from within, to allow the Fleet of Sacred Consecration to descend to Earth's surface. A pair of them were engaged and killed by John-117 under Armory A-01, but their interference allowed more Sangheili to kill the gunnery sergeant in the armory.[14] Many more were deployed by the Solemn Penance directly into the city of Mombasa, particularly into the narrow streets and subterranean tunnels of the city, where they used their camouflage to ambush UNSC forces.[15][16]
Following the Prophet of Regret's arrival at Installation 05 on November 2, 2552, he deployed troops into the ruined structures and underwater facilities in the vicinity of the temple from which the Prophet conducted his religious sermons. A number of Stealth Sangheili along with similarly-camouflaged Unggoy were stationed in one of several underwater passageways that connected the various structures in the large artificial lake that ultimately connected to the Prophet's temple. This group was slain by John-117 as he passed through the area in his mission to assassinate the Prophet of Regret.[17] The next day, as the Great Schism broke out on High Charity, the Stealth Sangheili aided the rest of the species as they defended themselves from the now Jiralhanae-commanded Covenant military. A pair of energy sword wielding Stealth Sangheili along with a group of Special Operations Unggoy defended the door connecting the second Valley of Tears to the tower that would lead to the Mausoleum of the Arbiter, where the Sangheili prepared to fight a last stand against the Covenant. All members of both warring factions were slain by the Master Chief during his pursuit of the Prophet of Truth.[18]
After the conclusion of the Human-Covenant War, a number of Stealth Sangheili joined a faction of the defunct Covenant Empire led by Sangheili Zealot Merg Vol. In 2554, this "new" Covenant attacked the human research colony world of Draetheus V and its moon X50. As the battle raged on, Merg Vol discovered the true purpose of X50: the moon was actually a Forerunner installation capable of building and destroying planets. The cult leader was successful in activating X50's main weapon, beginning the process of dismantling Draetheus V. Covenant forces established a mile wide defense perimeter around the Forerunner structure from where Vol had activated the weapon. The UNSC realized that they would need to get combat technicians into the structure to disable the weapon. To protect the technicians, UNSC command had deployed snipers among the Marine reinforcements. These snipers would provide suppressing fire from the higher ground around the structure. However, the area they were deploying to was swarming with Stealth Sangheili. Spartan Davis escorted several sniper teams to their locations, killing many Stealth Sangheili in the process.[19]
Later in the battle, Spartan Sarah Palmer and a group of Marines made their way through one of Draetheus V's forests, seeking out Covenant commander Parg Vol's personal transport, of which Palmer would use to infiltrate Merg Vol's camp and slay the leader of the Covenant cultists. As the UNSC team advanced towards the Phantom, they were beset by a number of Stealth Sangheili, along with other Covenant forces that attempted to halt the humans process, to no avail. After Palmer located the Phantom gunboat, the Covenant launched an all out assault on her position, sending forth Stealth Sangheili, along with regular Sangheili infantry and even a Jiralhanae Chieftain but all of them fell to the Spartan, and Parg Vol's Phantom was secured.[20] Before Palmer could take off, however, she had to bypass the security systems onboard the Phantom. To this end, a combat technician was brought in. While the technician worked, Palmer was forced to defend against a massive enemy assault force; Parg Vol had heard about the attempted theft of his personal transport, and sent all available Covenant forces to stop the humans. Under support fire from a platoon of Wraiths, the Covenant launched a ferocious attack, sending waves of Unggoy at first, including suicide units. Kig-Yar soldiers were then sent in, followed by Sangheili, including many Stealth operatives and another Jiralhanae Chieftain. Despite the overwhelming odds, Palmer was able to hold the Covenant off long enough for the technician to bypass the security protocols, and they soon left for Merg Vol's camp.[21] Ultimately Sarah Palmer would be successful in assaulting Merg Vol's camp, resulting in the death of the cult leader, and the fragmentation of his Covenant soon after.[22]
Equipment[edit]
While they possess active camouflage units, their defensive capabilities are lower than those of other Sangheili due to the weakness of their personal energy shields.[citation needed] Early in the Human-Covenant War, Stealth Sangheili had no energy shields, relying only on their stealth and weapons to accomplish their complicated missions.[citation needed] This was later rectified, but their newly gained energy shields were weak, causing any Sangheili who held the rank to still rely heavily on stealth and quickness.[citation needed]
While Stealth Sangheili are not required to be armed, and several subgroups like the Ossoona very specifically are not, most still brandish at least a few standard-issue weapons in preparation of any new assignment.[1] Stealth Sangheili often arm themselves with Okarda'phaa-pattern plasma rifles or Type-33 needlers, and utilize Type-1 energy swords for close-quarters combat.[5][23][24] However, during the Battle of Trove in February 2531, some Stealth Sangheili were seen armed with a non-ceremonial variant of the energy stave.[25]
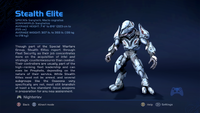
In terms of armor sets, Stealth Sangheili wear either the standard Combat harness in light blue,[23][26] brown or silver coloration,[27][28] or the more specialized Infiltration harness in dark brown/ black[29] or teal coloration.[30] Simulated Warzone Stealth Sangheili are seen with the Commander-class harness.[31]
Gameplay[edit]
Halo: Combat Evolved[edit]
Stealth Sangheili are usually armed with plasma rifles and, frequently, energy swords. They are also far less prone to making tactical mistakes, such as not charging directly into a fight and taking cover more often. Their agility and active camouflage makes them difficult targets to hit, and they often attack in pairs, much like Mgalekgolo.
The best way to combat a Stealth Sangheili in Halo: Combat Evolved would be to take advantage of their lack of shields. The M6D magnum and the SRS99C-S2 AM sniper rifle will kill them with a single shot to the head, though it can be difficult to land shots due to the Sangheili's agility and camouflage ability. The MA5B assault rifle is very effective at close range, as its ability to fill the air with a large number of projectiles reduces the need for accurate aiming, and allows the player to find the Sangheili more easily while they are still camouflaged.
Despite having active camouflage, when a Stealth Sangheili is equipped with an energy sword, the sword's glow will give away their location, making for an easy kill.
Halo 2[edit]
Compared to the iterations in Halo: Combat Evolved, the Stealth Sangheili are now equipped with energy shields of a shield strength slightly less than half of the Sangheili Minor. Likewise, a headshot-capable weapons such as the SRS99C-S2 AM sniper rifle, M6C magnum, BR55 battle rifle, or the Vostu-pattern carbine would be the best tool to eliminate these Sangheili. In close-quarters, consider using the M90 shotgun or dual-wielding the SMGs or plasma rifles. Two variations exist, one with tan/brown armor and another with white/silver armor. The tan/brown is uncommon (rare to very rare on lower difficulties), and their energy shield strength and armor are substantially better than their white/silver counterparts with the fastest shield regen of any Sangheili in Halo 2. According to the tags in the Halo 2 game files, the stronger elites are Stealth Majors and the weaker elites are Stealth Minors; this probably reflects their actual ranks, but Bungie did not explicitly confirm that Stealth Major and Stealth Minor are the canon names of specific ranks.
Stealth Sangheili appear frequently in the Halo 2 campaign, mainly the levels Cairo Station, Outskirts on Legendary, Metropolis on Heroic/Legendary, and Delta Halo on Legendary, though they also appear in the underwater structure in the level Regret, and on Gravemind.
Halo: Spartan Assault and Halo: Spartan Strike[edit]
Stealth Sangheili reappear in Halo: Spartan Assault. While their energy shielding and armor is not as strong as other Sangheili in the game, they are still extremely deadly. They are armed solely with energy swords, making them extremely dangerous in close-quarter situations. Their energy swords can kill a player in two hits. Stealth Sangheili generally patrol around a certain area on a level. Once the player comes into the Sangheili's view, it will charge at the player with its sword. Additionally, Stealth Sangheili use active camouflage which makes them difficult to see to inattentive players. Levels with thick forests filled with Stealth Sangheili, such as Hunt for the Phantom, are especially dangerous as the Sangheili can easily blend in with their surroundings.
The best tactic to use against Stealth Sangheili is to avoid allowing one to get close. Grenades, explosives, and other weapons that deal heavy damage are effective. A player can get near a Stealth Sangheili without it seeing the player by staying out of its detection zone. This can allow the player to attack the unaware Sangheili.
Halo 5: Guardians[edit]
Stealth Sangheili only appear in Warzone mode. They appear on the map Raid on Apex 7 as the Zealot Assassins' minions on each side of the map, two minutes after the game's beginning. Stealth Elites are equipped with active camouflage and energy swords, and their energy shields are very weak as usual. The harness they use is the Commander type. They typically charge at the player, but can be killed quite easily. It is recommended to take them down after the Zealot Assassin, so as to avoid missing the boss kill, but players must be careful not to be ambushed by the Stealth Elites.[31]
Gallery[edit]
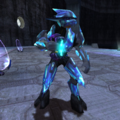
A Stealth Sangheili in Halo: Combat Evolved.
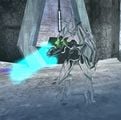
A camouflaged Stealth Sangheili in Halo: Combat Evolved.
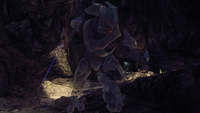
A camouflaged Stealth Sangheili in Halo: Combat Evolved Anniversary
A Stealth Sangheili armed with dual plasma rifles in Halo 2.
A camouflaged Stealth Sangheili in Halo 2 armed with a plasma rifle on Cairo Station during the Battle of Earth.
Stealth Sangheili in Halo Wars charging Red Team with energy staves.
A Stealth Sangheili, as displayed in the Library feature of Halo: Combat Evolved Anniversary.
A camouflaged Stealth Sangheili in Halo 2: Anniversary with a plasma rifle in New Mombasa.
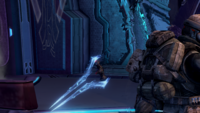
A Stealth Sangheili in Halo 2: Anniversary on Cairo Station.
A brown stealth Sangheili on the mission Delta Halo.
A camouflaged Stealth Sangheili on Raid on Apex 7 in Halo 5: Guardians.

|
Browse more images in this article's gallery page. |
List of appearances[edit]
- Halo: Combat Evolved (First appearance)
- Halo: The Flood
- Halo 2
- Halo Wars
- Halo 3: ODST
- Halo: Combat Evolved Anniversary
- Halo: Spartan Assault
- Halo 2: Anniversary
- Halo: Spartan Strike
- Halo 5: Guardians
Sources[edit]
- ^ a b c d e Halo: Combat Evolved Anniversary, The Library: Stealth Elite
- ^ Halo: Spartan Assault, Quotes
- ^ Halo Encyclopedia (2009 edition), page 133 (2011 edition)
- ^ Halo: The Flood, page 28
- ^ a b Halo: Spartan Assault
- ^ Halo: Spartan Strike
- ^ Halo Wars, campaign level, Relic Interior
- ^ Halo Wars, campaign level, Escape
- ^ Halo: Combat Evolved, campaign level The Truth and Reconciliation
- ^ Halo: Combat Evolved, campaign level The Silent Cartographer
- ^ Halo: Combat Evolved, campaign level Assault on the Control Room
- ^ Halo: Combat Evolved, campaign level Two Betrayals
- ^ Halo: Combat Evolved, campaign level The Maw
- ^ Halo 2, campaign level Cairo Station
- ^ Halo 2, campaign level Outskirts
- ^ Halo 2, campaign level Metropolis
- ^ Halo 2, campaign level Regret
- ^ Halo 2, campaign level Gravemind
- ^ Halo: Spartan Assault, Infiltration of the Covenant Perimeter
- ^ Halo: Spartan Assault, Hunt for the Phantom
- ^ Halo: Spartan Assault, The Scorching of the Thicket
- ^ Halo: Spartan Assault, Battle for the Moon
- ^ a b Halo: Combat Evolved
- ^ Halo 2
- ^ Halo Wars, campaign level Escape
- ^ Halo Wars
- ^ Halo 2
- ^ Halo 2: Anniversary
- ^ Halo: Reach
- ^ Halo: Combat Evolved Anniversary
- ^ a b Halo 5: Guardians Official Game Guide (Collector's Edition), page 320
| |||||||||||||||||||||||||||||||||||
