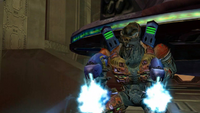
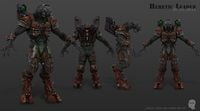
Sesa 'Refumee: Difference between revisions
From Halopedia, the Halo wiki
(→Trivia) |
m (Text replacement - "\(age \d+\)" to "") |
||
| (387 intermediate revisions by more than 100 users not shown) | |||
| Line 1: | Line 1: | ||
{{ | {{Status|Canon}} | ||
{{Character infobox | |||
|variant=Cov | |||
{{ | |name=Sesa 'Refumee | ||
|image=[[File:Enc22-Sesa.jpg|300px]] | |||
|homeworld=[[Feldokra]]{{Ref/Book|Id=EN|Enc22|Page=253}} | |||
|birth=[[2499#July|July 11, 2499]]{{Ref/Reuse|EN}} | |||
|death=[[2552#October|October 20, 2552]] | |||
|name=Sesa 'Refumee | |causeofdeath=Killed by the [[Arbiter]] [[Thel 'Vadam]] | ||
|image=[[ | |parents= | ||
|homeworld | |siblings= | ||
|spouses= | |||
|children= | |||
| | |species=[[Sangheili]] | ||
| | |gender=Male | ||
| | |height={{Convert|221|cm|ftin|sp=us}}{{Ref/Reuse|EN}} | ||
| | |mass={{Convert|142|kg|lb|sp=us}}{{Ref/Reuse|EN}} | ||
|hair= | |||
|eyes= | |||
|affiliation=*[[Covenant]] | |||
**[[Ministry of Tranquility]] {{C|formerly}}{{Ref/Reuse|EN}} | |||
| | *[[Sesa 'Refumee's heretic faction]] | ||
| | |rank=Third Commander{{Ref/Reuse|EN}} | ||
| | |sn= | ||
| | |notable= | ||
| | |||
| | |||
| | |||
| | |||
|affiliation=[[ | |||
| | |||
}} | }} | ||
{{Quote|The Elites are blind, [[Thel 'Vadam|Arbiter]], but I will make them see.|Sesa 'Refumee}} | |||
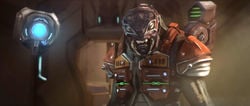
'''Sesa 'Refumee''' was the leader of [[Sesa 'Refumee's heretic faction|a group of heretics]] who had defected from the [[Covenant Empire|Covenant]] and taken control of a [[Forerunner]] [[Threshold gas mine|gas mine]] over [[Threshold]] and a small [[Burial Mounds|outpost]] on [[Basis]], the gas giant's moon which [[Installation 04]] rested between.<ref name="arbiter">'''[[Halo 2]]''', campaign level ''[[The Arbiter]]''</ref><ref name="oracle">'''Halo 2''', campaign level ''[[The Oracle]]''</ref> | |||
'''Sesa 'Refumee''' | |||
[[ | |||
= | |||
== | ==Biography== | ||
===Heretic uprising=== | |||
{{Quote|I wondered who the Prophets would send to silence me. An [[Arbiter]]? I'm flattered.|'Refumee to [[Arbiter]] [[Thel 'Vadamee]].}} | |||
[[File:Refumee & Spark.png|thumb|left|250px|Sesa 'Refumee meets [[04-343 Guilty Spark|343 Guilty Spark]].]] | |||
In [[2552#September|September 2552]], Sesa 'Refumee led an artifact retrieval group serving the [[Ministry of Tranquility]] within the [[Fleet of Particular Justice]] alongside [[Loka 'Bandolee]]. After the fleet arrived at [[Installation 04]] in pursuit of the {{UNSCShip|Pillar of Autumn}}, 'Refumee's expeditionary group was sent to study a [[Forerunner]] [[Threshold gas mine|gas mine]] above [[Threshold]] at the behest of the [[Prophet of Stewardship]]. [[Supreme Commander]] [[Thel 'Vadam]]ee disapproved of the mission, believing that all military forces needed to be concentrated on the human forces on the installation.<ref>'''[[Halo: The Flood]] (2010)''', ''[[Priority Broadcast Log/Eleventh Cycle, Third Unit]]''</ref>{{Ref/Reuse|EN}} As such, 'Refumee was not on Installation 04 when [[John-117]] detonated the ''Pillar of Autumn''{{'}}s [[Fusion drive|engines]], destroying the ring. However, when most of the Fleet of Particular Justice had been destroyed or left the system, Sesa 'Refumee and his forces were left stranded on the gas mine facility.<ref>'''[[Halo Encyclopedia (2009 edition)]]''', ''page 243''</ref> | |||
[[File:H2Aterm-Sesa and GS 3.jpg|thumb|250px|Sesa 'Refumee and 343 Guilty Spark converse.]] | |||
After Alpha Halo's destruction, Installation 04's [[monitor]], [[343 Guilty Spark]], travelled to Threshold's gas mine shortly after the Halo's destruction. The monitor encountered initially hostile [[Kig-Yar]] soldiers that were a part of 'Refumee's unit. However, a [[Sangheili]] soldier found the monitor and brought Guilty Spark to 'Refumee. The monitor "edified" him about the true nature of the [[Halo Array]], the fate of the Forerunners, and the origins of the [[Flood]]. Realizing that the [[San'Shyuum]]'s teachings were false, 'Refumee cut off communications to the remainder of the fleet.<ref>'''[[Halo: Combat Evolved Anniversary]]''', ''[[Terminal (Halo: Combat Evolved Anniversary)|Terminal 11]]''</ref> 'Refumee and Guilty Spark had a lengthy conversation over the [[history of the Covenant]] and the Sangheili. He initially considered conveying these revelations to his commander, Thel 'Vadamee, the only individual that he felt he could trust with 343 Guilty Spark's revelations. However, Thel's disgrace and appointment as [[Arbiter]] prevented any detailed conversations.<ref name="h2aterm">'''Halo 2: Anniversary''', ''[[Terminal (Halo 2: Anniversary)|Terminals]]''</ref> 'Refumee subsequently led the Sangheili, Kig-Yar, and [[Unggoy]] under his command to revolt against the Prophets. 'Refumee then proceeded to fortify the gas mine with defenses, anticipating a response from the Prophets. He attempted to spread the truth to the rest of the Covenant in hopes that others would rally to his cause, which infuriated the [[Hierarchs|High Prophets]] of [[Prophet of Truth|Truth]] and [[Prophet of Mercy|Mercy]].{{Ref/Reuse|arbiter}} | |||
Sesa was branded a [[Treason|traitor]] and a [[List of known Covenant heretics|heretic]] by Truth, who sent Thel 'Vadamee, the newly appointed [[Arbiter]], to [[Raid on the Threshold gas mine|execute]] 'Refumee and to quell his heretical movement. At first, 'Refumee tried to protect himself by releasing the Flood in specific areas to kill the Arbiter and his [[Covenant Special Operations|strike team]], but this backfired and 'Refumee's followers were forced into a two-sided war. In the meantime, a perilous and lethal storm raged outside. Hoping the storm would kill his pursuers, 'Refumee sealed himself within an impenetrable protected zone of the station. To force 'Refumee out of hiding, 'Vadamee cut the cable that prevented the station from falling into the gas giant.{{Ref/Reuse|arbiter}} As 'Refumee attempted to make his escape in a {{Pattern|Kai|Seraph}} fighter, the Arbiter found him and demanded to know the source of 'Refumee's heretical beliefs, causing 343 Guilty Spark to show himself. Though the Monitor began attempting to edify the Arbiter, 'Refumee decided to attack him rather than attempt to convert the Arbiter to his side. Despite 'Refumee's clever use of [[holo-drone]]s, 'Vadamee soon killed him and retrieved 343 Guilty Spark from the station.{{Ref/Reuse|oracle}} | |||
Sesa 'Refumee | |||
===Legacy=== | |||
With the death of 'Refumee and most of his followers at the hands of the Arbiter, and with 343 Guilty Spark in the hands of [[Tartarus]] and the Hierarchs, the heresy was quelled. However, 'Refumee's words had planted a seed of doubt into 'Vadamee's mind.{{Ref/Reuse|EN}} After the Arbiter was presented the same message by the [[Gravemind]], John-117, and 343 Guilty Spark, he slowly came to believe 'Refumee's words.<ref name="gravemind">'''Halo 2''', campaign level ''[[Gravemind (level)|Gravemind]]''</ref> Ultimately, the ideals that Sesa 'Refumee's faction promoted were later revived during the [[Great Schism]] by the [[Covenant separatists]]. In the years following the war, Arbiter Thel 'Vadamee sought to recognize 'Refumee's efforts in changing the course of their species for the better, granting special dispensation to the members of 'Refum keep in the [[Swords of Sanghelios]].{{Ref/Reuse|EN}} | |||
[[ | ==Gameplay== | ||
For all intents and purposes, Sesa 'Refumee, on his own, is just a [[Sangheili]] [[Sangheili Ranger|Ranger]] with differently-colored armor and shields that could withstand up to two [[Type-1 energy sword|energy sword]] lunges, making him accurately comparable to a [[Sangheili Ultra]]. During his [[boss|boss fight]] he utilizes two [[holo-drone]]s to assist him in a fight and as a method to stay away from harm's reach. These holo-drones, when projected, create two identical models—albeit a darker armor tint—of himself, which deal real damage upon the player. When a holo-drone is "killed", the model will dissipate and the holo-drone ball will simply drop to the floor. On higher levels, defeating the first drones will make the real Sesa fly into one of the pipes and several more drones will appear. However, the real Sesa will often hide in one of the pipes on the top of the room. He will not respond to damage and can be easily killed with a [[Vostu-pattern carbine|Covenant carbine]] or [[Type-33 Needler|Needler]]. | |||
[[ | ==Production note== | ||
{{Linkbox|quote=yes|gallery=yes}} | |||
Sesa 'Refumee is voiced by [[Miguel Ferrer]] in ''[[Halo 2]]'' and by [[John DiMaggio]] in ''[[Halo 2: Anniversary]]''<nowiki>'</nowiki>s terminals.<ref>'''Halo 2''', ''[[Halo 2 credits|credits]]''</ref><ref>'''[[Halo 2: Anniversary]]''', ''[[Remaking the Legend]]''</ref> His voice actor in ''[[Halo: Combat Evolved Anniversary]]''<nowiki>'</nowiki>s terminals is uncredited. | |||
==Trivia== | ==Trivia== | ||
* | *Even though 'Refumee left the [[Covenant]], he did not remove the "-ee" suffix from his name, which denotes service in the Covenant military. Out of universe, this is most likely a result of his name having been given before ''[[Halo: The Cole Protocol]]'' established the meaning of the "-ee" suffix. | ||
*Despite considering [[Thel 'Vadamee]] the one person he could trust with [[343 Guilty Spark]]'s revelations,{{Ref/Reuse|h2aterm}} when granted the opportunity during his final confrontation with Thel, he instead used Spark's appearance as a distraction rather than trying to use the "Oracle" to convince Thel of the truth.{{Ref/Reuse|oracle}} | |||
*His homeworld is erroneously listed as Sanghelios in his Waypoint profile.<ref>[https://web.archive.org/web/20211105095037/https://www.halowaypoint.com/en-us/universe/characters/sesa-refumee Halo Waypoint]</ref> | |||
* | |||
* | |||
== | ==Gallery== | ||
<gallery> | |||
Image:HereticLeaderPlasmaRifle08.jpg|Sesa 'Refumee in ''[[Halo 2]]''. | |||
File:Holodrones.jpg|'Refumee with two holo-drones. | |||
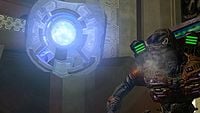
File:GS-Heretic.jpg|Alongside 'Refumee, [[343 Guilty Spark]] discusses the Halo Array. | |||
File:Sesa_Firing.png|'Refumee firing his plasma rifles. | |||
File:CEA - Sesa Terminal.jpg|Sesa 'Refumee in ''[[Halo: Combat Evolved Anniversary]]''<nowiki>'</nowiki>s terminals. | |||
File:CEA - Sesa Terminal 2.jpg|'Refumee learning of the Prophets' lies. | |||
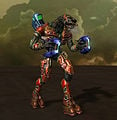
File:H2A - Sesa model.jpg|An early model of 'Refumee for ''[[Halo 2: Anniversary]]''. | |||
File:H2A-RefumeeRises.jpg|'Refumee engages the Arbiter in ''Halo 2: Anniversary''. | |||
File:H2A-SesaRefumee.jpg|An up-close shot of 'Refumee's face in ''Halo 2: Anniversary''. | |||
File:H2Aterm-SesaPlasmaRifle.jpg|Sesa 'Refumee examines a plasma rifle in ''Halo 2: Anniversary''{{'}}s [[Terminal (Halo 2: Anniversary)|terminals]]. | |||
</gallery> | |||
== | ==List of appearances== | ||
*''[[Halo: The Flood]]'' | |||
**''[[Halo: The Flood#2010 bonus content|Adjunct]]'' {{Mo}} | |||
*''[[Halo 2]]'' {{1st}} | |||
*''[[Halo: Combat Evolved Anniversary]]'' | |||
**''[[Terminal (Halo: Combat Evolved Anniversary)|Terminals]]'' | |||
*''[[Halo 2: Anniversary]]'' | |||
**''[[Terminal (Halo 2: Anniversary)|Terminals]]'' | |||
==Sources== | |||
{{ | {{Ref/Sources}} | ||
[[Category: | {{DEFAULTSORT:Refumee, Sesa}} | ||
[[Category: | [[Category:Sangheili characters]] | ||
[[Category:Covenant military personnel]] | |||
[[Category:Bosses]] | |||
Latest revision as of 12:12, June 10, 2024
| Sesa 'Refumee | |
|---|---|
| |
| Biographical information | |
|
Homeworld: |
|
|
Born: |
|
|
Died: |
October 20, 2552 (aged 53) |
|
Cause of death: |
Killed by the Arbiter Thel 'Vadam |
| Personal details | |
|
Species: |
|
|
Gender: |
Male |
|
Height: |
221 centimeters (7 ft 3 in)[1] |
|
Weight: |
142 kilograms (310 lb)[1] |
| Political and military information | |
|
Affiliation: |
|
|
Rank: |
Third Commander[1] |
- "The Elites are blind, Arbiter, but I will make them see."
- — Sesa 'Refumee
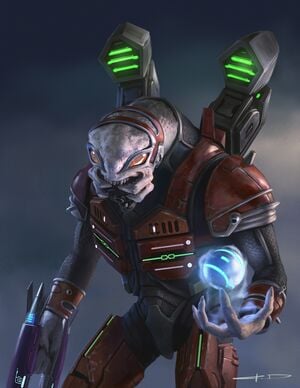
Sesa 'Refumee was the leader of a group of heretics who had defected from the Covenant and taken control of a Forerunner gas mine over Threshold and a small outpost on Basis, the gas giant's moon which Installation 04 rested between.[2][3]
Biography[edit]
Heretic uprising[edit]
- "I wondered who the Prophets would send to silence me. An Arbiter? I'm flattered."
- — 'Refumee to Arbiter Thel 'Vadamee.
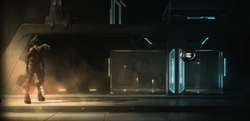
In September 2552, Sesa 'Refumee led an artifact retrieval group serving the Ministry of Tranquility within the Fleet of Particular Justice alongside Loka 'Bandolee. After the fleet arrived at Installation 04 in pursuit of the UNSC Pillar of Autumn, 'Refumee's expeditionary group was sent to study a Forerunner gas mine above Threshold at the behest of the Prophet of Stewardship. Supreme Commander Thel 'Vadamee disapproved of the mission, believing that all military forces needed to be concentrated on the human forces on the installation.[4][1] As such, 'Refumee was not on Installation 04 when John-117 detonated the Pillar of Autumn's engines, destroying the ring. However, when most of the Fleet of Particular Justice had been destroyed or left the system, Sesa 'Refumee and his forces were left stranded on the gas mine facility.[5]
After Alpha Halo's destruction, Installation 04's monitor, 343 Guilty Spark, travelled to Threshold's gas mine shortly after the Halo's destruction. The monitor encountered initially hostile Kig-Yar soldiers that were a part of 'Refumee's unit. However, a Sangheili soldier found the monitor and brought Guilty Spark to 'Refumee. The monitor "edified" him about the true nature of the Halo Array, the fate of the Forerunners, and the origins of the Flood. Realizing that the San'Shyuum's teachings were false, 'Refumee cut off communications to the remainder of the fleet.[6] 'Refumee and Guilty Spark had a lengthy conversation over the history of the Covenant and the Sangheili. He initially considered conveying these revelations to his commander, Thel 'Vadamee, the only individual that he felt he could trust with 343 Guilty Spark's revelations. However, Thel's disgrace and appointment as Arbiter prevented any detailed conversations.[7] 'Refumee subsequently led the Sangheili, Kig-Yar, and Unggoy under his command to revolt against the Prophets. 'Refumee then proceeded to fortify the gas mine with defenses, anticipating a response from the Prophets. He attempted to spread the truth to the rest of the Covenant in hopes that others would rally to his cause, which infuriated the High Prophets of Truth and Mercy.[2]
Sesa was branded a traitor and a heretic by Truth, who sent Thel 'Vadamee, the newly appointed Arbiter, to execute 'Refumee and to quell his heretical movement. At first, 'Refumee tried to protect himself by releasing the Flood in specific areas to kill the Arbiter and his strike team, but this backfired and 'Refumee's followers were forced into a two-sided war. In the meantime, a perilous and lethal storm raged outside. Hoping the storm would kill his pursuers, 'Refumee sealed himself within an impenetrable protected zone of the station. To force 'Refumee out of hiding, 'Vadamee cut the cable that prevented the station from falling into the gas giant.[2] As 'Refumee attempted to make his escape in a Kai-pattern Seraph fighter, the Arbiter found him and demanded to know the source of 'Refumee's heretical beliefs, causing 343 Guilty Spark to show himself. Though the Monitor began attempting to edify the Arbiter, 'Refumee decided to attack him rather than attempt to convert the Arbiter to his side. Despite 'Refumee's clever use of holo-drones, 'Vadamee soon killed him and retrieved 343 Guilty Spark from the station.[3]
Legacy[edit]
With the death of 'Refumee and most of his followers at the hands of the Arbiter, and with 343 Guilty Spark in the hands of Tartarus and the Hierarchs, the heresy was quelled. However, 'Refumee's words had planted a seed of doubt into 'Vadamee's mind.[1] After the Arbiter was presented the same message by the Gravemind, John-117, and 343 Guilty Spark, he slowly came to believe 'Refumee's words.[8] Ultimately, the ideals that Sesa 'Refumee's faction promoted were later revived during the Great Schism by the Covenant separatists. In the years following the war, Arbiter Thel 'Vadamee sought to recognize 'Refumee's efforts in changing the course of their species for the better, granting special dispensation to the members of 'Refum keep in the Swords of Sanghelios.[1]
Gameplay[edit]
For all intents and purposes, Sesa 'Refumee, on his own, is just a Sangheili Ranger with differently-colored armor and shields that could withstand up to two energy sword lunges, making him accurately comparable to a Sangheili Ultra. During his boss fight he utilizes two holo-drones to assist him in a fight and as a method to stay away from harm's reach. These holo-drones, when projected, create two identical models—albeit a darker armor tint—of himself, which deal real damage upon the player. When a holo-drone is "killed", the model will dissipate and the holo-drone ball will simply drop to the floor. On higher levels, defeating the first drones will make the real Sesa fly into one of the pipes and several more drones will appear. However, the real Sesa will often hide in one of the pipes on the top of the room. He will not respond to damage and can be easily killed with a Covenant carbine or Needler.
Production note[edit]

|
Check out our collection of quotes related to Sesa 'Refumee on its quotes page. |

|
Browse more images in this article's gallery page. |
Sesa 'Refumee is voiced by Miguel Ferrer in Halo 2 and by John DiMaggio in Halo 2: Anniversary's terminals.[9][10] His voice actor in Halo: Combat Evolved Anniversary's terminals is uncredited.
Trivia[edit]
- Even though 'Refumee left the Covenant, he did not remove the "-ee" suffix from his name, which denotes service in the Covenant military. Out of universe, this is most likely a result of his name having been given before Halo: The Cole Protocol established the meaning of the "-ee" suffix.
- Despite considering Thel 'Vadamee the one person he could trust with 343 Guilty Spark's revelations,[7] when granted the opportunity during his final confrontation with Thel, he instead used Spark's appearance as a distraction rather than trying to use the "Oracle" to convince Thel of the truth.[3]
- His homeworld is erroneously listed as Sanghelios in his Waypoint profile.[11]
Gallery[edit]
Sesa 'Refumee in Halo 2.
Alongside 'Refumee, 343 Guilty Spark discusses the Halo Array.
Sesa 'Refumee in Halo: Combat Evolved Anniversary's terminals.
An early model of 'Refumee for Halo 2: Anniversary.
Sesa 'Refumee examines a plasma rifle in Halo 2: Anniversary's terminals.
List of appearances[edit]
- Halo: The Flood
- Adjunct (Mentioned only)
- Halo 2 (First appearance)
- Halo: Combat Evolved Anniversary
- Halo 2: Anniversary
Sources[edit]
- ^ a b c d e f g h i Halo Encyclopedia (2022 edition), page 253
- ^ a b c Halo 2, campaign level The Arbiter
- ^ a b c Halo 2, campaign level The Oracle
- ^ Halo: The Flood (2010), Priority Broadcast Log/Eleventh Cycle, Third Unit
- ^ Halo Encyclopedia (2009 edition), page 243
- ^ Halo: Combat Evolved Anniversary, Terminal 11
- ^ a b Halo 2: Anniversary, Terminals
- ^ Halo 2, campaign level Gravemind
- ^ Halo 2, credits
- ^ Halo 2: Anniversary, Remaking the Legend
- ^ Halo Waypoint
