Control Room (Installation 04): Difference between revisions
From Halopedia, the Halo wiki
No edit summary |
mNo edit summary |
||
| Line 1: | Line 1: | ||
{{era|H1|TF | {{era|H1|TF|H3}} | ||
<center>''Looking for [[Control Room (Installation 05)|Installation 05's Control Room]], or the [[Control Room]] in general?''</center> | <center>''Looking for [[Control Room (Installation 05)|Installation 05's Control Room]], or the [[Control Room]] in general?''</center> | ||
| Line 6: | Line 5: | ||
==Description== | ==Description== | ||
{{quote|Unfortunately, [[343 Guilty Spark (Monitor)|my]] usefulness to this particular endeavor has come to an end. Protocol does not allow units with [[Monitor|my classification]] to...perform a task as important as the reunification of the [[Index]] with the [[The Core|Core]]. That final step is reserved for [[John-117|you]], [[Reclaimer]].| 343 Guilty Spark}} | |||
The control room is located in a subterranean level below the surface of Halo Installation 04. The facility was built directly into a giant artificial cavern and protected by several sets of massive, presumed blast-proof, doors. | The control room is located in a subterranean level below the surface of Halo Installation 04. The facility was built directly into a giant artificial cavern and protected by several sets of massive, presumed blast-proof, doors. | ||
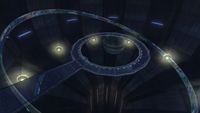
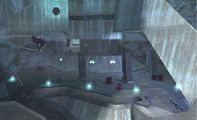
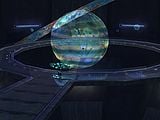
Inside there is a large circular bridge that is lacking supports. The bridge ends in a circular walkway. Both the bridge and walkway are made out of a reflective metal. In the center of the walkway there is a hologram of [[Threshold]], [[Basis]], and the ring between the two.<ref>[[Halo: The Flood]] page 192</ref> | Inside there is a large circular bridge that is lacking supports. The bridge ends in a circular walkway. Both the bridge and walkway are made out of a reflective metal. In the center of the walkway there is a hologram of [[Threshold]], [[Basis]], and the ring between the two.<ref>[[Halo: The Flood]] page 192</ref> On the outside of the walkway there is a model of the Halo ring itself. The model displayed a detailed map of the terrain and slowly rotated.<ref>[[Halo: The Flood]] page 193</ref> | ||
On the outside of the walkway there is a model of the Halo ring itself. The model displayed a detailed map of the terrain and slowly rotated.<ref>[[Halo: The Flood]] page 193</ref> | |||
There is a single computer terminal in the room where the [[Index]] is places to activate the rings. The terminal also reported the weather, rate of spin, information on the machines keeping the ring running, and information on the outbreak of the [[Flood]].<ref>[[Halo: The Flood]] page 254</ref> | There is a single computer terminal in the room where the [[Index]] is places to activate the rings. The terminal also reported the weather, rate of spin, information on the machines keeping the ring running, and information on the outbreak of the [[Flood]].<ref>[[Halo: The Flood]] page 254</ref> | ||
==History== | ==History== | ||
For thousands of years, the ring and it's control room were completely derelict. In [[2552]], after the [[UNSC]] ship ''[[UNSC Pillar of Autumn|Pillar of Autumn]]'' crashed landed on the ring, [[Covenant]] scouts came across the control room, presumably through use of the [[Silent Cartographer]]. | For thousands of years, the ring and it's control room were completely derelict. In [[2552]], after the [[UNSC]] ship ''[[UNSC Pillar of Autumn|Pillar of Autumn]]'' crashed landed on the ring, [[Covenant]] scouts came across the control room, presumably through use of the [[Silent Cartographer]]. | ||
| Line 22: | Line 18: | ||
Later, Halo's Monitor, 343 Guilty Spark, brought the Chief back to the control room in order to activate the ring. When he learned what the ring's true function was, the Chief yanked Cortana out of the panel and raced to stop the activation process.<ref> [[Halo: The Flood]] page 255</ref> | Later, Halo's Monitor, 343 Guilty Spark, brought the Chief back to the control room in order to activate the ring. When he learned what the ring's true function was, the Chief yanked Cortana out of the panel and raced to stop the activation process.<ref> [[Halo: The Flood]] page 255</ref> | ||
==Appearances== | ==Appearances== | ||
| Line 34: | Line 26: | ||
*[[Halo 3]] ''(on [[Installation 04 (II)|the replacement Alpha Halo]])'' | *[[Halo 3]] ''(on [[Installation 04 (II)|the replacement Alpha Halo]])'' | ||
**[[Halo (Halo 3 Level)|Halo]] | **[[Halo (Halo 3 Level)|Halo]] | ||
==Trivia== | |||
*It has been noted that when viewed from the top, the main console room resembles the [[Marathon]] logo. | |||
==Gallery== | ==Gallery== | ||
Revision as of 16:46, February 7, 2009
Installation 04's Control Room was the site that controlled all of the Installation's operations.
Description
- "Unfortunately, my usefulness to this particular endeavor has come to an end. Protocol does not allow units with my classification to...perform a task as important as the reunification of the Index with the Core. That final step is reserved for you, Reclaimer."
- — 343 Guilty Spark
The control room is located in a subterranean level below the surface of Halo Installation 04. The facility was built directly into a giant artificial cavern and protected by several sets of massive, presumed blast-proof, doors.
Inside there is a large circular bridge that is lacking supports. The bridge ends in a circular walkway. Both the bridge and walkway are made out of a reflective metal. In the center of the walkway there is a hologram of Threshold, Basis, and the ring between the two.[1] On the outside of the walkway there is a model of the Halo ring itself. The model displayed a detailed map of the terrain and slowly rotated.[2]
There is a single computer terminal in the room where the Index is places to activate the rings. The terminal also reported the weather, rate of spin, information on the machines keeping the ring running, and information on the outbreak of the Flood.[3]
History
For thousands of years, the ring and it's control room were completely derelict. In 2552, after the UNSC ship Pillar of Autumn crashed landed on the ring, Covenant scouts came across the control room, presumably through use of the Silent Cartographer.
When the Master Chief John-117 came across the control room, he integrated Cortana into the interface. Absorbing the wealth of knowledge, she informed him of a terrible secret and sent the chief after Captain Keyes and his squad who were going after a Covenant weapons cache.[4]
Later, Halo's Monitor, 343 Guilty Spark, brought the Chief back to the control room in order to activate the ring. When he learned what the ring's true function was, the Chief yanked Cortana out of the panel and raced to stop the activation process.[5]
Appearances
- Halo: Combat Evolved/Halo: The Flood
- The Silent Cartographer (Mentioned only)
- Assault on the Control Room
- Two Betrayals
- Halo 3 (on the replacement Alpha Halo)
Trivia
- It has been noted that when viewed from the top, the main console room resembles the Marathon logo.
Gallery
References
- ^ Halo: The Flood page 192
- ^ Halo: The Flood page 193
- ^ Halo: The Flood page 254
- ^ Halo: The Flood page 192
- ^ Halo: The Flood page 255


