Halo Infinite skulls: Difference between revisions
From Halopedia, the Halo wiki
mNo edit summary |
|||
| (8 intermediate revisions by 6 users not shown) | |||
| Line 1: | Line 1: | ||
{{Title|''Halo Infinite'' skulls}} | {{Title|''Halo Infinite'' skulls}} | ||
{{ | {{Status|Gameplay}} | ||
{{disambig header|the gameplay modifiers in Halo Infinite|other uses|Skull}} | {{disambig header|the gameplay modifiers in Halo Infinite|other uses|Skull}} | ||
'''Skulls''' are game modifiers featured in ''[[Halo Infinite]]'' with the appearance of a [[human]] [[skull]]. | '''Skulls''' are game modifiers featured in ''[[Halo Infinite]]'' with the appearance of a [[human]] [[skull]]. | ||
| Line 10: | Line 10: | ||
===Boom=== | ===Boom=== | ||
{{Article | {{Article quote|Behold, the Temple of Boom. Doubles explosion radius.}} | ||
'''Level''': [[Warship Gbraakon]] | '''Level''': [[Warship Gbraakon]] | ||
'''How to unlock''': Can only collected during The Warship Gbraakon mission. | '''How to unlock''': Can only be collected during The Warship Gbraakon mission. | ||
'''Notes''': Upon reaching the section of the level with a vast two floor hall, and three freight lifts located on the right. Use the middle lift to rise above the adjacent crate located on the right and the skull will be visible. | '''Notes''': Upon reaching the section of the level with a vast two floor hall, and three freight lifts located on the right. Use the middle lift to rise above the adjacent crate located on the right and the skull will be visible. | ||
===Cowbell=== | ===Cowbell=== | ||
{{Article | {{Article quote|Because we needed more Cowbell. Acceleration from explosions is increased.}} | ||
'''Level''': [[Foundation (Halo Infinite)|Foundation]] | '''Level''': [[Foundation (Halo Infinite)|Foundation]] | ||
'''How to unlock''': Can only collected during the Foundation mission. | '''How to unlock''': Can only be collected during the Foundation mission. | ||
'''Notes''': Upon reaching the section of the level with a window drawing your attention to a blue orb in the distance, proceed to you right, and then use the grapple hook to climb the pillars and reach the angular structure located on the ceiling. The skull is located here. | '''Notes''': Upon reaching the section of the level with a window drawing your attention to a blue orb in the distance, proceed to you right, and then use the grapple hook to climb the pillars and reach the angular structure located on the ceiling. The skull is located here. | ||
===Mythic=== | ===Mythic=== | ||
{{Article | {{Article quote|Because it wasn't hard enough. Enemies have increased health.}} | ||
[[File:HINF Mythic Skull.png| | [[File:HINF Mythic Skull.png|thumb|200px|Mythic skull]] | ||
'''Level''': [[The Command Spire]] | '''Level''': [[The Command Spire]] | ||
'''How to unlock''': Can only collected during The Command Spire mission. | '''How to unlock''': Can only be collected during The Command Spire mission. | ||
'''Notes''': Upon reaching the section of the level where the hexagonal materials are passing through energy barriers horizontally, proceed through the barriers until an open section where the hexagonal materials are being adorned with Forerunner markings and begin to change direction. Proceed to grapple up onto the material, and then immediately grapple up into the opening in the ceiling and enter the doorway and follow this until you reach the room with the skull. | '''Notes''': Upon reaching the section of the level where the hexagonal materials are passing through energy barriers horizontally, proceed through the barriers until an open section where the hexagonal materials are being adorned with Forerunner markings and begin to change direction. Proceed to grapple up onto the material, and then immediately grapple up into the opening in the ceiling and enter the doorway and follow this until you reach the room with the skull. | ||
===Grunt Birthday Party=== | ===Grunt Birthday Party=== | ||
{{Article | {{Article quote|Maybe it's the methane? Grunt headshots lead to glorious celebrations.}} | ||
[[File:HINF GruntBirthday Skull.png| | [[File:HINF GruntBirthday Skull.png|thumb|200px|Grunt Birthday skull]] | ||
'''Level''': [[Repository (Halo Infinite level)|Repository]] | '''Level''': [[Repository (Halo Infinite level)|Repository]] | ||
'''How to unlock''': Can only collected during The Repository mission. | '''How to unlock''': Can only be collected during The Repository mission. | ||
'''Notes''': Upon reaching the section of the level where the terminal is located, once activated, a [[hardlight]] bridge will activate to the leading to the other side of the room, where [[Banished]] forces will engage you. Dispose of these, then return to the doorway that led you to the terminal. On your right, the doorway will have unlocked, proceed through here and collect the [[Power seed]]. Return to the room with the terminal, and on the opposite side of the room to where you enter is another doorway, proceed through there and in the room, place the power seed in the terminal. Once [[The Weapon]] points out the [[Silent Auditorium (location)|Silent Auditorium]], there will be two large halls with doors leading both left and right. In the middle of the second hall, there will be an angular piece drawing your eyes upward, and in between two [[Sentinel | '''Notes''': Upon reaching the section of the level where the terminal is located, once activated, a [[hardlight]] bridge will activate to the leading to the other side of the room, where [[Banished]] forces will engage you. Dispose of these, then return to the doorway that led you to the terminal. On your right, the doorway will have unlocked, proceed through here and collect the [[Power seed]]. Return to the room with the terminal, and on the opposite side of the room to where you enter is another doorway, proceed through there and in the room, place the power seed in the terminal. Once [[The Weapon]] points out the [[Silent Auditorium (location)|Silent Auditorium]], there will be two large halls with doors leading both left and right. In the middle of the second hall, there will be an angular piece drawing your eyes upward, and in between two [[Sentinel emitter]]s, there will be a glass window now open. Dispose of the five [[Stealth Sangheili|Stealth Elites]] to collect the skull. | ||
===Bandana=== | ===Bandana=== | ||
{{Article | {{Article quote|We did say Infinite. Grants unlimited weapon ammo and grenades, and removes equipment cooldown.}} | ||
[[File:HINF Bandana Skull.png| | [[File:HINF Bandana Skull.png|thumb|200px|Bandana skull]] | ||
'''Level''': [[Silent Auditorium]] | '''Level''': [[Silent Auditorium]] | ||
'''How to unlock''': Can only collected during The Silent Auditorium mission. | '''How to unlock''': Can only be collected during The Silent Auditorium mission. | ||
'''Notes''': To unlock the door to the room containing this skull, no Sentinels can be killed before claiming the skull. The room itself can be found near the end of the level within the hallway area with statues located on your left. After activating a light bridge, cross the bridge, and instead of heading left towards your objective, go straight ahead and through the door to find the skull. | '''Notes''': To unlock the door to the room containing this skull, no Sentinels can be killed before claiming the skull. The room itself can be found near the end of the level within the hallway area with statues located on your left. After activating a light bridge, cross the bridge, and instead of heading left towards your objective, go straight ahead and through the door to find the skull. | ||
===Thunderstorm=== | ===Thunderstorm=== | ||
{{Article | {{Article quote|Promotions for everybody. Upgrades the rank of most enemies.}} | ||
[[File:HINF Thunderstorm Skull.png| | [[File:HINF Thunderstorm Skull.png|thumb|200px|Thunderstorm skull]] | ||
'''Level''': [[The Sequence]] mission, but can be collected after in open world. | '''Level''': [[The Sequence]] mission, but can be collected after in open world. | ||
'''How to unlock''': Can only collected after access to the open | '''How to unlock''': Can only be collected after access to the open world and The Sequence mission. | ||
'''Notes''': Proceed to the northern most [[ | '''Notes''': Proceed to the northern most [[Beacon tower]] that also overlooks the island with the Banished AA guns. Proceed to the hexagonal columns to the west of the beam emitter and atop one standing alone from the others is the skull. | ||
===Fog=== | ===Fog=== | ||
{{Article | {{Article quote|They could be anywhere. Disables motion tracker.}} | ||
[[File:HINF Fog Skull.png| | [[File:HINF Fog Skull.png|thumb|200px|Fog skull]] | ||
'''Location''': Open world of Zeta Halo, found west of [[FOB Alpha]]. | '''Location''': Open world of Zeta Halo, found west of [[FOB Alpha]]. | ||
'''How to unlock''': Can only collected after access to the open world. | '''How to unlock''': Can only be collected after access to the open world. | ||
'''Notes''': Proceed from FOB Alpha along the outer edge of the island within the hexagonal columns of the ring. | '''Notes''': Proceed from FOB Alpha along the outer edge of the island within the hexagonal columns of the ring. | ||
===Blind=== | ===Blind=== | ||
{{Article | {{Article quote|Great for shooting photos, bad for shooting enemies. HUD and weapon do not display onscreen.}} | ||
[[File:HINF Blind Skull.png| | [[File:HINF Blind Skull.png|thumb|200px|Blind skull]] | ||
'''Location''': Found south of | '''Location''': Found south of [[Ransom Keep]] | ||
'''How to unlock''': Can only collected after access to the open world. | '''How to unlock''': Can only be collected after access to the open world. | ||
'''Notes''': | '''Notes''': South of Ransom Keep will be a canyon between two mountains that eventually opens into space. Further down the gap will be a rock joining the two mountains together with a dead marine on it, jump down the gap until you land on hexagonal structures. The skull can be found hidden in between some of the structures. | ||
===IWHBYD (I Would Have Been Your Daddy)=== | ===IWHBYD (I Would Have Been Your Daddy)=== | ||
{{Article | {{Article quote|Did they really just say that? Rare combat dialogue becomes more common.}} | ||
[[File:HINF IWHBYD Skull.png| | [[File:HINF IWHBYD Skull.png|thumb|200px|IWHBYD skull]] | ||
'''Location''': Found atop the Tower. | '''Location''': Found atop the Tower. | ||
'''How to unlock''': Can only collected after access to the open world. | '''How to unlock''': Can only be collected after access to the open world. | ||
'''Notes''': Climb atop the Tower to collect the skull. | '''Notes''': Climb atop the Tower to collect the skull. | ||
===Famine=== | ===Famine=== | ||
{{Article | {{Article quote|I'm out! Weapons dropped by enemies have half the ammo they normally would.}} | ||
[[File:HINF Famine Skull.png| | [[File:HINF Famine Skull.png|thumb|200px|Famine skull]] | ||
'''Level''': [[The Sequence]] mission, but can be collected after in open world. | '''Level''': [[The Sequence]] mission, but can be collected after in open world. | ||
'''How to unlock''': Can only collected after access to the open world and The Sequence mission. | '''How to unlock''': Can only be collected after access to the open world and The Sequence mission. | ||
'''Notes''': Proceed to the eastern most Beam emitter. On a small piece of land floating east of this emitter is a dead [[elite]] with the skull. | '''Notes''': Proceed to the eastern most Beam emitter. On a small piece of land floating east of this emitter is a dead [[elite]] with the skull. | ||
===Black Eye=== | ===Black Eye=== | ||
{{Article | {{Article quote|Better get punchy. Your shields only recharge when you melee enemies.}} | ||
'''Level''': [[The Sequence]] mission, but can be collected after in open world. | '''Level''': [[The Sequence]] mission, but can be collected after in open world. | ||
'''How to unlock''': Can only collected after access to the open world and The Sequence mission. | '''How to unlock''': Can only be collected after access to the open world and The Sequence mission. | ||
'''Notes''': Proceed to the waterfall, north of the southern most Beam emitter. Enter the small cave behind the waterfall and atop a log is the skull. | '''Notes''': Proceed to the waterfall, north of the southern most Beam emitter. Enter the small cave behind the waterfall and atop a log is the skull. | ||
===Catch=== | ===Catch=== | ||
{{Article | {{Article quote|Hold these for us. Enemies throw and drop more grenades.}} | ||
[[File:HINF Catch Skull.png| | [[File:HINF Catch Skull.png|thumb|200px|Catch skull]] | ||
'''Location''': Open world of Zeta Halo, found on the most northern island past [[Outpost Tremonius (location)|Outpost Tremonius]]. | '''Location''': Open world of Zeta Halo, found on the most northern island past [[Outpost Tremonius (location)|Outpost Tremonius]]. | ||
'''How to unlock''': Can only collected after access to the open world. | '''How to unlock''': Can only be collected after access to the open world. | ||
'''Notes''': Proceed to the island north of Outpost Tremonius, and in a canyon with two [[Hunter]]s the skull can be found in a tree stump full of helmets. | '''Notes''': Proceed to the island north of Outpost Tremonius, and in a canyon with two [[Hunter]]s the skull can be found in a tree stump full of helmets. | ||
== Sources == | == Sources == | ||
{{Ref/Sources}} | {{Ref/Sources}} | ||
Latest revision as of 23:04, December 27, 2024
Skulls are game modifiers featured in Halo Infinite with the appearance of a human skull.
How to find them[edit]
There are twelve skulls in total and a majority of these can be found whilst exploring the open world, whereas a select few can only be collected during specific campaign main missions.[1]
Campaign skulls[edit]
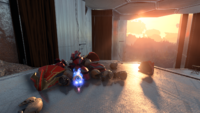
Boom[edit]
| “ | Behold, the Temple of Boom. Doubles explosion radius. | ” |
Level: Warship Gbraakon
How to unlock: Can only be collected during The Warship Gbraakon mission.
Notes: Upon reaching the section of the level with a vast two floor hall, and three freight lifts located on the right. Use the middle lift to rise above the adjacent crate located on the right and the skull will be visible.
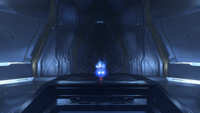
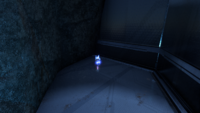
Cowbell[edit]
| “ | Because we needed more Cowbell. Acceleration from explosions is increased. | ” |
Level: Foundation
How to unlock: Can only be collected during the Foundation mission.
Notes: Upon reaching the section of the level with a window drawing your attention to a blue orb in the distance, proceed to you right, and then use the grapple hook to climb the pillars and reach the angular structure located on the ceiling. The skull is located here.
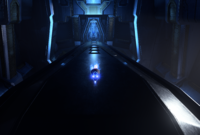
Mythic[edit]
| “ | Because it wasn't hard enough. Enemies have increased health. | ” |
Level: The Command Spire
How to unlock: Can only be collected during The Command Spire mission.
Notes: Upon reaching the section of the level where the hexagonal materials are passing through energy barriers horizontally, proceed through the barriers until an open section where the hexagonal materials are being adorned with Forerunner markings and begin to change direction. Proceed to grapple up onto the material, and then immediately grapple up into the opening in the ceiling and enter the doorway and follow this until you reach the room with the skull.
Grunt Birthday Party[edit]
| “ | Maybe it's the methane? Grunt headshots lead to glorious celebrations. | ” |
Level: Repository
How to unlock: Can only be collected during The Repository mission.
Notes: Upon reaching the section of the level where the terminal is located, once activated, a hardlight bridge will activate to the leading to the other side of the room, where Banished forces will engage you. Dispose of these, then return to the doorway that led you to the terminal. On your right, the doorway will have unlocked, proceed through here and collect the Power seed. Return to the room with the terminal, and on the opposite side of the room to where you enter is another doorway, proceed through there and in the room, place the power seed in the terminal. Once The Weapon points out the Silent Auditorium, there will be two large halls with doors leading both left and right. In the middle of the second hall, there will be an angular piece drawing your eyes upward, and in between two Sentinel emitters, there will be a glass window now open. Dispose of the five Stealth Elites to collect the skull.
Bandana[edit]
| “ | We did say Infinite. Grants unlimited weapon ammo and grenades, and removes equipment cooldown. | ” |
Level: Silent Auditorium
How to unlock: Can only be collected during The Silent Auditorium mission.
Notes: To unlock the door to the room containing this skull, no Sentinels can be killed before claiming the skull. The room itself can be found near the end of the level within the hallway area with statues located on your left. After activating a light bridge, cross the bridge, and instead of heading left towards your objective, go straight ahead and through the door to find the skull.
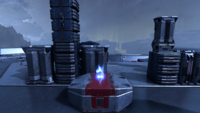
Thunderstorm[edit]
| “ | Promotions for everybody. Upgrades the rank of most enemies. | ” |
Level: The Sequence mission, but can be collected after in open world.
How to unlock: Can only be collected after access to the open world and The Sequence mission.
Notes: Proceed to the northern most Beacon tower that also overlooks the island with the Banished AA guns. Proceed to the hexagonal columns to the west of the beam emitter and atop one standing alone from the others is the skull.
Fog[edit]
| “ | They could be anywhere. Disables motion tracker. | ” |
Location: Open world of Zeta Halo, found west of FOB Alpha.
How to unlock: Can only be collected after access to the open world.
Notes: Proceed from FOB Alpha along the outer edge of the island within the hexagonal columns of the ring.
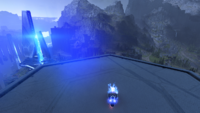
Blind[edit]
| “ | Great for shooting photos, bad for shooting enemies. HUD and weapon do not display onscreen. | ” |
Location: Found south of Ransom Keep
How to unlock: Can only be collected after access to the open world.
Notes: South of Ransom Keep will be a canyon between two mountains that eventually opens into space. Further down the gap will be a rock joining the two mountains together with a dead marine on it, jump down the gap until you land on hexagonal structures. The skull can be found hidden in between some of the structures.
IWHBYD (I Would Have Been Your Daddy)[edit]
| “ | Did they really just say that? Rare combat dialogue becomes more common. | ” |
Location: Found atop the Tower.
How to unlock: Can only be collected after access to the open world.
Notes: Climb atop the Tower to collect the skull.
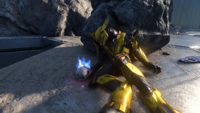
Famine[edit]
| “ | I'm out! Weapons dropped by enemies have half the ammo they normally would. | ” |
Level: The Sequence mission, but can be collected after in open world.
How to unlock: Can only be collected after access to the open world and The Sequence mission.
Notes: Proceed to the eastern most Beam emitter. On a small piece of land floating east of this emitter is a dead elite with the skull.
Black Eye[edit]
| “ | Better get punchy. Your shields only recharge when you melee enemies. | ” |
Level: The Sequence mission, but can be collected after in open world.
How to unlock: Can only be collected after access to the open world and The Sequence mission.
Notes: Proceed to the waterfall, north of the southern most Beam emitter. Enter the small cave behind the waterfall and atop a log is the skull.
Catch[edit]
| “ | Hold these for us. Enemies throw and drop more grenades. | ” |
Location: Open world of Zeta Halo, found on the most northern island past Outpost Tremonius.
How to unlock: Can only be collected after access to the open world.
Notes: Proceed to the island north of Outpost Tremonius, and in a canyon with two Hunters the skull can be found in a tree stump full of helmets.
Sources[edit]
- ^ YouTube - Halo Canon, Halo Infinite Skull Locations Guide Halo Infinite Collectibles: Skull locations on Halo Infinite (Retrieved on Dec 8, 2021)
