Blackout: Difference between revisions
From Halopedia, the Halo wiki
Stryker117 (talk | contribs) mNo edit summary |
(Removed extraneous comma) |
||
| (48 intermediate revisions by 23 users not shown) | |||
| Line 1: | Line 1: | ||
{{ | {{Status|Gameplay}} | ||
{{ | {{Multiplayer map infobox | ||
|pagegamelabel=H3 | |||
|name=Blackout | |name=Blackout | ||
|image=[[File:Blackout brtowerview.jpg|300px]] | |image=[[File:Blackout brtowerview.jpg|300px]] | ||
|game=''[[Halo 3]]'' | |game=''[[Halo 3]]'' | ||
| | |devname=<code>lockout</code>{{Ref/File|Id=H3EK|H3EK|H3EK\tags\levels\dlc\lockout\lockout.scenario}} | ||
| | |map=War Game Map_Set/: 037-2<ref name="waypoint">[https://www.halowaypoint.com/en-us/universe/locations/earth '''Halo Waypoint''': ''Earth'']</ref> | ||
| | |location= [[UNSC Weather Station Z/41]], Arctic, [[Earth]]{{Ref/Reuse|waypoint}} | ||
|terrain= Icy metal walkways and platforms | |||
|symmetry=Asymmetrical | |||
|playernumber=4-12 | |||
| | |||
| | |||
|gametypes=*[[Team Slayer]] | |gametypes=*[[Team Slayer]] | ||
*[[Slayer]] | *[[Slayer]] | ||
*[[Oddball]] | *[[Oddball]] | ||
*[[King of the Hill]] | *[[King of the Hill]] | ||
}} | }} | ||
{{Article | {{Article quote|Bathed in frozen moonlight, this abandoned drilling platform is now a monument to human frailty.}} | ||
'''Blackout'''<ref>[http:// | '''Blackout'''<ref name="blackout">[http://halo.bungie.net/News/content.aspx?type=topnews&cid=13413 '''Bungie.net''': ''Legendary Map: Blackout'']</ref> is a [[multiplayer]] map featured in ''[[Halo 3]]'' and is a remake of the ''[[Halo 2]]'' map [[Lockout]]. It is featured as one of the three maps in the [[Legendary Map Pack]] that became available on April 15, [[2008]]. | ||
== | ==Setting== | ||
{{Main|UNSC Weather Station Z/41}} | |||
Blackout takes place on UNSC Weather Station Z/41,{{Ref/Reuse|blackout}} in the [[Wikipedia:Arctic|Arctic]] on [[Earth]].{{Ref/Reuse|waypoint}} The station was originally a privately owned research platform. The stark location and imaginative rumors about alien life forms stored at the remote station made it a tempting site for reimagining in [[War Games]].{{Ref/Reuse|waypoint}} The station has racks of glacier core samples, Doppler radar and other pieces of research gear strewn about, and an Aurora Borealis overhead.{{Ref/Reuse|blackout}} | |||
==Design== | |||
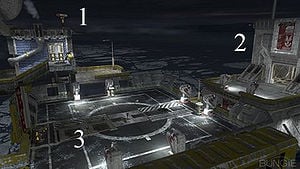
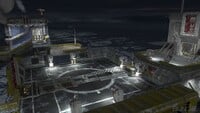
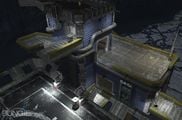
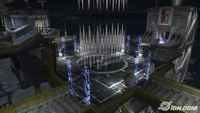
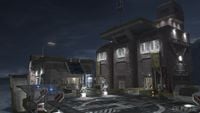
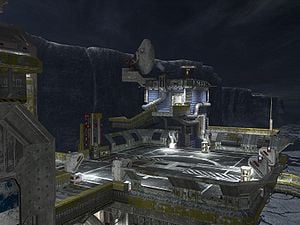
The map is built around a helicopter pad. Branching off of this pad in all four directions are buildings; each building has an upper and lower level, and two of them have a third floor. These two towers have been dubbed the "Sniper Tower" and the "BR Tower" as these are the weapons which spawns atop each of them. The Sniper Tower (where the [[SRS99D-S2 AM sniper rifle|sniper rifle]] spawns) is the smaller of the two, and the BR Tower is the larger. The other two buildings consist of a walled room that leads to the BR Tower, and a tall building that has an "Air Lift" in it, a large fan which propels air, and you, upwards. The Air Lift building has an exit at the Helipad and the lower level. | |||
==Forge== | ==Forge== | ||
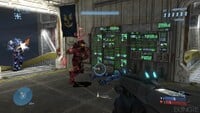
In the [http:// | In the [http://halo.bungie.net/News/content.aspx?type=topnews&cid=13509 second most recent ViDoc], multiple forge items from Blackout were revealed. They include detailed staircases, man-cannons, standard doorways, portals, and blocking doorways, shield doors, and newly edited shipping crates that stay once they are placed. Another new object is the FX filter. Using these will change the tint, contrast, brightness, and overall color of the map, and it is recommended to experiment. You may combine them, to make cool effects. The barracks on Blackout contain a basketball hoop, and the [[BR55HB battle rifle|battle rifle]] tower is now featured with windows compared to being fully opened. | ||
The level is not an exact replica of Lockout, as there are several noticeable differences. Several jumps have been removed to limit mobility around the map, as well as the removal of a "window" in the Library area that does not allow the players to see under the middle of the level. Players also cannot shoot from the bottom level of the "BR" Tower to the bottom level of the "Sniper" Tower. The following are some activities in Forge that the player can do. | The level is not an exact replica of Lockout, as there are several noticeable differences. Several jumps have been removed to limit mobility around the map, as well as the removal of a "window" in the Library area that does not allow the players to see under the middle of the level. Players also cannot shoot from the bottom level of the "BR" Tower to the bottom level of the "Sniper" Tower. The following are some activities in Forge that the player can do. | ||
| Line 49: | Line 37: | ||
*Through a glitch in Forge, you are able to spawn a teleporter inside of the smokestacks. Once inside, however, the player has very limited mobility, and if moved in a certain spot, will be killed by the Guardians or the death will count as a suicide. | *Through a glitch in Forge, you are able to spawn a teleporter inside of the smokestacks. Once inside, however, the player has very limited mobility, and if moved in a certain spot, will be killed by the Guardians or the death will count as a suicide. | ||
*When closing off rooms, make sure that there is no vertical way to get in, or find some way to block off said entrances. | *When closing off rooms, make sure that there is no vertical way to get in, or find some way to block off said entrances. | ||
*The Large Shield Door | *The Large Shield Door fits perfectly over the larger gap in the wall on BR3, creating a good safe haven where you can let your shields recharge. | ||
==Strategies== | ==Strategies== | ||
[[File:Blackout-SniperTower.jpg|thumb|left|300px|1) The Sniper Tower, 2) The Air Lift room, 3) The Helipad.]] | [[File:Blackout-SniperTower.jpg|thumb|left|300px|1) The Sniper Tower, 2) The Air Lift room, 3) The Helipad.]] | ||
<!--This is STRATEGIES, not Trivia, only Strategies belong here, please put trivia above in the Trivia section--> | <!--This is STRATEGIES, not Trivia, only Strategies belong here, please put trivia above in the Trivia section--> | ||
*As mentioned above you can shoot the [[Fusion | *As mentioned above, you can shoot the [[Fusion coil|Fusion Coils]] to launch the sniper rifle toward you. | ||
*You can camp in the center room (under the Helicopter pad), on the slanted walls | *You can camp in the center room (under the Helicopter pad), on the slanted walls; a [[M90 shotgun|shotgun]] is recommended. | ||
*If you inch up on the wind tunnel, in the lift room at the top, you can fall down without being shot back up. | *If you inch up on the wind tunnel, in the lift room at the top, you can fall down without being shot back up. | ||
*Blackout has, just as Lockout, many combinations of death defying jumps. Learn the map, and use these to drop down behind your enemy or in your enemy's blind spot. One handy jump is from BR1 to BR2. Along the wall on the hatch that you can drop through from BR2 to BR1, there is a little ledge that you can jump on. If you jump on the ledge, you can jump up to the next floor. This is useful when there is someone above you because it will surprise him or her and it is quicker. | *Blackout has, just as Lockout, many combinations of death defying jumps. Learn the map, and use these to drop down behind your enemy or in your enemy's blind spot. One handy jump is from BR1 to BR2. Along the wall on the hatch that you can drop through from BR2 to BR1, there is a little ledge that you can jump on. If you jump on the ledge, you can jump up to the next floor. This is useful when there is someone above you because it will surprise him or her and it is quicker. | ||
*Control of the open areas depends on control of the | *Control of the open areas depends on control of the Sniper Tower and the sniper. | ||
*A great way to kill the opposing team is to control the air duct, Sniper | *A great way to kill the opposing team is to control the air duct, Sniper Tower, and helipad. Concentrate your fire when you see them. | ||
*When holding the helipad in Swat patrol the ramps. Many people go up the left one. You can get many kills and save your buddies if you can kill the enemy fast. | *When holding the helipad in Swat, patrol the ramps. Many people go up the left one. You can get many kills and save your buddies if you can kill the enemy fast. | ||
*The bottom floors are common | *The bottom floors are a common area for firefights, so throw a few [[grenade]]s into the gaps on the other side to soften them up for your teammates below. | ||
*If you have the high ground, you can jump to give yourself an even better height advantage | *If you have the high ground, you can jump to give yourself an even better height advantage. Sometimes your opponent will back up only to fall to their deaths! | ||
* While alone on BR3 (third floor of BR Tower) always watch behind you. If you are alone and your | * While alone on BR3 (third floor of BR Tower) always watch behind you. If you are alone and your teammates are covering other points of the map, your opponents usually spawn below you at BR2 or BR1, offering a perfect chance for them to come behind you. | ||
* Many players often take the sword without bothering to look | * Many players often take the [[Type-1 energy sword|sword]] without bothering to look in the corner. You can hide in the there and easily assassinate them. It is risky because the sword user can see you and easily kill you, but if he fails to see you it can be quite humiliating. | ||
* The yellow walls can be jumped on top of, giving you a vantage point of the walkways below. | * The yellow walls can be jumped on top of, giving you a vantage point of the walkways below. | ||
* Always remember that when you are on Top Lift, you can always jump to Elbow if there is an enemy there, a | * Always remember that when you are on Top Lift, you can always jump to Elbow if there is an enemy there, a teammate in trouble or you just want to make an escape. This escape is actually better than dropping down the hatches on the side because you can get fragged easily. | ||
* When playing Team SWAT, if you spawn at Lift in the beginning of the game then do not go up the lift. Your enemy will most likely be expecting you and you will be killed as soon as you get up. If you spawn at Rec Room, then look towards lift. If there's nobody there or you killed him or her already, then look towards Elbow. You can usually get some kills early in the game this way. | * When playing Team SWAT, if you spawn at Lift in the beginning of the game then do not go up the lift. Your enemy will most likely be expecting you and you will be killed as soon as you get up. If you spawn at Rec Room, then look towards lift. If there's nobody there or you killed him or her already, then look towards Elbow. You can usually get some kills early in the game this way. | ||
* Try to place your grenades carefully, many can bounce and sail off the side of the map. | * Try to place your grenades carefully, many can bounce and sail off the side of the map. | ||
| Line 73: | Line 61: | ||
==Trivia== | ==Trivia== | ||
===Production notes=== | |||
*Blackout's code name was ''Moonlight Sonata'' during its development due to the level's dark night-time sky, and as an allusion to one of Beethoven's works.<ref>[http://halo.bungie.net/news/content.aspx?type=topnews&cid=13264 '''Bungie.net''': ''Bungie Weekly Update: 2/15/08'']</ref> Originally, the map was to be set in an oil derrick, but this changed over time. The weather station designation was arbritraily chosen by artist [[Paul Russel]]. | |||
**During its initial reveal, the map was initially stated by Russell to be set in the Antarctic on Earth,{{Ref/Reuse|blackout}} though an official [[Halo Waypoint]] universe post on the matter later clarified the map's setting as the Arctic Circle.{{Ref/Reuse|waypoint}} | |||
*Another idea for the map's setting was to be a partially destroyed Strato-Sentinel on [[Installation 00|The Ark]], near the planetoid in its center.<ref>'''[[The Art of Halo 3]]''', ''page 128''</ref> | |||
*During the production of the Legendary Map Pack, [[Assembly]] was originally going to ship alongside the other two maps. | |||
*Blackout was almost not made, as [[Guardian (map)|Guardian]] already existed in ''Halo 3'' and was also inspired by Lockout.{{Ref/Reuse|blackout}} | |||
*Blackout was recreated in the ''[[Halo Mash-Up: Minecraft Evolved]]''.<ref>[https://blogs.halowaypoint.com/en-us/blogs/waypoint/posts/more-master-chief-and-minecraft '''Halo Waypoint -''' ''More Master Chief and Minecraft'']</ref> | |||
===Miscellaneous=== | ===Miscellaneous=== | ||
<!--This is TRIVIA, not Strategies, only trivia belongs here, please put strategies below in the Strategies section--> | <!--This is TRIVIA, not Strategies, only trivia belongs here, please put strategies below in the Strategies section--> | ||
*Bungie claimed that one of the only differences between Lockout and Blackout is that the [[ | *Bungie claimed that one of the only differences between Lockout and Blackout is that the [[Type-33 needler|needlers]] were replaced with [[Paegaas Workshop Spiker|Brute Spikers]]. | ||
*Bungie claims that the model for Blackout was rebuilt because the original model of Lockout was too messy and chaotic to work with. | *Bungie claims that the model for Blackout was rebuilt because the original model of Lockout was too messy and chaotic to work with. | ||
*The map is slightly larger than Lockout in some aspects and areas: the | *The map is slightly larger than Lockout in some aspects and areas: the battle rifle tower is actually larger, the Barracks are smaller, and the platform next to the Sniper Tower is larger. | ||
*Upon falling off the platform, a splash can be seen after your character lands in the water. On other occasions, if your character lands in the water flat on his/her back or stomach | *Upon falling off the platform, a splash can be seen after your character lands in the water. On other occasions, if your character lands in the water flat on his/her back or stomach they will land and slowly sink downward into the ocean. | ||
*The windows throughout the map are identical, including their reflection. The windows were originally made for the Barracks (opposite the lift). The reflection when you look in these windows is a blurry view of the lift area. If you look into the other windows (bottom of sniper tower are easiest to see), you will see the same image. | *The windows throughout the map are identical, including their reflection. The windows were originally made for the Barracks (opposite the lift). The reflection when you look in these windows is a blurry view of the lift area. If you look into the other windows (bottom of sniper tower are easiest to see), you will see the same image. | ||
*Blackout is a favored map for Team SWAT because of its mix of mid and short range combat. | *Blackout is a favored map for Team SWAT because of its mix of mid and short range combat. | ||
*The room right behind the sniper spawn cannot be entered. Even using glitches to get your way in will result in death by the guardians. | *The room right behind the sniper spawn cannot be entered. Even using glitches to get your way in will result in death by the guardians. | ||
*Interestingly this map has been a hotbed for the [[Ghosts of Halo]], perhaps none-too-surprisingly, as the first Ghost of Halo was reported at ''Lockout'', ''Blackout'''s predecessor. | *Interestingly this map has been a hotbed for the [[Ghosts of Halo]], perhaps none-too-surprisingly, as the first Ghost of Halo was reported at ''Lockout'', ''Blackout''<nowiki>'</nowiki>s predecessor. | ||
*Blackout, along with [[Cold Storage]] and [[ | *Blackout, along with [[Cold Storage]] and [[Orbital]], are the only maps in ''Halo 3'' that do not spawn a [[Type-25 Brute Shot|Brute Shot]] by default. | ||
*Exactly every 5 minutes, a red comet will soar over the sky for a split second. This also appears in [[Sandbox]]. | |||
*Exactly every 5 minutes, a red comet will soar over the sky for a split second. This also appears in [[ | |||
*Bungie stated in the Legendary Vidoc that you can block off all the doors in Blackout if you want to with doors. However, there is not a large enough supply of doors to block ''all'' the ways inside. | *Bungie stated in the Legendary Vidoc that you can block off all the doors in Blackout if you want to with doors. However, there is not a large enough supply of doors to block ''all'' the ways inside. | ||
==Gallery== | ==Gallery== | ||
<gallery | {{Linkbox|gallery=yes}} | ||
<gallery> | |||
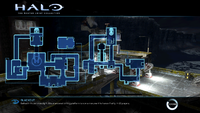
File:HMCC H3 Blackout Map.png|Blackout Map. | |||
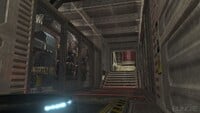
File:1206472364 Blackout 1.jpg|The shotgun hall. | File:1206472364 Blackout 1.jpg|The shotgun hall. | ||
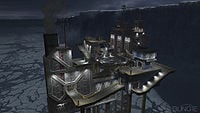
File:Blackout.jpg|Weather station Z41 (AKA ''Blackout''). | File:Blackout.jpg|Weather station Z41 (AKA ''Blackout''). | ||
File:1206472407 Blackout 3.jpg|The landing pad. | File:1206472407 Blackout 3.jpg|The landing pad. | ||
File:Blackout 123122.JPG|The sniper tower. | File:Blackout 123122.JPG|The sniper tower. | ||
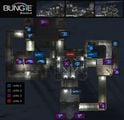
File: | File:H3_Blackout_Layout.jpg|Weapon and equipment respawn locations. | ||
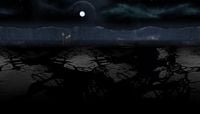
File:BlackoutPanorama.jpg|''Blackout'''s backdrop. | File:BlackoutPanorama.jpg|''Blackout'''s backdrop. | ||
File:Halo-3-legendary-map-pack--20080408000155827.jpg | File:Halo-3-legendary-map-pack--20080408000155827.jpg | ||
| Line 105: | Line 99: | ||
File:Halo-3-legendary-map-pack--20080408000208498.jpg | File:Halo-3-legendary-map-pack--20080408000208498.jpg | ||
File:Halo-3-legendary-map-pack--20080408000211295.jpg | File:Halo-3-legendary-map-pack--20080408000211295.jpg | ||
File: | File:H3_Blackout_Overview.jpg | ||
</gallery> | </gallery> | ||
==Sources== | ==Sources== | ||
{{Ref/Sources}} | |||
{{ | {{Levels|H3|mode=yes}} | ||
[[Category:Legendary Map Pack]] | |||
Latest revision as of 20:49, December 15, 2024
| Blackout | |
|---|---|
| |
| Map overview | |
|
Game: |
|
|
Map file name (?): |
|
| Lore information | |
|
Map designation (?): |
War Game Map_Set/: 037-2[2] |
|
Location: |
UNSC Weather Station Z/41, Arctic, Earth[2] |
| Gameplay overview | |
|
Terrain: |
Icy metal walkways and platforms |
|
Map layout: |
Asymmetrical |
|
Recommended number of players: |
4-12 |
|
Recommended gametype(s): |
|
| “ | Bathed in frozen moonlight, this abandoned drilling platform is now a monument to human frailty. | ” |
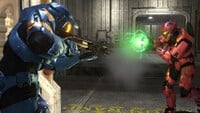
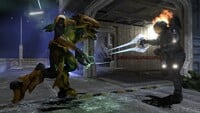
Blackout[3] is a multiplayer map featured in Halo 3 and is a remake of the Halo 2 map Lockout. It is featured as one of the three maps in the Legendary Map Pack that became available on April 15, 2008.
Setting[edit]
- Main article: UNSC Weather Station Z/41
Blackout takes place on UNSC Weather Station Z/41,[3] in the Arctic on Earth.[2] The station was originally a privately owned research platform. The stark location and imaginative rumors about alien life forms stored at the remote station made it a tempting site for reimagining in War Games.[2] The station has racks of glacier core samples, Doppler radar and other pieces of research gear strewn about, and an Aurora Borealis overhead.[3]
Design[edit]
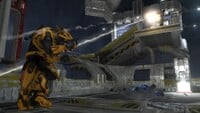
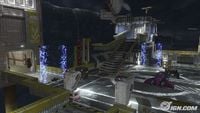
The map is built around a helicopter pad. Branching off of this pad in all four directions are buildings; each building has an upper and lower level, and two of them have a third floor. These two towers have been dubbed the "Sniper Tower" and the "BR Tower" as these are the weapons which spawns atop each of them. The Sniper Tower (where the sniper rifle spawns) is the smaller of the two, and the BR Tower is the larger. The other two buildings consist of a walled room that leads to the BR Tower, and a tall building that has an "Air Lift" in it, a large fan which propels air, and you, upwards. The Air Lift building has an exit at the Helipad and the lower level.
Forge[edit]
In the second most recent ViDoc, multiple forge items from Blackout were revealed. They include detailed staircases, man-cannons, standard doorways, portals, and blocking doorways, shield doors, and newly edited shipping crates that stay once they are placed. Another new object is the FX filter. Using these will change the tint, contrast, brightness, and overall color of the map, and it is recommended to experiment. You may combine them, to make cool effects. The barracks on Blackout contain a basketball hoop, and the battle rifle tower is now featured with windows compared to being fully opened.
The level is not an exact replica of Lockout, as there are several noticeable differences. Several jumps have been removed to limit mobility around the map, as well as the removal of a "window" in the Library area that does not allow the players to see under the middle of the level. Players also cannot shoot from the bottom level of the "BR" Tower to the bottom level of the "Sniper" Tower. The following are some activities in Forge that the player can do.
- Doors placed in certain entrances usually make Infection Mode more interesting and challenging.
- Using the doors you can block off whole rooms of the level, this small change alone can change the way the level plays, in respect to movements of the players, effectively changing the entire dynamic of the game.
- If you pick up a turret while somebody's in it, then push him or her as far up as possible, you can send him or her past the barrier and he or she can float objects way above the level. But there's a death barrier if you go too high.
- Through a glitch in Forge, you are able to spawn a teleporter inside of the smokestacks. Once inside, however, the player has very limited mobility, and if moved in a certain spot, will be killed by the Guardians or the death will count as a suicide.
- When closing off rooms, make sure that there is no vertical way to get in, or find some way to block off said entrances.
- The Large Shield Door fits perfectly over the larger gap in the wall on BR3, creating a good safe haven where you can let your shields recharge.
Strategies[edit]
- As mentioned above, you can shoot the Fusion Coils to launch the sniper rifle toward you.
- You can camp in the center room (under the Helicopter pad), on the slanted walls; a shotgun is recommended.
- If you inch up on the wind tunnel, in the lift room at the top, you can fall down without being shot back up.
- Blackout has, just as Lockout, many combinations of death defying jumps. Learn the map, and use these to drop down behind your enemy or in your enemy's blind spot. One handy jump is from BR1 to BR2. Along the wall on the hatch that you can drop through from BR2 to BR1, there is a little ledge that you can jump on. If you jump on the ledge, you can jump up to the next floor. This is useful when there is someone above you because it will surprise him or her and it is quicker.
- Control of the open areas depends on control of the Sniper Tower and the sniper.
- A great way to kill the opposing team is to control the air duct, Sniper Tower, and helipad. Concentrate your fire when you see them.
- When holding the helipad in Swat, patrol the ramps. Many people go up the left one. You can get many kills and save your buddies if you can kill the enemy fast.
- The bottom floors are a common area for firefights, so throw a few grenades into the gaps on the other side to soften them up for your teammates below.
- If you have the high ground, you can jump to give yourself an even better height advantage. Sometimes your opponent will back up only to fall to their deaths!
- While alone on BR3 (third floor of BR Tower) always watch behind you. If you are alone and your teammates are covering other points of the map, your opponents usually spawn below you at BR2 or BR1, offering a perfect chance for them to come behind you.
- Many players often take the sword without bothering to look in the corner. You can hide in the there and easily assassinate them. It is risky because the sword user can see you and easily kill you, but if he fails to see you it can be quite humiliating.
- The yellow walls can be jumped on top of, giving you a vantage point of the walkways below.
- Always remember that when you are on Top Lift, you can always jump to Elbow if there is an enemy there, a teammate in trouble or you just want to make an escape. This escape is actually better than dropping down the hatches on the side because you can get fragged easily.
- When playing Team SWAT, if you spawn at Lift in the beginning of the game then do not go up the lift. Your enemy will most likely be expecting you and you will be killed as soon as you get up. If you spawn at Rec Room, then look towards lift. If there's nobody there or you killed him or her already, then look towards Elbow. You can usually get some kills early in the game this way.
- Try to place your grenades carefully, many can bounce and sail off the side of the map.
- Unlike in Lockout the bottom passage is not entirely lined up, or at least less so than Lockout. This was probably meant to reduce long range battles down the passage and make it an easier area to traverse.
- As in Lockout, close-ranged weapons are key.
- You can drop down about halfway at the airlift, armed with a close range weapon you can ambush another player.
Trivia[edit]
Production notes[edit]
- Blackout's code name was Moonlight Sonata during its development due to the level's dark night-time sky, and as an allusion to one of Beethoven's works.[4] Originally, the map was to be set in an oil derrick, but this changed over time. The weather station designation was arbritraily chosen by artist Paul Russel.
- During its initial reveal, the map was initially stated by Russell to be set in the Antarctic on Earth,[3] though an official Halo Waypoint universe post on the matter later clarified the map's setting as the Arctic Circle.[2]
- Another idea for the map's setting was to be a partially destroyed Strato-Sentinel on The Ark, near the planetoid in its center.[5]
- During the production of the Legendary Map Pack, Assembly was originally going to ship alongside the other two maps.
- Blackout was almost not made, as Guardian already existed in Halo 3 and was also inspired by Lockout.[3]
- Blackout was recreated in the Halo Mash-Up: Minecraft Evolved.[6]
Miscellaneous[edit]
- Bungie claimed that one of the only differences between Lockout and Blackout is that the needlers were replaced with Brute Spikers.
- Bungie claims that the model for Blackout was rebuilt because the original model of Lockout was too messy and chaotic to work with.
- The map is slightly larger than Lockout in some aspects and areas: the battle rifle tower is actually larger, the Barracks are smaller, and the platform next to the Sniper Tower is larger.
- Upon falling off the platform, a splash can be seen after your character lands in the water. On other occasions, if your character lands in the water flat on his/her back or stomach they will land and slowly sink downward into the ocean.
- The windows throughout the map are identical, including their reflection. The windows were originally made for the Barracks (opposite the lift). The reflection when you look in these windows is a blurry view of the lift area. If you look into the other windows (bottom of sniper tower are easiest to see), you will see the same image.
- Blackout is a favored map for Team SWAT because of its mix of mid and short range combat.
- The room right behind the sniper spawn cannot be entered. Even using glitches to get your way in will result in death by the guardians.
- Interestingly this map has been a hotbed for the Ghosts of Halo, perhaps none-too-surprisingly, as the first Ghost of Halo was reported at Lockout, Blackout's predecessor.
- Blackout, along with Cold Storage and Orbital, are the only maps in Halo 3 that do not spawn a Brute Shot by default.
- Exactly every 5 minutes, a red comet will soar over the sky for a split second. This also appears in Sandbox.
- Bungie stated in the Legendary Vidoc that you can block off all the doors in Blackout if you want to with doors. However, there is not a large enough supply of doors to block all the ways inside.
Gallery[edit]

|
Browse more images in this article's gallery page. |
Sources[edit]
- ^ Halo 3 Editing Kit, game file
H3EK\tags\levels\dlc\lockout\lockout.scenario - ^ a b c d e Halo Waypoint: Earth
- ^ a b c d e Bungie.net: Legendary Map: Blackout
- ^ Bungie.net: Bungie Weekly Update: 2/15/08
- ^ The Art of Halo 3, page 128
- ^ Halo Waypoint - More Master Chief and Minecraft
| ||||||||||||||||||||||||||||||||||||||||
