Snowbound: Difference between revisions
From Halopedia, the Halo wiki
(Added the skybox concept from today's Waypoint post.) |
|||
| (50 intermediate revisions by 20 users not shown) | |||
| Line 1: | Line 1: | ||
{{ | {{Status|Gameplay}} | ||
{{Multiplayer | {{Multiplayer map infobox | ||
|pagegamelabel=H3 | |||
|name=Snowbound | |name=Snowbound | ||
|image=[[File:Sb landscape2.jpg|center|300px]] | |image=[[File:Sb landscape2.jpg|center|300px]] | ||
|game=''[[Halo 3]]'' | |game=''[[Halo 3]]'' | ||
|location= | |devname=<code>snowbound</code>{{Ref/File|Id=H3EK|H3EK|H3EK\tags\levels\multi\snowbound\snowbound.scenario}} | ||
|map= | |||
|location=[[Strilun IV]]{{Ref/Book|Enc22|Page=301|Detail=''Shuku''-pattern sentry turret caption|Quote=STRILUN_DEFENSE}} | |||
|terrain=[[Covenant]] structures in icy terrain built over a [[Forerunner]] installation. | |terrain=[[Covenant]] structures in icy terrain built over a [[Forerunner]] installation. | ||
| | |symmetry=Semi-symmetrical | ||
|playernumber=2-8 | |||
| | |||
|gametypes=*[[Team Slayer]] | |gametypes=*[[Team Slayer]] | ||
*[[Slayer]] | *[[Slayer]] | ||
| Line 30: | Line 16: | ||
*[[King of the Hill]] | *[[King of the Hill]] | ||
*[[Multi Flag CTF]] | *[[Multi Flag CTF]] | ||
*[[Assault]] | |||
}} | }} | ||
{{Article | {{Article quote|Hostile conditions did not prevent the Covenant from seeking salvage on this buried [[Forerunner]] construct.}} | ||
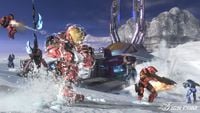
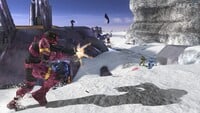
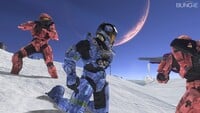
'''Snowbound''' is a medium-sized [[multiplayer]] map in ''[[Halo 3]]''. | '''Snowbound''' is a medium-sized [[multiplayer]] map in ''[[Halo 3]]''. | ||
== | ==Universe and lore== | ||
Snowbound is | [[File:H3 Snowbound Planets.png|thumb|left|200px|The planets in the sky.]] | ||
{{Main|Strilun IV}} | |||
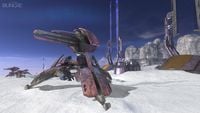
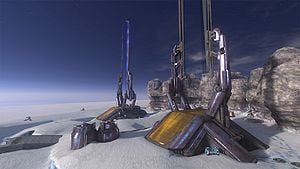
Snowbound is set in a snowy Forerunner area with two large Covenant [[base]]s at either end of the map. The two bases are joined underground by a cave, revealing a deep network of Forerunner structures underground. The [[planet]] the map is set on is a former [[Forerunner]] world controlled by the [[Covenant]], not far from [[human]]-occupied space.<ref name="BWU">[http://halo.bungie.net/news/content.aspx?type=topnews&cid=13160 '''Bungie.net''': ''Bungie Weekly Update 01/11/08''] - ''It’s on an alien world discovered and controlled by the Covenant. It’s location is secret, but it is in this spiral arm of the Galaxy. Close to human occupied space. If you look through the glass floors of the Covenant structures, you’ll see Forerunner artifacts buried beneath the ice.''</ref> On the horizon, two celestial bodies can be seen. The Covenant base is surrounded by a perimeter of {{Pattern|Shuku|sentry turret}}s that fire upon anything in range. | |||
{{Clear}} | |||
==Overview== | |||
===Layout=== | |||
Snowbound is a medium-sized, semi-symmetrical map with two bases. The bases, known as High Base and Low Base, are connected by an underground tunnel network. Much fighting takes place in or around the [[shield doors]] found inside the bases. Rocky outcroppings are located along the southern and western edges of the map (Rock Side); ''Shuku''-pattern sentry turrets prevent players from exiting the map via its otherwise-unblocked northern and eastern edges (Tundra Side). When players venture too close to the map's boundaries, an alarm sounds, warning them to return to the bases before the turrets open fire. | |||
<gallery> | |||
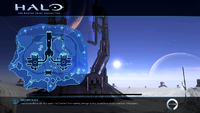
File:HMCC H3 Snowbound Map.png|Snowbound Map. | |||
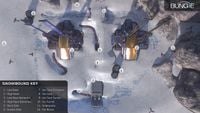
File:Snowbound overview.jpg|Callouts of Snowbound at the time of the [[Halo 3 Beta|''Halo 3'' Beta]]. | |||
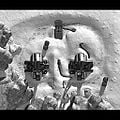
File:Snowbound-HeatMap.jpeg|A birds-eye view of Snowbound. | |||
</gallery> | |||
====Callouts==== | |||
*'''Low Base''' - Low Base is one of the two Covenant bases on the map. This base, which is located on the eastern side of the map, appears to be fully functional, though it has apparently been abandoned. It is often referred to by players as "BR Spawn" because of the two [[battle rifles]] that spawn on its outer rear walls. Inside the base, there is a [[Spartan Laser]], two [[Paegaas Workshop Spiker]]s, and a [[Z-4190 bubble shield|bubble shield]]. Outside the base, a [[carbine]], a Spiker, and a [[Mauler]] spawn to the south; an [[Active camouflage|active camo]] spawns towards the north. On top of the base, there is a [[needler]] and a pair of [[Anskum-pattern plasma grenade|plasma grenade]]s. | |||
*'''High Base''' - Directly adjacent to Low Base, High Base offers a different set of weapons. High Base's lights flicker and buzz, implying that it has become damaged. The large sphere in the center of the base appears broken, and icicles hang from the base's exterior, implying that its heating system has stopped working. Whether this damage is the result of the base's abandonment or something else is unknown. | |||
:High Base is commonly referred to as "[[Sniper]] Spawn" or "Carbine Base" due to the carbine and [[beam rifle]] it contains. Behind the base, players can find a battle rifle or a {{Pattern|Okarda'phaa|plasma rifle}} around the rocky terrain. A Mauler lies to the north of the base, and an [[overshield]] to the south. Inside, there are two plasma rifles, a beam rifle, and a [[power drain]]. On top of the base, there is a [[plasma pistol]] and a pair of plasma grenades. | |||
*'''Low Base Batteries''' | |||
*'''High Base Batteries''' | |||
*'''Rock Side''' | |||
*'''Tundra Side''' | |||
*'''Ice Cave Entrance''' - On the opposite side end the Underpass, lies the Ice Cave's main entrance, with its distinctive overhang and large shield door. | |||
*'''Ice Cave''' - Predominantly known as the "[[Shotgun]] Spawn" in [[Lone Wolves]] or the "Sniper Spawn" in [[Team Slayer]], heavy fighting occurs in this cold and icy cave. This area sees frequent carnage due to its high traffic, tight quarters, and position between the High and Low Bases. To the immediate south is a narrow, elevated opening with no shield (''Ice Cave Tunnel''). On the western side of the cave's interior is a tunnel to the High Base; opposite that is a tunnel to the Low Base. Directly north is the Main Entrance, which is protected by a larger shield door. | |||
:Entering the Ice Cave from the Bases or the Ice Cave Tunnel is extremely risky. The main entrance is very defensible, as it affords the player with a full view of the cave's three most-used entrances and its shield door provides protection. Above the Ice Cave's main entrance spawns a [[Brute Shot]] (top), as well as a Spiker to the west and a Mauler to the east. An often seen tactic on this map is to hide on the other side of a shield door with the shotgun or Mauler and kill players as they pass through. | |||
<gallery> | |||
File:ShotgunCave.jpg|Ice Cave, with three paths shown including Ice Cave Tunnel (center), while the others go to the bases. | |||
</gallery> | |||
*'''Ice Cave Tunnel''' - In the center of the map, the Ice Cave Tunnel provides access to the Ice Cave, which in turn provides access to the interiors of both bases. A common tactic is to blindly toss grenades into the map's lower levels from this area, turning the underground corridors and tight spaces into [[grenade]]-powered deathtraps. | |||
*'''Ice Tunnel''' | |||
*'''Underpass''' - Located between both bases is Underpass (or "Ghost Spawn"), a tunnel where a single [[Ghost]] (or [[Mongoose]]) spawns. | |||
*'''Far Rocks''' | |||
===Strategies=== | |||
[[File:H3 Snowbound Bases.png|thumb|300px|The antennae on the two bases.]] | |||
=== | |||
<!--This is STRATEGIES, not Trivia, only strategies belong here, please put trivia above in the Trivia section--> | <!--This is STRATEGIES, not Trivia, only strategies belong here, please put trivia above in the Trivia section--> | ||
*After swapping for the Spartan Laser when spawning in [[Team Slayer]], if your team doesn't plan on using the Ghost, a good tactic would be to wait for an enemy to get in it, eliminating the Ghost, that enemy, and possibly the | *After swapping for the Spartan Laser when spawning in [[Team Slayer]], if your team doesn't plan on using the Ghost, a good tactic would be to wait for an enemy to get in it, eliminating the Ghost, that enemy, and possibly the overshield threat. | ||
*Even though the outside is good for sniping, the | *Even though the outside is good for sniping, the beam rifle is more commonly used inside for no-scoping and double shots, which is usually rather effective. | ||
*The rocks (Far Rocks) lined up near the Ghost spawn (Underpass) provide a relatively safe above-ground path from base to base. | *The rocks (Far Rocks) lined up near the Ghost spawn (Underpass) provide a relatively safe above-ground path from base to base. | ||
*The bases' ceilings are transparent, allowing players inside to see potential assailants above. | *The bases' ceilings are transparent, allowing players inside to see potential assailants above. | ||
*The | *The needler is a very useful weapon on this map. | ||
*The Maulers on the Tundra Side of the map can prove very useful for players that intend to patrol the Ice Cave. | *The Maulers on the Tundra Side of the map can prove very useful for players that intend to patrol the Ice Cave. | ||
* | *Bubble shields are useful when protecting the Ice Cave in team games, as players can deploy it when an enemy is trying to get through. | ||
*From almost the beginning of a match on this level, a majority of the fighting takes place in the Ice Cave or the tunnels leading to it. The team that holds the Ice Cave has the advantage, as the area's tight entrances allow for easy grenade kills. | *From almost the beginning of a match on this level, a majority of the fighting takes place in the Ice Cave or the tunnels leading to it. The team that holds the Ice Cave has the advantage, as the area's tight entrances allow for easy grenade kills. | ||
*When playing [[Team SWAT]], always jump through shield doors rather than walking through them. If there is someone beyond the shield door, this will surprise him or her. | *When playing [[Team SWAT]], always jump through shield doors rather than walking through them. If there is someone beyond the shield door, this will surprise him or her. | ||
*Players hiding near shield doors with a | *Players hiding near shield doors with a shotgun may get an instant kill when an unsuspecting foe walks through. | ||
*When going for [[achievements]], this map is good for [[Up Close and Personal]] and [[Lee R Wilson Memorial]]. To easily achieve the | *When going for [[achievements]], this map is good for [[Up Close and Personal]] and [[Lee R. Wilson Memorial]]. To easily achieve the Lee R Wilson Memorial, rush through a shield door and quickly throw a plasma grenade at an enemy waiting for you to rush him. He'll most likely start rushing you, making a stick easy to accomplish. | ||
*If you're playing [[Lone Wolves]] and you have a dark color for you primary color, for example, steel or purple, you can jump on the control balls and crouch on them to blend in. | *If you're playing [[Lone Wolves]] and you have a dark color for you primary color, for example, steel or purple, you can jump on the control balls and crouch on them to blend in. | ||
*When you're behind the glass screen in a base, jump on it and crouch on one of the supports on either side. This gives you an upper hand when using a close-range weapon or, if you have | *When you're behind the glass screen in a base, jump on it and crouch on one of the supports on either side. This gives you an upper hand when using a close-range weapon or, if you have active camo and you want to kill stealthily, stick a player. This also gives you a good view out the transparent ceiling. | ||
*This is one of the few maps that has a Spartan Laser on it by default. | *This is one of the few maps that has a Spartan Laser on it by default (and therefore one of the few maps where the Two for One achievement can be gotten). | ||
*When playing | *When playing [[Oddball]] on this map one may find it useful when carrying the skull to stick in the tunnels. It's much more difficult for enemies to dodge your beats. | ||
==Variants== | |||
===Boundless=== | |||
[[File:H3 Boundless.png|thumb|200px|Boundless. Note the lack of a shield door on the base.]] | |||
{{Article quote|Open the doors, let the crisp cold air in.}} | |||
'''Boundless''' is a map variant released to improve the gameplay balance, specifically as a response to reports of widespread shotgun-[[camping]] near the [[Shield door]]s.<ref name="boundless">[http://halo.bungie.net/News/content.aspx?type=topnews&cid=15268 '''Bungie.net''': ''Bungie Weekly Update 08/22/08'']</ref> It was due to be released on September 16, 2008, along with TU2, but was delayed until September 23, 2008. Like [[Sand Tarp]] and [[Epilogue]], it is included as a default map variant in ''[[Halo: The Master Chief Collection]]''. The following is a list of changes made; | |||
*The Spartan Laser in Low Base has been replaced by a beam rifle. | |||
*The Ghost has been replaced by a Mongoose. | |||
*The active camouflage has been replaced by a second overshield. | |||
*The weapons outside of each base has been equalized, with a Covenant carbine and a battle rifle on the side, and another carbine on the back. | |||
*In both High and Low bases, the two entrances from the top middle portion of the map still have shield doors. The others have been removed. | |||
==Forge== | ==Forge== | ||
<!--This section is for Forge tips, do not put things like "Add a Brute shot, its more fun" Give good reasons WHY and WHERE to add the object(s), like "Adding shield doors in the main hallway will change the flow of battle to the sides of it, allowing for more heated firefights in the side allies." Thank you for keeping Halopedia neat--> | <!--This section is for Forge tips, do not put things like "Add a Brute shot, its more fun" Give good reasons WHY and WHERE to add the object(s), like "Adding shield doors in the main hallway will change the flow of battle to the sides of it, allowing for more heated firefights in the side allies." Thank you for keeping Halopedia neat--> | ||
*In Forge, you can block off all tunnels to the Ice Caves (using mostly Crates and boxes, and Weapon Holders to keep them there), keeping players focused on long- to medium-range combat. | *In Forge, you can block off all tunnels to the Ice Caves (using mostly Crates and boxes, and Weapon Holders to keep them there), keeping players focused on long- to medium-range combat. | ||
*In Forge, you can get under the Ice Cave and float around. You can keep going in [[Monitor]] form until you come out underneath the Underpass. Once there, you can return to Player Mode and fight; you can build on this area, as it is a solid surface. To get there, simply place a few Crates next to the wall of the Ice Cave and insert a | *In Forge, you can get under the Ice Cave and float around. You can keep going in [[Monitor]] form until you come out underneath the Underpass. Once there, you can return to Player Mode and fight; you can build on this area, as it is a solid surface. To get there, simply place a few Crates next to the wall of the Ice Cave and insert a Mongoose. Get on the Mongoose, then get off and quickly enter Edit Mode. | ||
**To get there, enter the Ice cave and hover along the wall connecting the Ice Cave Entrance to the tunnel leading to Low Base. Move along this wall and toward the Low Base tunnel until you find the point at which the wall curves inward. Place a | **To get there, enter the Ice cave and hover along the wall connecting the Ice Cave Entrance to the tunnel leading to Low Base. Move along this wall and toward the Low Base tunnel until you find the point at which the wall curves inward. Place a Mongoose at this point, having it face parallel to the wall's curvature and towards the Low Base tunnel. Then, bring a Crate inside of the cave and use it to shove the Mongoose as close to the wall as you can get it. Hop on the Mongoose, enter Edit Mode, exit Edit Mode, and quickly re-enter Edit Mode, and you will find yourself beneath the cave. | ||
**You can indeed float beneath the Underpass, though if you fly as far as possible in the other direction, you can get the boundary turrets to try (unsuccessfully) to shoot you through the ground. | **You can indeed float beneath the Underpass, though if you fly as far as possible in the other direction, you can get the boundary turrets to try (unsuccessfully) to shoot you through the ground. | ||
*You can [[Get in the Blue Room under Snowbound|get into the blue rooms underneath the bases]], although you cannot exit without committing suicide. | *You can [[Get in the Blue Room under Snowbound|get into the blue rooms underneath the bases]], although you cannot exit without committing suicide. | ||
== | ==Production notes== | ||
In the ''Halo 3'' Beta, the engine incorporated real time reflections into many aspects of the game. The outside of Snowbound's bases, as well as the Ghost, player armor, and a few weapon holders, utilized the graphical enhancement of real time reflection. However, this was removed from the final version of the game. | |||
''' | |||
This map, along with a few others, were originally supposed to feature [[Rizsheda-pattern Shade|Shade turrets]] and [[Covenant watchtower]]s. They were removed in the released version, though tags for these Forge items still exist within the map's base coding. | |||
==Trivia== | ==Trivia== | ||
<!-- <!--This is TRIVIA, not Strategies, only trivia belongs here, please put strategies below in the Strategies section--> | <!-- <!--This is TRIVIA, not Strategies, only trivia belongs here, please put strategies below in the Strategies section--> | ||
===Miscellaneous=== | ===Miscellaneous=== | ||
* | *There are several ''Shuku''-pattern sentry turrets, positioned along the outside of the map, that will shoot at any players who go beyond the boundaries of the map. If killed by them, the kill will be credited to the Guardians. | ||
*Like [[Sandtrap]], players may leave footprints in the snow (which could be tracked) for a few seconds before fading away. This is helpful when opponents are in active camo.<ref>[http://www.eurogamer.net/article.php?article_id=72856 '''Eurogamer''': ''Halo 3 - On Snowbound, spike grenades and Cats.'']</ref> | |||
*The default version of Snowbound has been removed from all [[Matchmaking]] playlists except [[Lone Wolves]] and [[Rumble Pit]]. It has been replaced with the Hard Core (HC) Snowbound in which a few changes have been made, which deletes the Spartan Laser and shotgun from the map and puts the beam rifle on the original shotgun spawn point. Each base now has a bubble shield, where the default Snowbound had only one base with a bubble shield and another with a power drain. | |||
*Like [[Sandtrap]], players may leave footprints in the snow (which could be tracked) for a few seconds before fading away. This is helpful when opponents are in | |||
*The default version of Snowbound has been removed from all [[Matchmaking]] playlists except [[Lone Wolves]] and [[Rumble Pit]]. It has been replaced with the Hard Core (HC) Snowbound in which a few changes have been made, which deletes the Spartan Laser and | |||
===Easter egg=== | ===Easter egg=== | ||
*In the sky, the visible planet has a [[Marathon]] symbol on it. | *In the sky, the visible planet has a [[Marathon]] symbol on it. | ||
*In the | *In the active camo tunnel, there is a [[Wikipedia:Canada|Canadian]] $1 coin (or loonie) buried in the snow beneath the active camo, perhaps a homage to the "[[Lucky Loonie]]" customarily buried under the ice during Canadian National ice hockey or curling events.<ref>[http://halo.bungie.net/Online/Halo3UserContentDetails.aspx?h3fileid=49859357 '''Bungie.net: Halo 3 File Details:''' CANADA]</ref> The "lucky loonie" was made famous during the 2002 Salt Lake City Olympic games when both the Canadian men and women teams won the gold medal. However, this coin is not seen during split-screen games. | ||
==Gallery== | ==Gallery== | ||
<gallery | {{Linkbox|gallery=yes}} | ||
File:Snowbound | ===Concept art=== | ||
File:Snowbound- | <gallery> | ||
File: | File:H3_Snowbound_Base_Concept.jpg|Concept art of a base interior. | ||
File:Imprisoned Monitor.jpg|A | File:H3_Snowbound_Skybox_Concept.jpg|Concept art of the skybox. | ||
File:H3_Snowbound_Turret_Concept.jpg|Concept art of the turrets. | |||
</gallery> | |||
===Development images=== | |||
<gallery> | |||
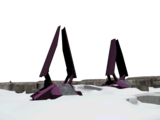
File:H3 Snowbound PrePro Screenshot 1.jpg|An early, pre-production-era, screenshot of Snowbound.{{Ref/Twitter|MaxHoberman|1645603456739147776|Max Hoberman|Quote=Let's play more Halo guessing games! Here's another map at the end of preproduction. Which is it?|D=11|M=04|Y=2023}} | |||
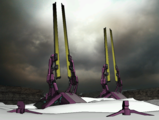
File:H3 Snowbound PrePro Screenshot 2.jpg|An early, pre-production-era, screenshot of Snowbound.{{Ref/Twitter|MaxHoberman|1645605743725256704|Max Hoberman|Quote=Ok, that one was just a warm up. Yes, that's Halo 3's Snowbound, in a primitive state. Here's another view.|D=11|M=04|Y=2023}} | |||
File:H3 Snowbound EarlyGeo.png|A look at some of the early geometry of Snowbound, following the pre-production phase. | |||
File:H3 Snowbound Paintover Concept.png|A concept paintover of this early geometry, dictating the look of the final map. | |||
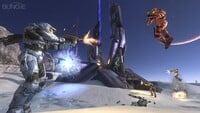
File:H3 Alpha Snowbound.jpg|A battle on Snowbound during the [[Halo 3 Alpha|Alpha Build]] of ''Halo 3''. | |||
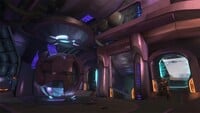
File:H3 Alpha Snowbound Base.jpg|One of the bases in the Alpha Build of ''Halo 3''. | |||
</gallery> | |||
===Screenshots=== | |||
<gallery> | |||
File:Imprisoned Monitor.jpg|A Monitor under Snowbound. | |||
File:MiddleView2.jpg|An overview of Snowbound. | File:MiddleView2.jpg|An overview of Snowbound. | ||
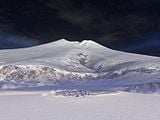
File:1204275216 Snowbound.jpg|Snowbound at the foot of the mountain when viewed from a distance. | File:1204275216 Snowbound.jpg|Snowbound at the foot of the mountain when viewed from a distance. | ||
File:Halo3 116511087 Medium.jpg|A Canadian coin easter egg. | File:Halo3 116511087 Medium.jpg|A Canadian coin easter egg. | ||
File:A battle on snowbound.jpg | |||
File:Halo3 Snowbound-env-01.jpg | |||
File:H3 Snowbound Battle.jpg|Promotional image of a match on Snowbound. | |||
File:H3 Snowbound Defeat.jpg|Promotional image of a match on Snowbound. | |||
</gallery> | </gallery> | ||
==Sources== | ==Sources== | ||
{{Ref/Sources}} | |||
{{ | {{Levels|H3|mode=yes}} | ||
Latest revision as of 17:39, December 11, 2024
| Snowbound | |
|---|---|
| Map overview | |
|
Game: |
|
|
Map file name (?): |
|
| Lore information | |
|
Location: |
|
| Gameplay overview | |
|
Terrain: |
Covenant structures in icy terrain built over a Forerunner installation. |
|
Map layout: |
Semi-symmetrical |
|
Recommended number of players: |
2-8 |
|
Recommended gametype(s): |
|
| “ | Hostile conditions did not prevent the Covenant from seeking salvage on this buried Forerunner construct. | ” |
Snowbound is a medium-sized multiplayer map in Halo 3.
Universe and lore[edit]
- Main article: Strilun IV
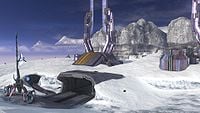
Snowbound is set in a snowy Forerunner area with two large Covenant bases at either end of the map. The two bases are joined underground by a cave, revealing a deep network of Forerunner structures underground. The planet the map is set on is a former Forerunner world controlled by the Covenant, not far from human-occupied space.[3] On the horizon, two celestial bodies can be seen. The Covenant base is surrounded by a perimeter of Shuku-pattern sentry turrets that fire upon anything in range.
Overview[edit]
Layout[edit]
Snowbound is a medium-sized, semi-symmetrical map with two bases. The bases, known as High Base and Low Base, are connected by an underground tunnel network. Much fighting takes place in or around the shield doors found inside the bases. Rocky outcroppings are located along the southern and western edges of the map (Rock Side); Shuku-pattern sentry turrets prevent players from exiting the map via its otherwise-unblocked northern and eastern edges (Tundra Side). When players venture too close to the map's boundaries, an alarm sounds, warning them to return to the bases before the turrets open fire.
Callouts of Snowbound at the time of the Halo 3 Beta.
Callouts[edit]
- Low Base - Low Base is one of the two Covenant bases on the map. This base, which is located on the eastern side of the map, appears to be fully functional, though it has apparently been abandoned. It is often referred to by players as "BR Spawn" because of the two battle rifles that spawn on its outer rear walls. Inside the base, there is a Spartan Laser, two Paegaas Workshop Spikers, and a bubble shield. Outside the base, a carbine, a Spiker, and a Mauler spawn to the south; an active camo spawns towards the north. On top of the base, there is a needler and a pair of plasma grenades.
- High Base - Directly adjacent to Low Base, High Base offers a different set of weapons. High Base's lights flicker and buzz, implying that it has become damaged. The large sphere in the center of the base appears broken, and icicles hang from the base's exterior, implying that its heating system has stopped working. Whether this damage is the result of the base's abandonment or something else is unknown.
- High Base is commonly referred to as "Sniper Spawn" or "Carbine Base" due to the carbine and beam rifle it contains. Behind the base, players can find a battle rifle or a Okarda'phaa-pattern plasma rifle around the rocky terrain. A Mauler lies to the north of the base, and an overshield to the south. Inside, there are two plasma rifles, a beam rifle, and a power drain. On top of the base, there is a plasma pistol and a pair of plasma grenades.
- Low Base Batteries
- High Base Batteries
- Rock Side
- Tundra Side
- Ice Cave Entrance - On the opposite side end the Underpass, lies the Ice Cave's main entrance, with its distinctive overhang and large shield door.
- Ice Cave - Predominantly known as the "Shotgun Spawn" in Lone Wolves or the "Sniper Spawn" in Team Slayer, heavy fighting occurs in this cold and icy cave. This area sees frequent carnage due to its high traffic, tight quarters, and position between the High and Low Bases. To the immediate south is a narrow, elevated opening with no shield (Ice Cave Tunnel). On the western side of the cave's interior is a tunnel to the High Base; opposite that is a tunnel to the Low Base. Directly north is the Main Entrance, which is protected by a larger shield door.
- Entering the Ice Cave from the Bases or the Ice Cave Tunnel is extremely risky. The main entrance is very defensible, as it affords the player with a full view of the cave's three most-used entrances and its shield door provides protection. Above the Ice Cave's main entrance spawns a Brute Shot (top), as well as a Spiker to the west and a Mauler to the east. An often seen tactic on this map is to hide on the other side of a shield door with the shotgun or Mauler and kill players as they pass through.
- Ice Cave Tunnel - In the center of the map, the Ice Cave Tunnel provides access to the Ice Cave, which in turn provides access to the interiors of both bases. A common tactic is to blindly toss grenades into the map's lower levels from this area, turning the underground corridors and tight spaces into grenade-powered deathtraps.
- Ice Tunnel
- Underpass - Located between both bases is Underpass (or "Ghost Spawn"), a tunnel where a single Ghost (or Mongoose) spawns.
- Far Rocks
Strategies[edit]
- After swapping for the Spartan Laser when spawning in Team Slayer, if your team doesn't plan on using the Ghost, a good tactic would be to wait for an enemy to get in it, eliminating the Ghost, that enemy, and possibly the overshield threat.
- Even though the outside is good for sniping, the beam rifle is more commonly used inside for no-scoping and double shots, which is usually rather effective.
- The rocks (Far Rocks) lined up near the Ghost spawn (Underpass) provide a relatively safe above-ground path from base to base.
- The bases' ceilings are transparent, allowing players inside to see potential assailants above.
- The needler is a very useful weapon on this map.
- The Maulers on the Tundra Side of the map can prove very useful for players that intend to patrol the Ice Cave.
- Bubble shields are useful when protecting the Ice Cave in team games, as players can deploy it when an enemy is trying to get through.
- From almost the beginning of a match on this level, a majority of the fighting takes place in the Ice Cave or the tunnels leading to it. The team that holds the Ice Cave has the advantage, as the area's tight entrances allow for easy grenade kills.
- When playing Team SWAT, always jump through shield doors rather than walking through them. If there is someone beyond the shield door, this will surprise him or her.
- Players hiding near shield doors with a shotgun may get an instant kill when an unsuspecting foe walks through.
- When going for achievements, this map is good for Up Close and Personal and Lee R. Wilson Memorial. To easily achieve the Lee R Wilson Memorial, rush through a shield door and quickly throw a plasma grenade at an enemy waiting for you to rush him. He'll most likely start rushing you, making a stick easy to accomplish.
- If you're playing Lone Wolves and you have a dark color for you primary color, for example, steel or purple, you can jump on the control balls and crouch on them to blend in.
- When you're behind the glass screen in a base, jump on it and crouch on one of the supports on either side. This gives you an upper hand when using a close-range weapon or, if you have active camo and you want to kill stealthily, stick a player. This also gives you a good view out the transparent ceiling.
- This is one of the few maps that has a Spartan Laser on it by default (and therefore one of the few maps where the Two for One achievement can be gotten).
- When playing Oddball on this map one may find it useful when carrying the skull to stick in the tunnels. It's much more difficult for enemies to dodge your beats.
Variants[edit]
Boundless[edit]
| “ | Open the doors, let the crisp cold air in. | ” |
Boundless is a map variant released to improve the gameplay balance, specifically as a response to reports of widespread shotgun-camping near the Shield doors.[4] It was due to be released on September 16, 2008, along with TU2, but was delayed until September 23, 2008. Like Sand Tarp and Epilogue, it is included as a default map variant in Halo: The Master Chief Collection. The following is a list of changes made;
- The Spartan Laser in Low Base has been replaced by a beam rifle.
- The Ghost has been replaced by a Mongoose.
- The active camouflage has been replaced by a second overshield.
- The weapons outside of each base has been equalized, with a Covenant carbine and a battle rifle on the side, and another carbine on the back.
- In both High and Low bases, the two entrances from the top middle portion of the map still have shield doors. The others have been removed.
Forge[edit]
- In Forge, you can block off all tunnels to the Ice Caves (using mostly Crates and boxes, and Weapon Holders to keep them there), keeping players focused on long- to medium-range combat.
- In Forge, you can get under the Ice Cave and float around. You can keep going in Monitor form until you come out underneath the Underpass. Once there, you can return to Player Mode and fight; you can build on this area, as it is a solid surface. To get there, simply place a few Crates next to the wall of the Ice Cave and insert a Mongoose. Get on the Mongoose, then get off and quickly enter Edit Mode.
- To get there, enter the Ice cave and hover along the wall connecting the Ice Cave Entrance to the tunnel leading to Low Base. Move along this wall and toward the Low Base tunnel until you find the point at which the wall curves inward. Place a Mongoose at this point, having it face parallel to the wall's curvature and towards the Low Base tunnel. Then, bring a Crate inside of the cave and use it to shove the Mongoose as close to the wall as you can get it. Hop on the Mongoose, enter Edit Mode, exit Edit Mode, and quickly re-enter Edit Mode, and you will find yourself beneath the cave.
- You can indeed float beneath the Underpass, though if you fly as far as possible in the other direction, you can get the boundary turrets to try (unsuccessfully) to shoot you through the ground.
- You can get into the blue rooms underneath the bases, although you cannot exit without committing suicide.
Production notes[edit]
In the Halo 3 Beta, the engine incorporated real time reflections into many aspects of the game. The outside of Snowbound's bases, as well as the Ghost, player armor, and a few weapon holders, utilized the graphical enhancement of real time reflection. However, this was removed from the final version of the game.
This map, along with a few others, were originally supposed to feature Shade turrets and Covenant watchtowers. They were removed in the released version, though tags for these Forge items still exist within the map's base coding.
Trivia[edit]
Miscellaneous[edit]
- There are several Shuku-pattern sentry turrets, positioned along the outside of the map, that will shoot at any players who go beyond the boundaries of the map. If killed by them, the kill will be credited to the Guardians.
- Like Sandtrap, players may leave footprints in the snow (which could be tracked) for a few seconds before fading away. This is helpful when opponents are in active camo.[5]
- The default version of Snowbound has been removed from all Matchmaking playlists except Lone Wolves and Rumble Pit. It has been replaced with the Hard Core (HC) Snowbound in which a few changes have been made, which deletes the Spartan Laser and shotgun from the map and puts the beam rifle on the original shotgun spawn point. Each base now has a bubble shield, where the default Snowbound had only one base with a bubble shield and another with a power drain.
Easter egg[edit]
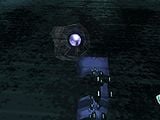
- In the sky, the visible planet has a Marathon symbol on it.
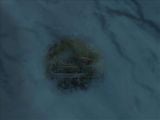
- In the active camo tunnel, there is a Canadian $1 coin (or loonie) buried in the snow beneath the active camo, perhaps a homage to the "Lucky Loonie" customarily buried under the ice during Canadian National ice hockey or curling events.[6] The "lucky loonie" was made famous during the 2002 Salt Lake City Olympic games when both the Canadian men and women teams won the gold medal. However, this coin is not seen during split-screen games.
Gallery[edit]

|
Browse more images in this article's gallery page. |
Concept art[edit]
Development images[edit]
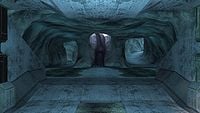
An early, pre-production-era, screenshot of Snowbound.[7]
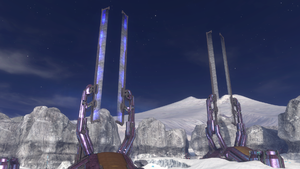
An early, pre-production-era, screenshot of Snowbound.[8]
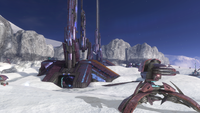
A battle on Snowbound during the Alpha Build of Halo 3.
Screenshots[edit]
Sources[edit]
- ^ Halo 3 Editing Kit, game file
H3EK\tags\levels\multi\snowbound\snowbound.scenario - ^ Halo Encyclopedia (2022 edition), page 301: Shuku-pattern sentry turret caption "STRILUN_DEFENSE"
- ^ Bungie.net: Bungie Weekly Update 01/11/08 - It’s on an alien world discovered and controlled by the Covenant. It’s location is secret, but it is in this spiral arm of the Galaxy. Close to human occupied space. If you look through the glass floors of the Covenant structures, you’ll see Forerunner artifacts buried beneath the ice.
- ^ Bungie.net: Bungie Weekly Update 08/22/08
- ^ Eurogamer: Halo 3 - On Snowbound, spike grenades and Cats.
- ^ Bungie.net: Halo 3 File Details: CANADA
- ^ Twitter, Max Hoberman (@MaxHoberman): "Let's play more Halo guessing games! Here's another map at the end of preproduction. Which is it?" (Retrieved on Apr 11, 2023) [archive]
- ^ Twitter, Max Hoberman (@MaxHoberman): "Ok, that one was just a warm up. Yes, that's Halo 3's Snowbound, in a primitive state. Here's another view." (Retrieved on Apr 11, 2023) [archive]
| ||||||||||||||||||||||||||||||||||||||||



![An early, pre-production-era, screenshot of Snowbound.[7]](https://halo.wiki.gallery/images/thumb/4/47/H3_Snowbound_PrePro_Screenshot_1.jpg/200px-H3_Snowbound_PrePro_Screenshot_1.jpg)
![An early, pre-production-era, screenshot of Snowbound.[8]](https://halo.wiki.gallery/images/thumb/c/cd/H3_Snowbound_PrePro_Screenshot_2.jpg/200px-H3_Snowbound_PrePro_Screenshot_2.jpg)
