Drive an AA Wraith: Difference between revisions
From Halopedia, the Halo wiki
(→Trivia) |
m (→Single-player walkthrough: Page rename, replaced: [[Boarding| → [[Naval boarding|) |
||
| (91 intermediate revisions by 51 users not shown) | |||
| Line 1: | Line 1: | ||
{{ | {{Status|Gameplay}} | ||
{{ | {{#widget:YouTube|id=P8zrJ6zlSaA|width=400|right}} | ||
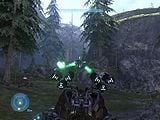
In the [[campaign]] and [[Firefight]] modes of ''[[Halo 3]]'' and ''[[Halo 3 ODST]]'', a glitch allows players to '''drive an {{Pattern|Ogab'd|anti-aircraft Wraith}} '''(and a normal {{Pattern|Zurdo|Wraith}} in ''Halo 3: ODST'') in any level it appears in. The glitch is a timing-related exploit that allows a player to kill the vehicle's driver and enter the cockpit before the {{Pattern|Zurdo|Wraith}} self-destructs. | |||
It is to be noted, however, that the | It is to be noted, however, that the Wraith will self-destruct once you leave it. Avoid leaving the [[Thel 'Vadam|Arbiter]] or any [[UNSC Marine Corps|Marine]] in the turret; they will die when the vehicle self-destructs, and the deaths will be counted as [[betrayal]]s. | ||
==Explanation== | |||
Anti-Air Wraiths and, in ''Halo 3: ODST'', normal Wraiths cannot normally be piloted because of a function [[Bungie]] attached to the vehicle: when the driver dies or exits, the vehicle self-destructs. This is why killing the driver before completing the glitch prevents it from working, and why the vehicle self-destructs when a player exits the cockpit. | |||
The glitch that allows players to pilot an Anti-Air Wraith is a timing exploit. If a player kills the driver while holding '''RB''', they will enter the vehicle the moment the driver dies—and before the vehicle self-destructs. The span of time at which the vehicle is pilot-less will be so brief that the game will fail to notice it, and thus will not destroy the vehicle. | |||
== Walkthrough == | == Walkthrough == | ||
===Single-player walkthrough=== | |||
# Find an AA Wraith | #Find an AA Wraith on any level where one can be [[Naval boarding|boarded]]. [[The Covenant (level)|The Covenant]] is an excellent level for the purpose. | ||
# | #Kill the gunner, if necessary. | ||
# Stand on the hatch | #Stand on the front hatch of the Wraith and [[melee]] it off. [[Weapons]] like [[Rocket Launcher]]s or [[Spartan Laser]]s with a good melee force will smash open the hatch in one hit without killing the driver. | ||
# After the hatch is off, | #*On higher difficulties or with the [[Halo 3 skulls#Tilt|Tilt]] [[Halo 3 skulls|skull]] on, you will probably have to board the Wraith and melee the hatch until it falls off, as a normal melee attack won't even dent the hatch. | ||
# If you boarded the Wraith, | #After the hatch is off, melee the driver to knock his helmet off. Do not kill the driver, or the glitch will fail. | ||
# ''' | #If you boarded the Wraith, jump off of it. Jump on top of the Wraith ''without boarding it''. Once you see the pilot's head, crouch and position yourself so you ''do not'' see "Hold RB to board Wraith". | ||
#Melee the driver's [[jiralhanae power armor|armor]] off. After that, ''while holding '''RB''''', kill the driver, preferably with a [[Head Shot]]-capable weapon or continuing to melee him to death. Once he dies, you will immediately enter the Wraith. | |||
There are some problem areas with this glitch. In particular, hijacking an Anti-Air Wraith becomes nearly impossible if the Wraith notices the player. If the player manages to jump onto the Wraith without being shot or splattered, the Wraith will continuously drive and back up in a circular motion, attempting to escape. Such erratic movements make it extremely difficult to keep a steady aim at the driver's head, and impossible to position oneself so that the "Hold RB to board Wraith" prompt does not appear. A player can counter this by stopping the vehicle with a [[Type-25 Directed Energy Pistol|Plasma Pistol]] overcharge or a [[Power drain|Power Drain]]. | |||
== | ===Cooperative Walkthrough=== | ||
[[ | In [[cooperative play]], two players (''Person A'' and ''Person B'') can cooperate to perform the glitch. On Local play, it does not matter which player acts out which role. On [[Xbox LIVE|Xbox Live]], however, only the [[Connection Host|host]] can act as ''Person A''; if a client player acts as ''Person A'', then at best they may end up [[Destroyed vehicles glitch|"driving" the vehicle after it has exploded]]. | ||
[[ | #Find an Anti-Air Wraith. | ||
#Get ''Person B'' to board the Wraith, while ''Person A'' stands at its front or side and holds '''RB'''. | |||
#''Person B'' should melee the driver and gunner normally. | |||
#As soon as the driver and gunner are killed, ''Person A'' will immediately enter the vehicle. | |||
This method addresses the problem of accidentally boarding the Wraith when trying to drive it. By boarding the Wraith, ''Person B'' prevents ''Person A'' from accidentally doing the same. This guarantees that when ''Person A'' holds '''RB''', they will enter the vehicle and pilot it. | |||
Note that the Wraith will still explode when ''Person A'' exits it—even if another player is manning the turret. | |||
==Trivia== | |||
*When piloted, the vehicle uses a temporary [[reticule]] that seems to be used for vehicles that lack unique reticles. This same reticule could be seen in several [[ViDoc]]s and in the ''[[Halo 3 Beta]]'', when using locked vehicles like the standard Wraith. It is possible that the Anti-Air Wraith is drivable because it is a modified version of the standard Wraith; it is also possible that Bungie once intended for it to be usable by players, but removed this capability due to the vehicle's immense firepower. | |||
*Notably, there is an animation that is seen only when the player gets out of the vehicle - the turret being contracted into its compartment. However, if the player starts The Covenant at Rally Point Alpha and gets a loading point (past the Banshees) and goes to Theater, the player will see the two Anti-Air Wraiths spawn with a gunner, but without the driver. The turret will be contracted, and strangely, the Anti-Air Wraith will not explode. | |||
*If hijacked, the main weapon can be fired at a rate much greater than is seen during normal gameplay; all one needs to do is button-mash on the right trigger. This is most likely because there was no [[Wikipedia:Cooldown|wait between shots]] programmed, since it was not intended to be driven. | |||
*When doing this glitch on higher difficulties, Heroic and Legendary on Halo 3 (all difficulties on Halo 3: ODST), overcharging the [[type-25 Directed Energy Pistol|plasma pistol]] will disable the Wraith, causing the Wraith to be still, giving the player a good opportunity to successfully hijack the Wraith. When the player attempts to hijack the Wraith, and the Wraith is not distracted, the Wraith will move erratically, and it is almost impossible to hijack the Wraith. | |||
*Unlike the Wraith's plasma turret, there is no apparent crosshair for the AA Wraith's turret. | |||
*Anti-Air Wraiths are quite rare in ''[[Halo 3: ODST]]''. In ''ODST'', ''all'' Wraiths, Anti-Air or otherwise, are rigged to explode when the driver dies or exits. This glitch must be performed to drive a Wraith at all (except for the levels [[Kikowani Station (location)|Kikowani Station]] and [[Coastal Highway]]). | |||
*Hijacking the standard Wraith in [[Firefight (Halo 3: ODST)|Firefight]] makes it far easier to unlock the [[Vidmaster Challenge: Endure]] [[achievement]]. The Wraith is very vulnerable to [[Pez'tk-pattern fuel rod gun|Fuel Rod Guns]], the Catch skull, and other Wraiths, however. | |||
*In the [[Season 2: Spark]] update for ''[[Halo: The Master Chief Collection]]'', Anti-Air Wraiths were made spawnable in [[Forge/Halo 3|Forge]] mode on the ''Halo 3'' maps [[Sandbox]], [[Foundry]] and [[Avalanche]]. These Wraiths do not explode when exited. | |||
*When Halo 3: ODST's Firefight was added to MCC with [[Series 3: Recon]], the Anti-Air Wraith was added to the list of driveable vehicles in custom Firefight, along with the [[AV-14 Hornet]]. | |||
==Halo 3 | ==Gallery== | ||
<gallery> | |||
File:Pilot AA Wraith.jpg|A player successfully commandeering a Wraith in ''Halo 3''. | |||
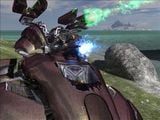
File:AA wraith.jpg|Two players in an AA Wraith in ''Halo 3''. | |||
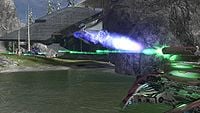
File:Wraith vs Wraith.jpg|A player-controlled AA Wraith engages another Wraith in battle in ''Halo 3''. | |||
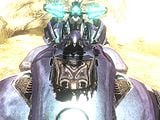
File:ODST Wraith.jpg|A player successfully commandeering a Wraith in ''Halo 3: ODST''. | |||
</gallery> | |||
{{Glitches}} | |||
[[Category:Halo 3 glitches]] | |||
[[Category:Halo 3: ODST glitches]] | |||
[[Category: Halo 3 | |||
[[Category:Halo 3]] | |||
Latest revision as of 17:09, September 28, 2023
It is to be noted, however, that the Wraith will self-destruct once you leave it. Avoid leaving the Arbiter or any Marine in the turret; they will die when the vehicle self-destructs, and the deaths will be counted as betrayals.
Explanation[edit]
Anti-Air Wraiths and, in Halo 3: ODST, normal Wraiths cannot normally be piloted because of a function Bungie attached to the vehicle: when the driver dies or exits, the vehicle self-destructs. This is why killing the driver before completing the glitch prevents it from working, and why the vehicle self-destructs when a player exits the cockpit.
The glitch that allows players to pilot an Anti-Air Wraith is a timing exploit. If a player kills the driver while holding RB, they will enter the vehicle the moment the driver dies—and before the vehicle self-destructs. The span of time at which the vehicle is pilot-less will be so brief that the game will fail to notice it, and thus will not destroy the vehicle.
Walkthrough[edit]
Single-player walkthrough[edit]
- Find an AA Wraith on any level where one can be boarded. The Covenant is an excellent level for the purpose.
- Kill the gunner, if necessary.
- Stand on the front hatch of the Wraith and melee it off. Weapons like Rocket Launchers or Spartan Lasers with a good melee force will smash open the hatch in one hit without killing the driver.
- After the hatch is off, melee the driver to knock his helmet off. Do not kill the driver, or the glitch will fail.
- If you boarded the Wraith, jump off of it. Jump on top of the Wraith without boarding it. Once you see the pilot's head, crouch and position yourself so you do not see "Hold RB to board Wraith".
- Melee the driver's armor off. After that, while holding RB, kill the driver, preferably with a Head Shot-capable weapon or continuing to melee him to death. Once he dies, you will immediately enter the Wraith.
There are some problem areas with this glitch. In particular, hijacking an Anti-Air Wraith becomes nearly impossible if the Wraith notices the player. If the player manages to jump onto the Wraith without being shot or splattered, the Wraith will continuously drive and back up in a circular motion, attempting to escape. Such erratic movements make it extremely difficult to keep a steady aim at the driver's head, and impossible to position oneself so that the "Hold RB to board Wraith" prompt does not appear. A player can counter this by stopping the vehicle with a Plasma Pistol overcharge or a Power Drain.
Cooperative Walkthrough[edit]
In cooperative play, two players (Person A and Person B) can cooperate to perform the glitch. On Local play, it does not matter which player acts out which role. On Xbox Live, however, only the host can act as Person A; if a client player acts as Person A, then at best they may end up "driving" the vehicle after it has exploded.
- Find an Anti-Air Wraith.
- Get Person B to board the Wraith, while Person A stands at its front or side and holds RB.
- Person B should melee the driver and gunner normally.
- As soon as the driver and gunner are killed, Person A will immediately enter the vehicle.
This method addresses the problem of accidentally boarding the Wraith when trying to drive it. By boarding the Wraith, Person B prevents Person A from accidentally doing the same. This guarantees that when Person A holds RB, they will enter the vehicle and pilot it.
Note that the Wraith will still explode when Person A exits it—even if another player is manning the turret.
Trivia[edit]
- When piloted, the vehicle uses a temporary reticule that seems to be used for vehicles that lack unique reticles. This same reticule could be seen in several ViDocs and in the Halo 3 Beta, when using locked vehicles like the standard Wraith. It is possible that the Anti-Air Wraith is drivable because it is a modified version of the standard Wraith; it is also possible that Bungie once intended for it to be usable by players, but removed this capability due to the vehicle's immense firepower.
- Notably, there is an animation that is seen only when the player gets out of the vehicle - the turret being contracted into its compartment. However, if the player starts The Covenant at Rally Point Alpha and gets a loading point (past the Banshees) and goes to Theater, the player will see the two Anti-Air Wraiths spawn with a gunner, but without the driver. The turret will be contracted, and strangely, the Anti-Air Wraith will not explode.
- If hijacked, the main weapon can be fired at a rate much greater than is seen during normal gameplay; all one needs to do is button-mash on the right trigger. This is most likely because there was no wait between shots programmed, since it was not intended to be driven.
- When doing this glitch on higher difficulties, Heroic and Legendary on Halo 3 (all difficulties on Halo 3: ODST), overcharging the plasma pistol will disable the Wraith, causing the Wraith to be still, giving the player a good opportunity to successfully hijack the Wraith. When the player attempts to hijack the Wraith, and the Wraith is not distracted, the Wraith will move erratically, and it is almost impossible to hijack the Wraith.
- Unlike the Wraith's plasma turret, there is no apparent crosshair for the AA Wraith's turret.
- Anti-Air Wraiths are quite rare in Halo 3: ODST. In ODST, all Wraiths, Anti-Air or otherwise, are rigged to explode when the driver dies or exits. This glitch must be performed to drive a Wraith at all (except for the levels Kikowani Station and Coastal Highway).
- Hijacking the standard Wraith in Firefight makes it far easier to unlock the Vidmaster Challenge: Endure achievement. The Wraith is very vulnerable to Fuel Rod Guns, the Catch skull, and other Wraiths, however.
- In the Season 2: Spark update for Halo: The Master Chief Collection, Anti-Air Wraiths were made spawnable in Forge mode on the Halo 3 maps Sandbox, Foundry and Avalanche. These Wraiths do not explode when exited.
- When Halo 3: ODST's Firefight was added to MCC with Series 3: Recon, the Anti-Air Wraith was added to the list of driveable vehicles in custom Firefight, along with the AV-14 Hornet.
Gallery[edit]


