War of Beginnings: Difference between revisions
From Halopedia, the Halo wiki
BaconShelf (talk | contribs) No edit summary |
Covenant PhD (talk | contribs) No edit summary |
||
| Line 19: | Line 19: | ||
|side1=*[[Reformist|San'Shyuum Reformists]] | |side1=*[[Reformist|San'Shyuum Reformists]] | ||
|side2=*[[Council of City States|Sangheili]] | |side2=*[[Council of City States|Sangheili]] | ||
|commanders1=*[[Breaking Shadow]]{{Ref/Reuse|Enc22}} | |commanders1= | ||
*[[Hierarchs|Hierarch]] [[J'nellin]] | |||
*[[Hierarch]] [[Qurlom]]<br> | |||
*[[Breaking Shadow]]{{Ref/Reuse|Enc22}} | |||
*[[Pervading Stone]]†{{Ref/Reuse|Enc22}} | *[[Pervading Stone]]†{{Ref/Reuse|Enc22}} | ||
|commanders2=*[[Arbiter]] [[Vema 'Togad]]{{Ref/Book|Id=Enc22P244|Enc22|Page=244}} | |commanders2=*[[Arbiter]] [[Vema 'Togad]]{{Ref/Book|Id=Enc22P244|Enc22|Page=244}} | ||
Revision as of 20:07, January 26, 2023
|
Previous: |
|||||||||||||||||||
|
Next: |
|||||||||||||||||||
| War of Beginnings | |||||||||||||||||||
|---|---|---|---|---|---|---|---|---|---|---|---|---|---|---|---|---|---|---|---|
| File:HM-Ulgethon.png | |||||||||||||||||||
|
Date: |
|||||||||||||||||||
|
Location: |
|||||||||||||||||||
|
Outcome: |
|||||||||||||||||||
| |||||||||||||||||||
- "So full of hate were our eyes that none of us could see.
Our war would yield countless dead, but never victory." - — Covenant Writ of Union
The War of Beginnings,[13] also known as the San'Shyuum-Sangheili War[14] and the First Age of Conflict, was an interstellar war set between the Sangheili species and the Reformist San'Shyuum, over religious and technological differences. At the conclusion of the war, the Writ of Union was penned and initiated, and the Covenant was kindled.[15]
Background
After fleeing their homeworld of Janjur Qom in 2100 BCE,[1] the San'Shyuum Reformists discovered ancient Forerunner installations in orbit over Salosur Qom, a world neighboring their own. Here, they found the Huragok and a powerful cartographer.[16] The cartographer would feed its information into the Dreadnought's Luminary, a system that could guide the San'Shyuum to more star systems with Forerunner relics. And so, they took the Dreadnought into slipspace, leaving the Qom Yaekesh system and travelling the stars. For hundreds of years, the San'Shyuum explored abandoned worlds and derelict installations, employing the Huragok to unfold their masters' secrets.[2]
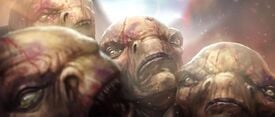
In 938 BCE, the San'Shyuum stumbled upon Ulgethon, a hardscrabble world that they believed to be uninhabited. After making landfall in the Dreanought, a pioneer detachment was sent to investigate a nearby repository of Forerunner relics. Arriving at the site, the San'Shyuum discovered the Sangheili—a sapient species they have never encountered previously—living among the Forerunner structures. Their initial meeting was amenable if tense, but the Sangheili would soon discover the San'Shyuum's true intentions.[2] While the Sangheili worshipped the Forerunners much like the Reformists, their stance on the manipulation of their gods' artifacts closely resembled that of the San'Shyuum Stoics, considering it blasphemy to disturb them.[17][2]
War
Ulgethon
- Main article: Desecration of Ulgethon
- "When we arrived on their frontier world of Ulgethon, the cost of life was severe.
Led by a mighty Arbiter, the Sangheili resisted our entreatment with ruthless force, leading to decades of war." - — A San'Shyuum scribe[7]
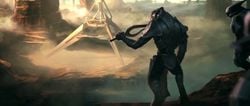
The war began on Ulgethon when the San'Shyuum emissaries revealed to the Sangheili their plan to excavate and research the Forerunner relics.[2] In response, Arbiter Vema 'Togad slaughtered and beheaded the delegation, sending their remains back to the Dreadnought atop a skiff.[7][18] Horrified by the display, the San'Shyuum immediately took the Dreadnought into the skies above Ulgethon,[2][7] only to be intercepted by a blockade of Sangheili warships. The fleet engaged the keyship, but it proved to be effectively impervious to their weapons, resulting in the defeat of the Sangheili vessels.[2] During their first battle on the ground, the Sangheili courageously faced off against the San'Shyuum's powerful Dreadnought from warrens and ridges across Ulgethon, using the most formidable weapons of war they could then fashion.[12]
However, the San'Shyuum ultimately used the Dreadnought to raze Ulgethon and eradicate its population.[2] The conflict on the planet lasted an entire year, leaving the planet a charred husk littered with fallen warriors and shattered ships.[19]
Continuing conflict
On the ground, the Sangheili had an early advantage, with each warrior comparable in skill to several San'Shyuum in battle. However, the San'Shyuum's technological superiority, and possession of the Forerunner Dreadnought, meant that they had the advantage in space battles, using the Dreadnought to great effect in devastating hit-and-run strikes against the Sangheili war fleets.[1] The San'Shyuum were successful in driving the Sangheili away from their interstellar colonies, while obliterating many Sangheili by appropriating Forerunner relics. The Sangheili were devastated by the lack of honor that the war brought; they were forced to continuously retreat as the San'Shyuum came closer and closer to Sanghelios.[20] During the war, the Sangheili made use of the fire-wand launcher,[4] a type of handheld flak cannon that is part of the design lineage of the fuel rod cannon.[21] The Hekar Taa-pattern blockade runner also first saw combat during the conflict, boasting impressive speed and power.[22]
Sacrifice of Codisfold
- Main article: Raid at Codisfold
As the war dragged on, it spread to other Sangheili colonies, bringing untold devastation as the San'Shyuum attempted to eradicate their new enemy.[2] With the seemingly unbeatable keyship in play, a San'Shyuum victory seemed inevitable to the Sangheili.[23][2]
Eventually, the Sangheili came up with a plan to defeat the vessel. They would sacrifice their colony of Codisfold, hiding dozens of ship-boring machines in the rings around the planet, hoping that they could board the Dreadnought. When the San'Shyuum arrived to destroy Codisfold, the ship-boring machines launched, carrying several skilled Sangheili infiltration teams.[3] The teams secretly stole onto the Dreadnought, damaging several of the Dreadnought's key systems and slaughtering thousands of San'Shyuum. While they were taken by surprise, the San'Shyuum counterattacked and managed to kill all of the Sangheili intruders.[23][3] Following this raid, the San'Shyuum attacked Codisfold, killing millions of Sangheili residents.[3] This event proved that the San'Shyuum and their keyship were not invulnerable,[2][23] and began to sway the opinions of the surviving San'Shyuum. Their leader, Pervading Stone, demanded that they continue their campaign against the Sangheili. Other key figures, such as Breaking Shadow and Ushering Dusk, opposed this and instead proposed a truce.[2][3] Shortly following this event, Stone secretly ordered the assassination of Dusk, removing him as an obstacle.[3]
Reformation
Meanwhile, the current First Kaidon of Sanghelios, Mhelaat 'Orlam, suggested that the Sangheili respectfully make use of their own Forerunner artifacts—many of which were known to be powerful weapons—to stave off certain annihilation at the hands of the San'Shyuum. As they Sangheili believed the manipulation of their gods' technology to be heresy, this proposition was resisted for a time, and 'Orlam was assassinated as a result.[2] However, an underground movement of Sangheili scientists began covertly studying their relics and incorporating elements into their warship, weapon, and armor designs.[1] Soon, the group of underground scientists emerged and declared their sins,[20] and in 876 BCE, 'Orlam's son, Pelahsar the Strident, lead the Sangheili to amend their beliefs on the treatment of Forerunner technologies in order to survive.[2] The scientists were allowed to live and their discoveries were put to use in the creation of new weapons and fleets of ships. Chief of these new creations was the R'sikosh-pattern man o' war by the name of Reckless Pursuit, armed with Forerunner weaponry.
The Sangheili began to hold their position and did not give up any territory to the San'Shyuum, though the Dreadnought continued to heavily damage the military. Occasionally, the Sangheili gained ground by employing hit-and-run tactics with slipspace before the Dreadnought could destroy their ships.[20] The San'Shyuum soon began to realize that if there were other species with martial capabilities like the Sangheili, they would be in serious danger.[15]
Blue and Red
- Main article: Skirmish of the Planet of Blue and Red
The war eventually led to a skirmish on Anvarl in 860 BCE. The planet's location made it of strategic importance to the Sangheili, however the San'Shyuum desired to take control of the world for the numerous Forerunner artifacts located on and underneath the planet's surface.[24] The San'Shyuum forces were led by Mken 'Scre'ah'ben, High Lord of Sacred Relics, while the Sangheili forces were led by Ussa 'Xellus. Although the San'Shyuum were vastly outnumbered,[25] they used Aggressor Sentinels to weaken Sangheili forces while scientists uncovered and examined the Forerunner structures. Eventually, the San'Shyuum's command stations were breached by Sangheili assassins—forcing all San'Shyuum on the planet to retreat to orbit. High Lord Mken had ordered the Forerunner Dreadnought to fire upon the Sangheili forces, but under Ussa's command, most of them had escaped into a Forerunner structure, which the San'Shyuum were unwilling to damage.[26] The Sangheili on the planet were eventually forced to flee the system.[4]
Sanghelios
- Main article: Battle of Sanghelios
The discovery that the Sangheili had begun to make use of Forerunner technology softened most San'Shyuum toward the possibility of a cease-fire, but Pervading Stone only grew more incensed. Seeking to obliterate the species once and for all, he finally took the Dreadnought to Sanghelios, ravaging both the planet and its two moons, Qikost and Suban.[2] The San'Shyuum and the Sangheili both fought for possession of the numerous Forerunner artifacts on the planet.[5] The state of Vadam was one of the many Sangheili city-states attacked by the San'Shyuum during the battle. However, Vadam keep's well-defended position in Kolaar Mountain prevented the keep from being destroyed.[27] During the battle, the Sangheili unleashed their powerful Forerunner weapons on the Dreadnought, eventually managing to bring it down on Suban and trap it with gravity anchors. With the San'Shyuum held captive within their keyship for a time, the Sangheili long debated whether to simply destroy the vessel and those within, or to breach it and take the Dreadnought for themselves.[2]
The Writ of Union
- "So let us cast arms aside, and like discard our wrath.
Thou, in faith, will keep us safe, whilst we find the Path." - — Covenant Writ of Union
By 855 BCE, while the Dreadnought was still immobilized on Suban, Breaking Shadow had led a coup d'etat against Pervading Stone. With his death and a newfound solidarity among the San'Shyuum aboard the Dreadnought, Breaking Shadow prepared to at last broach the possibility of peace to the Sangheili.[2]
The San'Shyuum had realized that they would not be victorious in this war with only one ship, especially one that was not nearly as invincible as they had originally thought.[20] In 852 BCE, the San'Shyuum sent an unarmed delegation to the Sangheili, who recounted all that had transpired in recent years. After this meeting, Breaking Shadow and Pelahsar the Strident forged a tenuous truce, forgiving the other's species for their crimes and working toward peace.[2] In time, the Sangheili learned of the San'Shyuum's belief in the Great Journey, where the Forerunners used the Halo Array to ascend to a god-like state, and wished to repeat this process on themselves. Coupled with this belief and the fact that the cause of war was obsolete, the Sangheili agreed to unite with the San'Shyuum into an alliance to avoid mutual extinction. By the end of 852 BCE, the two species formalized this newfound peace in a treaty known as the Writ of Union. This would form the Covenant, which defined the two races' positions: the San'Shyuum would act as the religious leaders, studying the Forerunners' technology and seeking out the Halos, while the Sangheili would serve as their protectors, using weapons and technology developed by the San'Shyuum.[28]
Engagements
| |||||||||||
Aftermath
With the signing of the Writ, the Sangheili treaty commission was formed.[29] As well, the Ministry of Relative Reconciliation was also created, with Qurlom at its head.[30]
The Dreadnought was decommissioned and made the center point and power source of High Charity, a mobile planetoid which would serve as the capital of the Covenant.[15][2]
Ussa 'Xellus' insurgency
While most Sangheili willingly—or begrudgingly—joined the new Covenant, there were those who resented what they viewed as submission to the San'Shyuum. The Covenant sought to make an example of these dissenters, silencing those who rejected the new union with overwhelming force. An incarnation of the Swords of Sanghelios formed at this time to bring the holdouts to the Writ of Union to heel. The resistance movement would come to be led by the Sangheili Ussa 'Xellus, a skilled strategist and veteran of the war. After the Xellus keep was attacked by a Covenant air raid, the civil war expanded across Sanghelios. Because of their inferior numbers 'Xellus and his followers were soon driven into hiding in the desolate region of Nwari. However, 'Xellus would travel across Sangheili colonies, looking for dissidents he could recruit to his cause. After the like-minded elder Sangheili 'Crecka showed him The Refuge, 'Xellus intended to make the Forerunner world his new base of operations and home for his people. Ussa and his followers soon left the Nwari region for the shield world as Covenant assassins closed in on their location.[4]
Eventually the Refuge was discovered by the Covenant and a fleet was sent to destroy the insurgents. However, Ussa activated the shield world's Disassembler process, which convinced the Covenant that the rebels had been killed. However, the Sangheili rebels—now known as the Ussans—lived on in the disparate components of the shield world,[31] even after the Covenant's dissolution in 2552.[32]
Other rebellions
The ship Joori's Light was another instance of rebellion against the Covenant. The crew took the ship into uncharted space and disappeared.[10]
Gallery
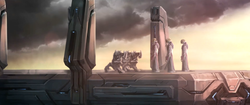
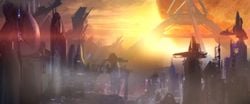
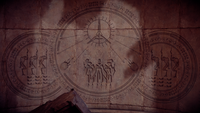
A mural representing the conflict
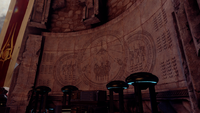
One of many ancient murals located within the Elder Council Chamber
List of appearances
- Halo: Contact Harvest (First mentioned)
- Halo: The Cole Protocol (Mentioned only)
- Halo: Evolutions
- Wages of Sin (Mentioned only)
- Halo: Glasslands (Mentioned only)
- Halo: Broken Circle (First appearance)
- Halo 2: Anniversary
- Halo 5: Guardians (Mentioned only)
- Halo Mythos
- Halo: Bad Blood (Indirect mention)
- Halo: Shadows of Reach
- Sacrifice (Mentioned only)
Sources
- ^ a b c d e Halo Encyclopedia (2009 edition), page 30
- ^ a b c d e f g h i j k l m n o p q r s t u v w x y z aa ab ac ad Halo Encyclopedia (2022 edition), page 191
- ^ a b c d e f g h Halo Encyclopedia (2022 edition), page 258
- ^ a b c d Halo: Broken Circle, Chapter 1
- ^ a b Halo Encyclopedia (2011 edition), page 120
- ^ Halo: The Cole Protocol, page 90
- ^ a b c d Halo 2: Anniversary, Terminal 6
- ^ Halo Encyclopedia (2022 edition), page 244
- ^ Halo: Broken Circle, page 189
- ^ a b Halo Waypoint, Canon Fodder - Holiday Shipping
- ^ Halo Encyclopedia (2022 edition), page 259
- ^ a b c d Halo Mythos, page 40
- ^ Halo Waypoint: Sanghelios
- ^ Halo: Broken Circle, page 1
- ^ a b c Halo: Contact Harvest, page 147
- ^ Halo Encyclopedia (2022 edition), page 190
- ^ Halo: The Cole Protocol, page 350
- ^ Halo: Broken Circle, page 4
- ^ Halo Mythos, page 39
- ^ a b c d Halo: Broken Circle, pages 57-58
- ^ Halo Encyclopedia (2022 edition), page 298
- ^ Halo Encyclopedia (2022 edition), page 271
- ^ a b c Halo: Shadows of Reach: Adjunct - Sacrifice
- ^ Halo: Broken Circle, pages 1-3
- ^ Halo: Broken Circle, pages 6-7
- ^ Halo: Broken Circle, pages 9-13
- ^ Halo: The Cole Protocol, page 90
- ^ Halo: Contact Harvest, page 151
- ^ Halo: Broken Circle, page 18
- ^ Halo: Broken Circle, page 18-23
- ^ Halo: Broken Circle, pages 182-183
- ^ Halo: Broken Circle, pages 291-294
