Control Room (Installation 04): Difference between revisions
From Halopedia, the Halo wiki
m (Fixing links so they don't point to disambiguation pages) |
m (Text replacement - "{{[Ee]ra\|[^}\n]*(Forerunner|Covenant|Human|UNSC|HCW|Post)[^}\n]*}}" to "{{Status|Canon}}") |
||
| (30 intermediate revisions by 21 users not shown) | |||
| Line 1: | Line 1: | ||
{{ | {{Status|Canon}} | ||
{{ | {{Center|''Looking for [[Control Room (Installation 05)|Installation 05's Control Room]], [[Control Room (Installation 03)|Installation 03's Control Room]], or the [[control room]]s in general?''}} | ||
[[File:Control Room2.jpg|300px|thumb|The central chamber of Installation 04's control room]] | |||
The '''Control Room''' was the site that controlled all of [[Installation 04]]'s operations. | |||
==Description== | |||
{{quote|Unfortunately, my usefulness to this particular endeavor has come to an end. [[Containment protocol|Protocol]] does not allow units with [[Monitor|my classification]] to... perform a task as important as the reunification of the [[Activation Index|Index]] with [[the Core]]. That final step is reserved for [[John-117|you]], [[Reclaimer]].|[[343 Guilty Spark]]}} | |||
The control room is located in an immensely deep gorge below the surface of Installation 04. The facility was built directly into a giant artificial cavern and protected by several sets of massive, presumed [[Blast door|blast-proof]], [[door]]s. | |||
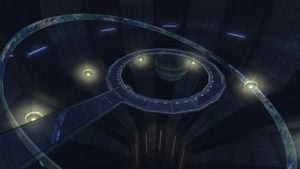
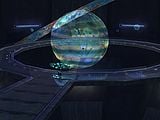
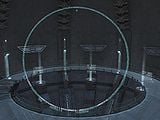
= | Inside there was a large circular [[Bridge (structure)|bridge]] that lacked supports. The bridge ended in a circular walkway. Both the bridge and walkway were made out of a reflective, transparent material. In the center of the walkway there was a hologram of [[Threshold]], [[Basis]], and the ring between the two.<ref name="Halo: The Flood">'''[[Halo: The Flood]]''', ''pages 192-193''</ref> On the outside of the walkway there was a model of the Halo ring itself. The model displayed a detailed map of the terrain and slowly rotated.{{Ref/Reuse|Halo: The Flood}} | ||
The | The chamber contained [[the Core]], a [[Holography|holographic]] computer terminal where the [[Activation Index]] could be inserted to activate the rings. The terminal also reported the weather, rate of spin, information on the machines keeping the ring running, and information on the outbreak of the [[Flood]].<ref name="Halo: The Flood V2">'''[[Halo: The Flood]]''', ''pages 254-255''</ref> | ||
===Installation 08=== | |||
The control room for the [[Installation 08|replacement Alpha Halo]] constructed at [[Installation 00|the Ark]] is a nearly identical copy of the original ring's counterpart. The temple structure has the same basic triangular shape as Installation 04's control room, with a long support beam running from the ground to the top of the structure. There are minor aesthetic differences, including the walkways on each level being more narrow, as well as the tower at the top being replaced by a large flat landing.<ref name="hh3">'''Halo 3''', campaign level ''[[Halo (Halo 3 level)|Halo]]''</ref> | |||
Inside the control room, the corridors and doorways are reminiscent of Installation 04, while offering minimal changes. The actual control room and control panel is scarcely different from the original. The large dome-shaped room still shows a holographic image of the Halo ring, although Threshold is missing from this image (as the ring has not been moved to that point).{{Ref/Reuse|hh3}} | |||
The differences in design from the original Alpha Halo may be due to the ring's incomplete state, as suggested by Cortana's observation, "Halo. It's so new...unfinished."{{Ref/Reuse|hh3}} | |||
==History== | ==History== | ||
===Installation 04=== | |||
For thousands of years, the ring and its control room were completely derelict. In [[2552]], after the [[United Nations Space Command|UNSC]] {{Class|Halcyon|cruiser}} {{UNSCShip|Pillar of Autumn}} crash-landed on the ring, [[Covenant]] scouts came across the control room, possibly through use of the [[Silent Cartographer]]. | |||
When [[Master Chief Petty Officer|Master Chief]] [[John-117]] came across the control room, he integrated [[Cortana]] into the Core. Absorbing the wealth of knowledge, she informed him of a terrible secret and sent the Chief after [[Captain (Navy)|Captain]] [[Jacob Keyes|Keyes]] and his squad who were going after supposed a Covenant weapons cache, in reality a [[Flood containment facility]].{{Ref/Reuse|Halo: The Flood}} | |||
Later, Halo's Monitor, 343 Guilty Spark, brought the Chief back to the control room in order to activate the ring. When he learned what the ring's true function was, the Chief yanked Cortana out of the panel and raced to stop the activation process.{{Ref/Reuse|Halo: The Flood V2}} | |||
===Installation 08=== | |||
In the months after Installation 04's destruction, [[Installation 00]], the Ark, began constructing [[Installation 08|a replacement]] for the ring. During the [[raid on Installation 08]] in the immediate wake of the destruction of the [[Covenant]], [[John-117]], [[Arbiter]] [[Thel 'Vadam]], [[Avery Johnson|Sergeant Johnson]] and 343 Guilty Spark entered the control room of the replacement Installation 04, intending to activate the ring and sterilize the Flood outbreak at the Ark. Despite the [[Gravemind]]'s attempts to stop them from reaching the control center by deploying copious amounts of Flood forms in the area via [[Flood dispersal pod|dispersal pods]], the group eventually made it inside. However, 343 Guilty Spark, infuriated by Sergeant Johnson's attempt to fire the ring while still in an unfinished state, turned on the trio and killed Johnson. The Master Chief soon destroyed the monitor and inserted Cortana to the Core. She used the previous Installation 04's [[Activation Index]] to initiate the firing process of the unfinished Halo, which began to rapidly demolish the control room and prompted John-117 and the Arbiter to escape.{{Ref/Reuse|hh3}} | |||
==Trivia== | ==Trivia== | ||
When viewed from the top, the main console room resembles the [[Marathon]] logo. | |||
== | ==Gallery== | ||
===Installation 04=== | |||
<gallery> | |||
File:HCE ControlRoom_Concept_1.png|Concept art of the control room. | |||
File:HCE ControlRoom_Concept_2.png|Concept art of the control room. | |||
File:Control Room 04.jpg|Exterior of the control room. | |||
File:Elitecontrolroom.jpg|A [[Sangheili]] stands before the giant hologram of [[Threshold]] and [[Installation 04|the ring]]. | |||
File:Controlroom.jpg|Exterior view of Installation 04's control room. | |||
File:Control Room 04.jpg|The entrance to the control room of Installation 04. | |||
File:AnniversaryControlRoom.png|Interior view of Installation 04's control room. | |||
File:Installation_04_classic_control_panel.png|Control panel of Installation 04. | |||
File:Control_Pannel_Glphs.png|The four [[Forerunner symbols]] that appeared on the control panel. The rightmost glyph actually represents [[Installation 02]]. | |||
File:Installation_04_control_pannel_anniversary.png|Control panel of Installation 04 in ''[[Halo Combat Evolved Anniversary]]''. Note the lack of glyphs that were present in the original. | |||
</gallery> | |||
== | ===Installation 08=== | ||
<gallery> | <gallery> | ||
File:Rep-Installation04 Control Room Overview.jpg|[[Installation 08]]'s control room. | |||
File:Halo Hologram.jpg|Inside the control room of Installation 08. | |||
File:ChiefBeam-large.jpg|Energy for Halo's firing being channeled through Installation 08's control room. | |||
File:H3_Installation08_ControlRoom_Concept_1.jpg|Early concept art of Installation 08's control room, with the Ark in the background. | |||
File:H3_Installation08_ControlRoom_Concept_2.jpg|Finalized concept art of the structure, now bearing clear similarities to the original ring's control room. | |||
File:Installation 04b control pannel.png|Control panel of Installation 08. | |||
</gallery> | </gallery> | ||
== | ==List of appearances== | ||
*''[[Halo: Combat Evolved]]'' {{1st}} | |||
*''[[Halo: The Flood]]'' | |||
*''[[Halo 3]]'' | |||
*''[[Halo: Combat Evolved Anniversary]]'' | |||
*''[[Halo Infinite: Memory Agent]]'' {{Mo}} | |||
==Sources== | |||
{{Ref/Sources}} | |||
==See | ==See also== | ||
*[[Control Room]] | *[[Control Room]] | ||
*[[Control Room (Installation 05)|Delta Halo's Control Room]] | *[[Control Room (Installation 05)|Delta Halo's Control Room]] | ||
{{ | {{Forerunner|array}} | ||
[[Category:Installation 04 locations]] | |||
[[Category:Installation 04]] | |||
Latest revision as of 15:57, March 19, 2022
The Control Room was the site that controlled all of Installation 04's operations.
Description[edit]
- "Unfortunately, my usefulness to this particular endeavor has come to an end. Protocol does not allow units with my classification to... perform a task as important as the reunification of the Index with the Core. That final step is reserved for you, Reclaimer."
- — 343 Guilty Spark
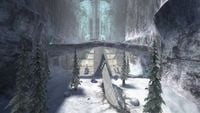
The control room is located in an immensely deep gorge below the surface of Installation 04. The facility was built directly into a giant artificial cavern and protected by several sets of massive, presumed blast-proof, doors.
Inside there was a large circular bridge that lacked supports. The bridge ended in a circular walkway. Both the bridge and walkway were made out of a reflective, transparent material. In the center of the walkway there was a hologram of Threshold, Basis, and the ring between the two.[1] On the outside of the walkway there was a model of the Halo ring itself. The model displayed a detailed map of the terrain and slowly rotated.[1]
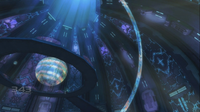
The chamber contained the Core, a holographic computer terminal where the Activation Index could be inserted to activate the rings. The terminal also reported the weather, rate of spin, information on the machines keeping the ring running, and information on the outbreak of the Flood.[2]
Installation 08[edit]
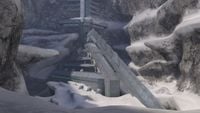
The control room for the replacement Alpha Halo constructed at the Ark is a nearly identical copy of the original ring's counterpart. The temple structure has the same basic triangular shape as Installation 04's control room, with a long support beam running from the ground to the top of the structure. There are minor aesthetic differences, including the walkways on each level being more narrow, as well as the tower at the top being replaced by a large flat landing.[3]
Inside the control room, the corridors and doorways are reminiscent of Installation 04, while offering minimal changes. The actual control room and control panel is scarcely different from the original. The large dome-shaped room still shows a holographic image of the Halo ring, although Threshold is missing from this image (as the ring has not been moved to that point).[3]
The differences in design from the original Alpha Halo may be due to the ring's incomplete state, as suggested by Cortana's observation, "Halo. It's so new...unfinished."[3]
History[edit]
Installation 04[edit]
For thousands of years, the ring and its control room were completely derelict. In 2552, after the UNSC Halcyon-class cruiser UNSC Pillar of Autumn crash-landed on the ring, Covenant scouts came across the control room, possibly through use of the Silent Cartographer.
When Master Chief John-117 came across the control room, he integrated Cortana into the Core. Absorbing the wealth of knowledge, she informed him of a terrible secret and sent the Chief after Captain Keyes and his squad who were going after supposed a Covenant weapons cache, in reality a Flood containment facility.[1]
Later, Halo's Monitor, 343 Guilty Spark, brought the Chief back to the control room in order to activate the ring. When he learned what the ring's true function was, the Chief yanked Cortana out of the panel and raced to stop the activation process.[2]
Installation 08[edit]
In the months after Installation 04's destruction, Installation 00, the Ark, began constructing a replacement for the ring. During the raid on Installation 08 in the immediate wake of the destruction of the Covenant, John-117, Arbiter Thel 'Vadam, Sergeant Johnson and 343 Guilty Spark entered the control room of the replacement Installation 04, intending to activate the ring and sterilize the Flood outbreak at the Ark. Despite the Gravemind's attempts to stop them from reaching the control center by deploying copious amounts of Flood forms in the area via dispersal pods, the group eventually made it inside. However, 343 Guilty Spark, infuriated by Sergeant Johnson's attempt to fire the ring while still in an unfinished state, turned on the trio and killed Johnson. The Master Chief soon destroyed the monitor and inserted Cortana to the Core. She used the previous Installation 04's Activation Index to initiate the firing process of the unfinished Halo, which began to rapidly demolish the control room and prompted John-117 and the Arbiter to escape.[3]
Trivia[edit]
When viewed from the top, the main console room resembles the Marathon logo.
Gallery[edit]
Installation 04[edit]
The four Forerunner symbols that appeared on the control panel. The rightmost glyph actually represents Installation 02.
Control panel of Installation 04 in Halo Combat Evolved Anniversary. Note the lack of glyphs that were present in the original.
Installation 08[edit]
Installation 08's control room.
List of appearances[edit]
- Halo: Combat Evolved (First appearance)
- Halo: The Flood
- Halo 3
- Halo: Combat Evolved Anniversary
- Halo Infinite: Memory Agent (Mentioned only)
Sources[edit]
See also[edit]
